2mm Ashuelot Branch 1939

garethashenden

Western Thunderer
I hope you will indulge my very American layout thread. Western Thunder seems like a good place for it as it fits with my finescale ethos.
I have finally found somewhere to model that fits in the available space. Sticking with the Boston & Maine, but branchline and steam instead of mainline and diesel. Part of the appeal of this particular branch is that I can model it accurately with only one locomotive. The Ashuelot branch is located in southwestern New Hampshire and follows the Ashuelot river from the Connecticut river to Keene NH in a roughly SW to NE direction. The river powered a lot of industries which in turn provided a healthy freight business for the railroad. Four or five papermills, three box factories, and a tannery, plus the more common local businesses of a granary and fuel dealers. The B&M ran the branch until 1980 when the Green Mountain took over for a couple years. It was abandoned in 1984. One of the papermills survived until 2005 when it was flooded.

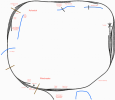
I am going to be modeling two stations, Ashuelot and Winchester. To be slightly confusing Ashuelot is a village in the town of Winchester, but it has its own station and post office. Trains run northwards (counterclockwise on the trackplan) from East Deerfield to Keene and return, working industries along the way. One freight train a day, three return trips of a doodlebug for passenger service. I'm deliberately choosing an era before WWII when the railroad was still dominant. I don't want to go too early as that gets harder to find equipment for. 1939 will be a good year for the sort of railroad that I want to portray, but it will present some scenery challenges. In September 1938 a category 3 hurricane swept up the Connecticut river valley and destroyed most of the forests. The forestry service organized a quite successful plan to save the timber, prevent massive fires, and not destroy the price of lumber. But I now will need to model what it looked like when they were done. Planning on approximately the first week of November 1939. Late fall, after the pretty colors but before the snow.

I have labeled towns, industries, and features. The river is blue, dams black, and road crossings brown. The staging yard isn't great, but its sufficient. I'm planning on basically having one northbound and one southbound train staged on the outer two tracks in the yard. Once a train makes a circuit of the room the engine will cut off, turn, and attach to the other train for the return trip. There are a few tracks for the doodlebug and other equipment. The operational challenge will be keeping the main clear for the passenger service. Minimum radius 20", 10 car trains.
JDwThsa.png
 

garethashenden

Western Thunderer
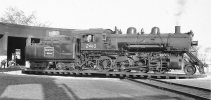
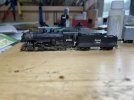
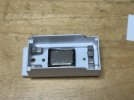
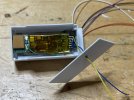
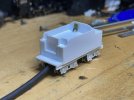
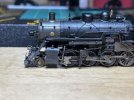
The first step is to provide suitable motive power. As only one steam engine is really needed its not too much of a challenge. There are four truss bridges north of Ashuelot, one modeled and three not, that are all lightly built. The heaviest locomotives allowed over then were K7 class 2-8-0s. K8s were allowed as far as Ashuelot. The Bachmann 2-8-0 makes a good starting point. It runs well, the drivers are close to the right size and spacing, and I already had one. But there are improvements that can be made. The biggest visual difference is the tender, which is way too long on the model. I have been scratchbuilding a tender from styrene. The Fox trucks are 3d printed from Lemosteam via Shapeways and use the Bachmann pickups and axles. I've fitted a speaker, Loksound micro decoder, Run-N-Smooth capacitors, and some tungsten cubes to the insides of the tender.

Prototype:
NznlUfT.jpg
Starting point:
oYVI6PW.jpg
6GODMFe.jpg
uXjkAIm.jpg
lpJrWqx.jpg

I have also taken steps to make the pony truck less toylike. I used some NWSL wheels and made a new truck out of brass bar and thin double sided pcb.
9YEeG9p.jpg
XeQHUh3.jpg
 

garethashenden

Western Thunderer
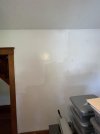
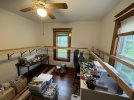
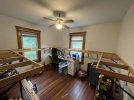
Before I start attaching shelves to the walls I decided to be responsible and paint the walls first. If I don't do it now I never will, and they were pretty grubby. It can be hard to see the difference between two shades of white paint, but it shows up in this in process picture.

wyoF6b5.jpg
 

garethashenden

Western Thunderer
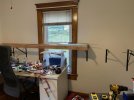
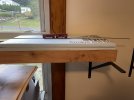
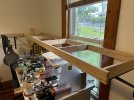
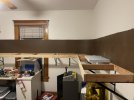
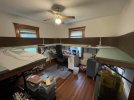
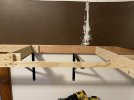
Yesterday my father and I ripped a sheet of 3/4" plywood into 2.75" wide strips. I'm currently waiting on Amazon to bring me a chop saw, then I'll be able to proceed with assembling the benchwork. I'm going to build a grid, with foam sheet on top. I've set a few strips on the brackets to get a sense of how it will feel. I like the height and how it feels in the room, but I'm not sure about the foam. I had been planning on two layers of 1" foam insulation, but I'm wondering if one would be enough. There is a river at the front in some places. If I go with 1" of foam I'd definitely be going down to the plywood in a few spots. I don't really see anything wrong with doing that and it would save a lot of foam. Rail height is 53/54"

RC9v2VQ.jpg
SVlapRw.jpg
GpczMdg.jpg
 

WM183

Western Thunderer
There's a few of us on here modelling American railroads. I'm really interested in your thread. Little prewar branch lines with a single 2-8-0 as power are my favoriete subject!
 

garethashenden

Western Thunderer
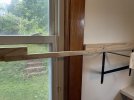
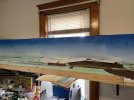
I bought five sheets of 1” foam. That will probably be enough for a double layer all the way around, but my math was a bit vague. I guess we’ll find out! Before the foam though, I want to get the backscene in place. I have 1/8” hardboard cut into 16” strips that I have attached to the walls. It’s about 2/3rds done. I’m going to paint it white now, as the brown is quite oppressive. Later I’ll deal with the sky and scenery colors.

eqvoLJ7.jpg
 

garethashenden

Western Thunderer
Things have been happening! I realized that while I had enough foam to do two layers all the way around, I only needed one. There are two spots where I want more height below the rail than that, but that isn't worth having to deal with an extra layer of foam all the way around. The two places are the bridge between Winchester and Ashuelot and Ashuelot Paper.
rf2sZo4.jpg
When I did the benchwork for the bridge section I created a dip using the two thin pieces from my sheet of plywood.
OZAGFLJ.jpg

For Ashuelot Paper I did the same thing, but only in the front.
ynHMU8m.jpg

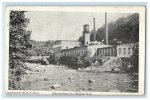
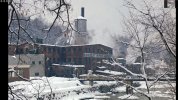
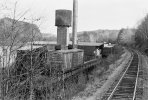
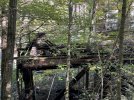
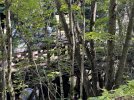
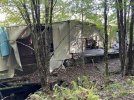
This papermill is nestled on an embankment between the river and the railroad. It was always one of the bigger shippers right up until the end of the railroad. I'm not sure when it closed, but its been partially demolished. They did a real half-ass job of it. This is where I decided to start modeling. The staging yard may get scenery, but this is the first real LDE when heading north. I have a couple of pictures of the mill from across the river, as the viewer would see it. One about 1910, the other 1960s. Yesterday I took a drive to Hinsdale and walked the rail trail. I was initially only intending to go to Ashuelot Paper, but I ended up walking all the way to Paper Services. I'm glad I did, I found a nice rock cutting which will serve to separate the two scenes. At Ashuelot Paper, the siding is below grade, maybe 10' lower and extended on a trestle. I think it was initially a coal trestle, but at some point they built a second loading dock there. There's a good Scott Whitney pictures from the early '80s showing the arrangement.
1910
dxRpMq1.jpg
1960s
GtNOtdc.jpg
1980s from behind
FYMnIFU.jpg

The trestle is still there, but its not safe for trains. I don't think its safe for people either.
CT0aQhy.jpg
X0PMbzJ.jpg

The loading dock
UFVlDKV.jpg

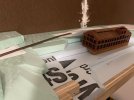
For the actual modeling, I stack up three layers of 3/4" foam. The bottom one will be the river. I've had this building for ages and at the moment its standing in so I can get a sense of things. Not sure if it will become permanent, probably not. I have also roughed in the rock cutting. I've angled the track more and added a curve from the initial plan. I knew I would, particularly in this area.
O1Phh7n.jpg
FBaL8Gj.jpg
 

garethashenden

Western Thunderer
I've been painting the sky. I gave the hardboard two overall coats of a light blue, the shade the sky is at the horizon. When that was dry I attemped to create a gradient between dark blue at the top and light blue at the bottom. Both colors were matched to a photograph taken in the right area and season. The results are ok. In some places they're good, but in others the paint dried faster than I expected and there are clear roller marks visible. I'm going to let it dry thoroughly, but I'll probably redo some sections.

fPPFRxs.jpg
WrguQ2H.jpg
 

Jordan

Mid-Western Thunderer
There's a few of us on here modelling American railroads.
Yes, just a few of us ;) although it'll be nice to see a U.S. layout built the 'proper' way, on the left hand side of The Pond. :thumbs:

Irritation #1 of living to the right of The Pond - scarcity & expense of 'cheap' products commonly used by U.S. modellers - extruded foam sheets and bottles of IPA (Iso Propyl Alcohol, not beer!!) being primary examples!! :rolleyes:
 

Jordan

Mid-Western Thunderer
IPA is very reasonable on eBay, I tend to buy 4x5 litres at a time. Eg.

Yes, it can be got in the UK, but not as easily as how it's stocked in every corner drug store over there. Same with extruded foam board; there are suppliers here but not how it's stocked in Home Depot - the poor equivalent in B&Q is a very crumbly, foil-backed product.
 

garethashenden

Western Thunderer
Yes, just a few of us ;) although it'll be nice to see a U.S. layout built the 'proper' way, on the left hand side of The Pond. :thumbs:

Irritation #1 of living to the right of The Pond - scarcity & expense of 'cheap' products commonly used by U.S. modellers - extruded foam sheets and bottles of IPA (Iso Propyl Alcohol, not beer!!) being primary examples!! :rolleyes:
I do find it somewhat amusing that we use so much light sturdy foam for layouts firmly attached to walls and its so rare in the land of portable exhibitions layouts. Should be the other way around I think.

I had toyed with both 2mmFS and P4 plans for this space before settling on this one, which would have been even more uncommon than modelling American trains in Britain.
 

76043

Western Thunderer
I'm using this stuff as the underpinnings for my next exhibition layout and have a 30mm thick sheet in stock.


Seems ideal for the structural side of the layout, has some sort of fibre mat stuck on each side, to which landscaped ordinary blue foam can be glued to, to hopefully create a rigid but lightweight baseboard. The visible elements can be faced with aero ply or whatever.
Tony
 

garethashenden

Western Thunderer
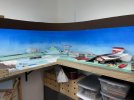
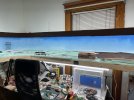
Things have been happening slowly, but they have been happening! Track laying has progressed to the runaround at Ashuelot and most of the track has been wired. My plan is to get the trains running from the fiddleyard Ashuelot but not beyond before turning my efforts to scenery and buildings. Once that's at least roughed in I'll progress to Winchester. Before I did the scenery I wanted to get the lighting sorted out as that will effect the scenery coloring. That is now done!

Rr0QWbW.jpg
ijWr0yT.jpg
 

garethashenden

Western Thunderer
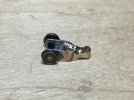
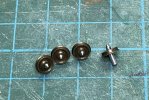
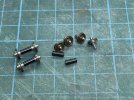
Got tired of the steamroller wheels on the K7's tender and decided to do something about them. I took a length of 1.5mm steel rod and put it in the lathe. Turned a 65° cone on the end. Removed the rod from the lathe and cut the cone off with a piece about 8mm attached. Repeat the process until there are 8 pinpoint stub axles. The next step is to press the axles onto the wheels. Its important that the pinpoints all protrude the same amount from the wheel face. They do, but I made an error with my calculations and they protrude more than I would like.
bZeqJzn.jpg

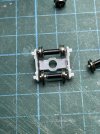
Two stub axles are then epoxied into a muff with the back to back measurement set at 8.1mm.
niDfB8W.jpg

By happy accident, my overly long axles are almost exactly the same length as the Bachmann originals. So they swap into the trucks just fine. They do look a bit odd though, the sideframes are too far from the wheels.
2F4T1kK.jpg

My original plan was to make plain functional sideframes with bearings to suit the axles, with a bolster between them, and then attach just the outsides of the 3d printed trucks. I have another pair of trucks to make for by much neglected B15 2-6-0 build, so I'll try that technique there. If that works as I think it will, I'll revisit these. The sideframe width is too much, I can already tell its going to bother me...
 

garethashenden

Western Thunderer
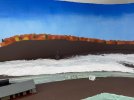
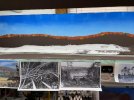
Well its been a while since I updated this. There haven't been massive moments that have made me need to post an update, but a fair bit of steady progress. Since last we saw things, I have started on the background hills. Initially using the same brown latex paint to quickly sketch in the shapes, then I've gone back and added tree blobs along the ridges in a few fall colors. I need to add some shadows to them now, they're a bit monotone at the moment, then do another layer on card in front of the backscene. Then a few more layers and start blending in modeled trees. I've also been working on the ground contours, smoothing things over with sculptamold. There are a few spots that are a bit rough, so I'll deal with those before I paint it all brown again.
DwnopFD.jpg
SmAVUlG.jpg

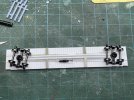
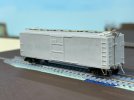
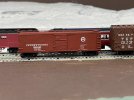
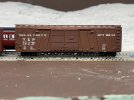
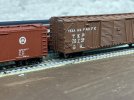
In between layout work I have been working on a couple of boxcars. The second on is a FineNScale kit for a PRR X29, and its built mostly as intended. The first one got a bit complicated and has been on the go for about 9 months. Starting with a Walthers double door single sheathed 50' boxcar kit, I attempted to make a model of the Texas & Pacific group of end door automobile cars they purchased in 1929. The prototype has a radial roof which rather complicated things. I took a big file to the stock roof and did my best to form it into a smooth curve. Then I glued a piece of 0.010" styrene over the roof and shaped that a bit more. It was kinda mediocre and the project languished as a result. After moving it around the workbench for a few months as I did other things, I decided to see what was up with it. It wasn't as bad as I had remembered, so a bit of filler here and a bit of sanding there and the radial roof was good enough. Adding the seams across the roof that are clearly curved helped with the appearance of things too. The next thing I tackled was the door supports. The T&P cars have a bunch of individual supports, rather than one nice long door guid. After a few failed experiments with styrene I 3d printed them and glued them on one at a time. They're not perfectly straight. Maybe I should have printed them all properly spaced as a single piece? I printed the door stops too. These are the bit I'm least happy with. Sometime after the model was painted they've all warped and look awful, I'll have to revisit them at some point. After this much work on the body the diecast underframe wasn't up to standards, so I made a new one. Its all styrene, aside from the Atlas sourced K brake and brass wire brake lines.
PGNmUpN.jpg
JGMhGgq.jpg
Vutyi47.jpg
yXGmikU.jpg
MwxJIrw.jpg

Most recently, today in fact, I finished wiring the track. I had a section wired and running, but last night I got the other half wired up. I was quite careful separating red from black droppers, but still had a dead short when I plugged in the controller. After checking a few things I went to bed, as morning is wiser than evening. This morning I started methodically undoing things to find the short. I suspected I hadn't fully gapped one of the turnouts (and I was correct) but I couldn't see any problems visually. Started by disconnecting the bus at the new section, and then did droppers one by one. After disconnecting the third dropper the new section no longer had a short, but the old section did. Hmm, it had been running before...
There are two turnouts at this point in the layout as the single track line adds a passing siding and a track for the freight house. I took another long thorough look at these two turnouts and found the problem. A sliver of copper had rolled over the edge when I was gapping the ties. It was nestled between the tie and the throwbar and once I removed it everything worked! Reconnected the wires I had removed and there were still no shorts!
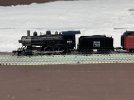
I thought about taking a video of the "first train", but that presented problems. I didn't have any DCC equipped Boston & Maine steam engines. The K7 2-8-0 that will be the main resident of the railroad is not yet running. I elected to do a quick DCC installation on a Model Power 4-4-0. Its a nice little engine, although there are things to improve. I quickly found that all the wheels were tight to gauge, but once that was corrected it runs rather well. I will need to address the tender wheels at some point, after fixing their gauge issues they're now too tight in the trucks to rotate on their own. Model Power numbered this locomotive 950, which puts it in the A41 class. It looks broadly like an A41, but they could have picked a better number, maybe one of the ones that lasted until after WW2, rather than one that was scrapped in 1926. Easy enough to fix, when I get around to it.
Vvr8cHf.jpg

 
Top