You are using an out of date browser. It may not display this or other websites correctly.
You should upgrade or use an alternative browser.
You should upgrade or use an alternative browser.
A West Midlands Works
- Thread starter Scanlon
- Start date
Scanlon
Western Thunderer
Scanlon
Western Thunderer
The frames for 80011 have been stripped down, thoroughly cleaned and are in the process of being sprayed.
Work has now commenced in parallel with the Standard Tank on building my Finney/Finney7 West Country kit which I acquired from the Newport Model Railway Club a few years ago. It was sold with the tender part built and some important etches missing. I chose to purchase a complete replacement tender kit. The model will be of 34019 Bideford with a modified tender and work has reached this stage.

This is the basic inner frames with the brake gear installed .
The outer frames were then built up and now require the major white metal and lost wax detailing to be fitted. At this stage the rods to the vacuum cylinders are only temporarily linked to the main brake pull rods.

A more comprehensive description of the build of one of these locos can be found at 7mm - Finney Battle of Britain so my description of the build will be somewhat briefer.
Work has now commenced in parallel with the Standard Tank on building my Finney/Finney7 West Country kit which I acquired from the Newport Model Railway Club a few years ago. It was sold with the tender part built and some important etches missing. I chose to purchase a complete replacement tender kit. The model will be of 34019 Bideford with a modified tender and work has reached this stage.

This is the basic inner frames with the brake gear installed .
The outer frames were then built up and now require the major white metal and lost wax detailing to be fitted. At this stage the rods to the vacuum cylinders are only temporarily linked to the main brake pull rods.

A more comprehensive description of the build of one of these locos can be found at 7mm - Finney Battle of Britain so my description of the build will be somewhat briefer.
Scanlon
Western Thunderer
It has been quite some time since I last wrote about my loco building. This is because examples of the models I have recently built have already been featured earlier in this thread. However, four of the locomotives previously featured have now returned from painting by Paul Moore.


35008 is modelled with its 5000-gallon tender with which it ran until 1962.
A build with a difference and which I am currently working on is a Chowbent Patriot. The basic engine is Chowbent but the tender is a modified Sancheng unit and some detailing parts are from Gladiator and Ragstone. The build has reached this stage.

My latest entirely new build is a Southern Region N1 from the new David Andrews kit. As usual I started with the tender which is of the straight sided 4000-gallon variant. These tenders were only fitted to the 5 1930 built locomotives, the other one 31822 retained a standard 3500-gallon tender throughout its existence. In addition, this type of tender was fitted to most of the S15’s allocated to Redhill depot as the turntable could not accommodate the normal 8-wheel variant.
Construction of the tender has been straightforward. The middle axle has been left to float. I will eventually fit pick-ups to all axles.


A lot of cleaning is still to be undertaken.
Alongside this build the Finney7 West Country and MOK Standard Tank are still proceeding albeit rather slower than I would like. Currently I am working on the frames of the Standard Tank which I hope to complete in a few weeks’ time.
I wish all WT readers and their families a very Happy Christmas and a Happy New Year.


35008 is modelled with its 5000-gallon tender with which it ran until 1962.
A build with a difference and which I am currently working on is a Chowbent Patriot. The basic engine is Chowbent but the tender is a modified Sancheng unit and some detailing parts are from Gladiator and Ragstone. The build has reached this stage.

My latest entirely new build is a Southern Region N1 from the new David Andrews kit. As usual I started with the tender which is of the straight sided 4000-gallon variant. These tenders were only fitted to the 5 1930 built locomotives, the other one 31822 retained a standard 3500-gallon tender throughout its existence. In addition, this type of tender was fitted to most of the S15’s allocated to Redhill depot as the turntable could not accommodate the normal 8-wheel variant.
Construction of the tender has been straightforward. The middle axle has been left to float. I will eventually fit pick-ups to all axles.


A lot of cleaning is still to be undertaken.
Alongside this build the Finney7 West Country and MOK Standard Tank are still proceeding albeit rather slower than I would like. Currently I am working on the frames of the Standard Tank which I hope to complete in a few weeks’ time.
I wish all WT readers and their families a very Happy Christmas and a Happy New Year.
Pencarrow
Western Thunderer
More photos, my rebuilt River painted and weathered by Ian Rathbone.
View attachment 132618
02 painted by Paul Moore, yet to be weathered.
View attachment 132619
lastly 77014, ex works
View attachment 132620
Morning Roger,
Loving the builds. Like you I have a soft spot for the Maunsell Moguls, so it's great to see examples of the David Andrews kits built up. At some stage I will tackle my N Class...
I see you've also built one of Jim's O2s. Mine is 95% complete and has been for several years. There is however an error in the instructions which thankfully I noticed at an early stage in my build. Cab doors were only fitted to the IoW locos and I believe the pull-push fitted mainland examples.
30199 and 30200 were long term Wadebridge residents and, in all the photos I have of them, there's no sign of cab doors. I fact some of the shots show safety chains across the cab opening.
Obviously a bit late for you now the model is painted and finished, and I was in two minds whether to comment or not. Apologies for not visiting your thread at a more appropriate time.
AJC
Western Thunderer
Cab doors on O2s are a bit more complex than you suggest, Chris. The general rule might well be right, but 225 (for example) had cab doors at withdrawal and had been push-pull fitted years earlier (with two different systems!) which is probably when it came by the doors. I haven’t spent enormous time looking at pictures of the class but I seem to remember that the pattern is not quite so clear cut. It may be a feature that came and went so the usual note about dates images applies.
Adam
Adam
Last edited:
Pencarrow
Western Thunderer
Cab doors on O2s are a bit more complex than you suggest, Chris. The general rule might well be right, but 225 (for example) had cab doors at withdrawal and had been push-pull fitted years earlier which is probably when it came by the doors. I haven’t spent enormous time looking at pictures of the class but I seem to remember that the pattern is not quite so clear cut. It may be a feature that came and went so the usual note about dates images applies.
Adam
I presume cab doors were fitted to the pull-push fitted versions as a safety feature to help prevent the lone fireman going AWOL in transit? Once fitted I guess there probably wasn't much to be gained from their removal.
Both 30199 and 30200 are of particular interest to me as they were residents of the area of the country that is the subject of my modelling interests. I've probably got 40+ photos of each and none shows doors fitted.
A typical shot of 30199 can be seen here: Bodmin General. 30199 & train from Wadebridge. 6.9.61 and 30200 with safety chain here: BR British Railways Steam Locomotive Class Adams Class O2 0-4-4T 30200 at Bodmin North in 1960 - 10/09/1960 - Peter Gray.
Whilst my original statement may have been an over simplification, and 30225 is an example of that, I think it's a good starting assumption to be tested in battle with period prototype photos.
Scanlon
Western Thunderer
Hi Chris,
Thanks for the information regarding cab doors. I have to admit to overlooking removing them after building up the basic body. I put the doors in place to give a bit of body to the rear of the tank/cab etch as this photo shows
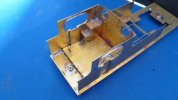
I shall have to live with the error.
You mentioned my soft spot for the Southern Maunsell moguls, this photo shows some of my collection which also includes a Brighton K!
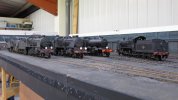
In closing I wish everyone a very Happy New Year.
Roger
Thanks for the information regarding cab doors. I have to admit to overlooking removing them after building up the basic body. I put the doors in place to give a bit of body to the rear of the tank/cab etch as this photo shows

I shall have to live with the error.
You mentioned my soft spot for the Southern Maunsell moguls, this photo shows some of my collection which also includes a Brighton K!

In closing I wish everyone a very Happy New Year.
Roger
Scanlon
Western Thunderer
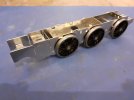
The build of the N1 is progressing nicely. The engine frames have been built up and tested in “gwr” mode to ensure there are no problems with anything binding. This photo shows the parts that form the basic frame, with a completed frame side made up.
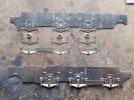
As usual the frames were built up on a chassis jig and initially only the leading and rear frame stretchers were tack soldered in place. Once I was happy everything was square these stretchers were finally soldered in place and the remainder of the frames built up.
Since then, the cylinders and both motion brackets have been built up and detailed.
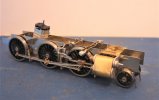
This photo shows the motion brackets installed but the rear motion bracket has yet to be soldered to the slidebars. Similarly, the intermediate motion bracket is shown in position but not bolted up. The clearance between the latter and the wheel is very tight and may yet need to be eased to avoid shorting especially when DCC is fitted.
Attention is now on the engine body. As mentioned in post 565 I had been asked by David Andrews to undertake a test build of the new kit. At that time I made copious notes and will be referring to them as necessary, they have already come in handy during the build of the running plate. Construction of the running plate is straightforward but I chose to fit the slightly depressed plate in front of the middle cylinder before installing the leading bufferbeam. Doing so at this stage of the build is simple whereas if following the build instructions, you will have a fight on your hands to locate it easily.
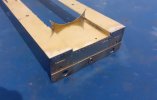
As can be seen part of this platework is also the front of the saddle and the little “wings” are very prone to damage. Learning from the test build I have strengthened them with solder until the saddle is built up. A trial fit of the near completed running plate showed some tightness under the cab area which would not allow it to sit in the correct orientation. A few strokes with a file quickly overcame the problem.
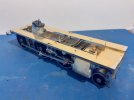
Now to start on the cab.

As usual the frames were built up on a chassis jig and initially only the leading and rear frame stretchers were tack soldered in place. Once I was happy everything was square these stretchers were finally soldered in place and the remainder of the frames built up.

Since then, the cylinders and both motion brackets have been built up and detailed.

This photo shows the motion brackets installed but the rear motion bracket has yet to be soldered to the slidebars. Similarly, the intermediate motion bracket is shown in position but not bolted up. The clearance between the latter and the wheel is very tight and may yet need to be eased to avoid shorting especially when DCC is fitted.
Attention is now on the engine body. As mentioned in post 565 I had been asked by David Andrews to undertake a test build of the new kit. At that time I made copious notes and will be referring to them as necessary, they have already come in handy during the build of the running plate. Construction of the running plate is straightforward but I chose to fit the slightly depressed plate in front of the middle cylinder before installing the leading bufferbeam. Doing so at this stage of the build is simple whereas if following the build instructions, you will have a fight on your hands to locate it easily.

As can be seen part of this platework is also the front of the saddle and the little “wings” are very prone to damage. Learning from the test build I have strengthened them with solder until the saddle is built up. A trial fit of the near completed running plate showed some tightness under the cab area which would not allow it to sit in the correct orientation. A few strokes with a file quickly overcame the problem.

Now to start on the cab.
Scanlon
Western Thunderer
Since the last posting I have been constructing the major components of the engine body. First was the cab and at this stage I like to have the seats in place as installing them later always presents problems cleaning up after soldering. This was followed by building up the frame and formers for the firebox. The opportunity was also taken to insert the washout plugs. A start has been made on building the boiler which has got to this stage.
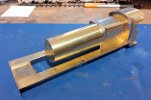
The front etch has just been put into place and will be correctly fitted once some lead has been added. Maybe more progress tomorrow.

The front etch has just been put into place and will be correctly fitted once some lead has been added. Maybe more progress tomorrow.
Pencarrow
Western Thunderer
Hi Chris,
Thanks for the information regarding cab doors. I have to admit to overlooking removing them after building up the basic body. I put the doors in place to give a bit of body to the rear of the tank/cab etch as this photo shows
View attachment 154156
I shall have to live with the error.
You mentioned my soft spot for the Southern Maunsell moguls, this photo shows some of my collection which also includes a Brighton K!
View attachment 154157
In closing I wish everyone a very Happy New Year.
Roger
Hi Roger
Superb collection of SR moguls, fantastic. If you ever need to find a home for one or two please let me know...
Scanlon
Western Thunderer
The last few days have seen a whirlwind of progress on the N1 and this is how the loco looks today.
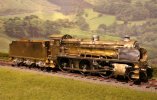
Almost complete but a lot of cleaning up to do. Probably the most difficult aspect of this build was constructing the smokebox saddle.
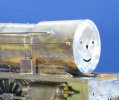
This is made up from 6 pieces all but two being quite small and difficult to handle. Fortunately, the inner side etches have etched lines on them which greatly aid getting the saddle level. I constructed mine by adding these parts first, then the curved “top” of the saddle and finally adding the nickel silver outer etches in place. A very robust saddle is the result.
With the saddle in place adding the boiler and then detailing same was relatively straightforward. During the next few days I’ll add the final detailing around the cylinders, build the backhead and fit wiper pick-ups to the tender. The engine has plunger pick-ups. Once the frames have been sprayed the valve gear will be added followed by testing on Heyside and then it can go for painting as 31880, this loco was the only one of its small class not to be fitted with AWS.
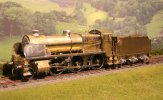

Almost complete but a lot of cleaning up to do. Probably the most difficult aspect of this build was constructing the smokebox saddle.

This is made up from 6 pieces all but two being quite small and difficult to handle. Fortunately, the inner side etches have etched lines on them which greatly aid getting the saddle level. I constructed mine by adding these parts first, then the curved “top” of the saddle and finally adding the nickel silver outer etches in place. A very robust saddle is the result.
With the saddle in place adding the boiler and then detailing same was relatively straightforward. During the next few days I’ll add the final detailing around the cylinders, build the backhead and fit wiper pick-ups to the tender. The engine has plunger pick-ups. Once the frames have been sprayed the valve gear will be added followed by testing on Heyside and then it can go for painting as 31880, this loco was the only one of its small class not to be fitted with AWS.

Scanlon
Western Thunderer
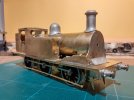
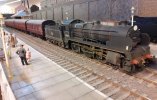
It has been quite some time since last updating this thread. The “Works” has not been idle but I took the decision to only report on builds of kits which are “new” to me. However here are photos of my more recent builds. First the N1 now weathered and at work on Heyside.
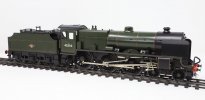
Secondly the Chowbent Patriot has been painted by Paul Moore who kindly provided this photo
Work on my Finney West Country has slowed somewhat but it is now back on the workbench although I will not be reporting on progress. There are far better build descriptions of these kits elsewhere on Western Thunder.
An entirely new build for me is an Albion Models ex LBSCR E1 0-6-0t. I have been looking for one of these kits for some time. When one was offered on the Gauge 0 Guild site complete with wheels and motor it had to be mine. The kit is quite old and the instructions clearly state the etches have been blown up from 4mm and there could be some discrepancies. As usual the build started with the frames and these photos show the basic components and the frames built up, on the chassis jig naturally.
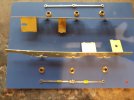
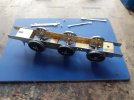
Very quickly one of the discrepancies appeared in that the left leading bearing had to be moved about 1mm forward to achieve a correctly aligned and smooth running chassis.
Attention then moved to the running plate and body construction. The kit is intended to build the E1 0-6-0t but etches for the D1 0-4-2t are also included. This caused confusion as unfortunately the person from whom I purchased the kit had separated some of the etches from the main etch which had the identification numbers. Trial and a considerable amount of error resulted but eventually the basic running plate and cab were assembled.
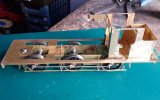
Next to be tackled were the side tanks. Construction was relatively straightforward but as was later learned putting the tops of the tanks in place was a mistake. Inevitably they got in the way when putting the boiler in place.
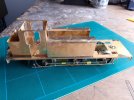
The kit has only minimal white metal detailing parts and small 3 feed oil boxes were required and are located on the front of each tank. I used two castings from my spares box and added pipework before putting the tank sides in place. Trying to do this later would have been very difficult.
A piece of brass is supplied for the boiler and has to be rolled to size. Fortunately, the dimensions were within 50thou in length but could have done with being about 1mm wider. Having rolled the boiler and got it soldered up and to size it was tried in place. Unfortunately, the D1 smokebox saddle had been used by yours truly. This led to many words of basic Anglo Saxon before the error of my ways was noticed. An overlay is provided for the smokebox and of course I had made it fit the smaller saddle. Well, it is correct now but about 3 hours of wasted work has resulted.
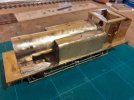
The build has now reached this stage. Lots of cleaning up to do, no invisible soldering here! A number of the white metal fittings must be used but I intend to replace as many parts with lost wax castings where possible.

Secondly the Chowbent Patriot has been painted by Paul Moore who kindly provided this photo

Work on my Finney West Country has slowed somewhat but it is now back on the workbench although I will not be reporting on progress. There are far better build descriptions of these kits elsewhere on Western Thunder.
An entirely new build for me is an Albion Models ex LBSCR E1 0-6-0t. I have been looking for one of these kits for some time. When one was offered on the Gauge 0 Guild site complete with wheels and motor it had to be mine. The kit is quite old and the instructions clearly state the etches have been blown up from 4mm and there could be some discrepancies. As usual the build started with the frames and these photos show the basic components and the frames built up, on the chassis jig naturally.


Very quickly one of the discrepancies appeared in that the left leading bearing had to be moved about 1mm forward to achieve a correctly aligned and smooth running chassis.
Attention then moved to the running plate and body construction. The kit is intended to build the E1 0-6-0t but etches for the D1 0-4-2t are also included. This caused confusion as unfortunately the person from whom I purchased the kit had separated some of the etches from the main etch which had the identification numbers. Trial and a considerable amount of error resulted but eventually the basic running plate and cab were assembled.

Next to be tackled were the side tanks. Construction was relatively straightforward but as was later learned putting the tops of the tanks in place was a mistake. Inevitably they got in the way when putting the boiler in place.

The kit has only minimal white metal detailing parts and small 3 feed oil boxes were required and are located on the front of each tank. I used two castings from my spares box and added pipework before putting the tank sides in place. Trying to do this later would have been very difficult.
A piece of brass is supplied for the boiler and has to be rolled to size. Fortunately, the dimensions were within 50thou in length but could have done with being about 1mm wider. Having rolled the boiler and got it soldered up and to size it was tried in place. Unfortunately, the D1 smokebox saddle had been used by yours truly. This led to many words of basic Anglo Saxon before the error of my ways was noticed. An overlay is provided for the smokebox and of course I had made it fit the smaller saddle. Well, it is correct now but about 3 hours of wasted work has resulted.

The build has now reached this stage. Lots of cleaning up to do, no invisible soldering here! A number of the white metal fittings must be used but I intend to replace as many parts with lost wax castings where possible.
Paul Tomlinson
Western Thunderer
Now I know who beat me to that kit.... Ian MacCormac does some resin bits for the D1 (which I've got) which might be of interest.
 ianmaccormacmodels.blogspot.com
IanMacCormacModels
ianlbsc
Western Thunderer
Hi Roger, just seen this. ianmaccormac@hotmail.com will reach me. Cheers, Ian


