Very Little Gravitas Indeed*

adrian

Flying Squad
Adrian, that is looking very nice indeed! I am glad you opted for the machined angle strip for the trusses, well worth the extra cost in my opinion. I have used Malcolm's way of springing the buffers on most of my coaches and it is cost effective.
Thanks for that info - I will set them up that way. The whole kit went together nicely following his instructions so I see no reason to deviate now.
A suggestion for painting the roof. After priming I mask off the roof and use car bumper spray which comes in several medium to dark grey colours - anthracite and. dark grey on mine.
Thanks for that as well, although I suspect I must have picked up on a comment from you before on the colours. I'd already ordered the paint, I'm using the Zero Paints RAL colours as it's already premixed for airbrush use and for the roof I'd selected RAL 7016 a.k.a. Anthracite Grey :thumbs:
That's looking beautiful. Stepping back a little to the skirting board jig - did you then form the metal by had - palm of the hand or thumbs maybe - from one end to the other?
It was a combination of things. I'd already tried the broom handle method for forming it which didn't work but I then used the broom handle rolled up and down the side when in the jig to form the curve. I then finished off with a rawhide mallet, not striking the brass but just rubbing it along the length to smooth out and wrinkles.
 

adrian

Flying Squad
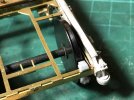
This weeks update - still too cold to be in the paint shop so attention turned to finishing off the bogies.

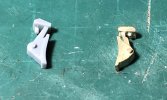
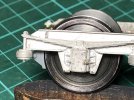
As mentioned I always prefer insulating brake shoes where possible so a replacement was drawn up for 3D printing, this was mk 1. The top part of the shoe is vertical to avoid rubbing against the sprung wheel, but only the bottom half is visible so I reckon I'll get away with it being a fixed unit.
brake_6.jpg

It needed a couple of updates, the shoe needed to be tapered to stop the rear portion rubbing on the wheels, also an offset applied to locating lug to line up the shoe with the Scale7 "broad" gauge, so they clipped in nicely.

brake_4.jpg

brake_5.jpg

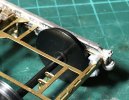
From the side - it lines up well and the top half is suitably hidden.

brake_1.jpg

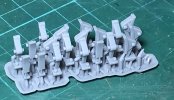
So now I have a forest of shoes to extract and fit.

brake_3.jpg

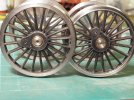
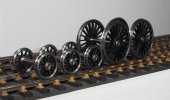
Whilst iterations and printing were ongoing plans for the next project(s) were started. Sort of spurred on by Mickoo's and Nic's comments w.r.t. to kits and whether sometimes having thrown so much away whether it would be better to start from scratch. This is also going back to my roots starting in 7mm so I've decided the next projects are going to be scratch build efforts. As they are going to be something slightly different from my previous output and from each other I'll probably start a separate build thread for each. In the meantime a little taster, whilst drawing and printing brake shoes I started one project by reprofiling a set of Slaters wheels for Scale7.

wheels - 1.jpeg
 

Yorkshire Dave

Western Thunderer
I've decided the next projects are going to be scratch build efforts. As they are going to be something slightly different from my previous output and from each other I'll probably start a separate build thread for each. In the meantime a little taster, whilst drawing and printing brake shoes I started one project by reprofiling a set of Slaters wheels for Scale7.

Bayerische Pt2/5 H would be different as would a LTSR 'Tilbury' tank.
 

adrian

Flying Squad
A little bit of a potpourri of an update for this week.

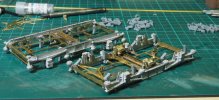
The 3D printing has been a little hit and miss development - getting clearances and geometry sorted but I think it's there now. Brakes are in place but just need to finish off the linkages and rodding. If I ever build a cameo scene I've got plenty of scrap brake blocks for a breakers yard!
update - 10.jpeg

Desperately trying to get it finished this week so that I can take advantage of the warmer weather and waft a coat of primer over everything.

Whilst redrafting and waiting for the 3D printer to spit out the next iteration of brake blocks - attention turned to the new projects. Yes I will admit to being slightly subversive with the reprofiled wheels - well I couldn't make it too easy for everyone. So yes these are all the right notes and in the right order.
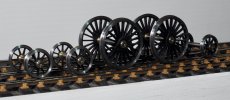
update - 1.jpeg

With the reprofiling the boss is skimmed down, to allow the securing screw to sit correctly I did try on one wheel to increase the counter bore on the wheel boss but it wasn't that sucessful, it seemed to put too much heat in and the brass boss started moving in the plastic so I scrapped that straight away. As seen on the above photo the screw stand far too proud on the hub.

Looking at the screws I wasn't sure if they were a little too large on the diameter to fit in the countersink, there was plenty of metal on the screw so my solution has been to skim a little off the diameter and a little off the face of the screw. A before and after shot.
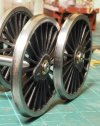
update - 6.jpeg

I was much happier with the fit now.

update - 7.jpeg

Whilst carefully inspecting the screws, I noticed that the socket on the screws seemed to be more "torq" screw than Allen key shaped. It seems the hole has been drilled then lobes cut in hence the curled up metal at the bottom of the hole.
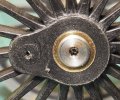
update - 8.jpeg

Looking at the way the socket is formed it definitely has a lobed form and having a mobile phone repair kit one of the little torq drivers fits a lot better than any allen key.
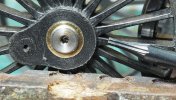
update - 9.jpeg

I mentioned in the previous post a couple of scratch build projects. This is a taster for the second, again rather unique, so I will probably start a separate thread for this one as well. So for an introduction a couple of strips of nickel-silver cut to shape.
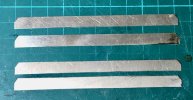
update - 2.jpeg

This needed a length of riveted angle along the top edge, the only problem being that by embossing rivets it stretches the metal and you end up with something not quite straight.
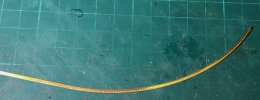
update - 4.jpeg

Fortunately this is a job where the parallel jaw pliers are very useful as they don't have a central pivot so I can feed the angle through whilst straightening it.
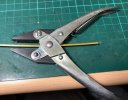
update - 3.jpeg

Straightened and soldered to the strips.
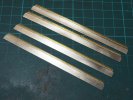
update - 5.jpeg

That's all for this week - I'll leave this last project as a Christmas conundrum.
 
Last edited:

Dog Star

Western Thunderer
Your use of the Maun to help in straightening rivetted strips is inspirational, I shall use that technique when working through the next Finney7 A4 tender.

regards, Graham
 
Last edited:

adrian

Flying Squad
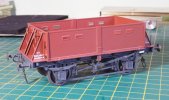
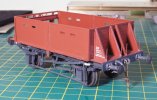
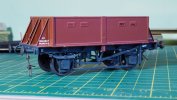
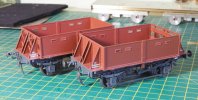
Just to try and finish off a couple of things - work has been full on recently so difficult to get anytime at the work bench at the moment. I did get a recent Scale7 newsletter and spotted a couple of photos of the part finished palbrick wagons. These were completed earlier in the year but realised that I hadn't posted any photos in the finished state. I hesitate to say finished because at some point I will need to take the plunge on doing some weathering.
palbrick - 1.jpeg

palbrick - 2.jpeg

palbrick - 3.jpeg

palbrick - 4.jpeg
 
Top