You are using an out of date browser. It may not display this or other websites correctly.
You should upgrade or use an alternative browser.
You should upgrade or use an alternative browser.
4mm Unnamed freight only shunting layout
- Thread starter matto21
- Start date
Hello all,
Next projects on the bench - I've lost a bit of motivation in working on the layout buildings so am back to building some bits of stock to try and keep my interest going.
I enjoyed the Ratio van very much so picked up another one plus a Parkside underframe to attempt a dia 1/204 BR version (although I now realise the vertical strapping is incorrect for this type of van)

Another one is this Parkside 12t plywood sided van that was built back in 2010.

Although I wasn't a fan of the paintjob, unusually for an old build of mine, it runs well (most of my old ones wobble alarmingly!). The underframe parts had become pretty brittle and broke when I was cleaning if up. I've replaced it as best as I can using bits and bobs from the spares box although everything I had was either too long, too short, too big or too small so there's a bit of fettling involved here.

Finally, I'm working on this Revell 1/72 Hawk and painting it to represent a RAF Valley aircraft.

Matt
Next projects on the bench - I've lost a bit of motivation in working on the layout buildings so am back to building some bits of stock to try and keep my interest going.
I enjoyed the Ratio van very much so picked up another one plus a Parkside underframe to attempt a dia 1/204 BR version (although I now realise the vertical strapping is incorrect for this type of van)

Another one is this Parkside 12t plywood sided van that was built back in 2010.

Although I wasn't a fan of the paintjob, unusually for an old build of mine, it runs well (most of my old ones wobble alarmingly!). The underframe parts had become pretty brittle and broke when I was cleaning if up. I've replaced it as best as I can using bits and bobs from the spares box although everything I had was either too long, too short, too big or too small so there's a bit of fettling involved here.

Finally, I'm working on this Revell 1/72 Hawk and painting it to represent a RAF Valley aircraft.

Matt
Hi all, belated happy new year to you all!
Progress has once again stalled as I've been occupied with yet more 1/48 aircraft building (a Bf-109 this time!), however I have found the time to repaint and weather another old build - this time a Parkside Tube wagon.
I remember seeing this kit being reviewed in BRM (I think) and buying one shorly afterwards.
Minimal effort made to bring it up to standard by adding a few bits and bobs to the underframe to make it more interesting (not necessarily 100% accurate!), and to reattach a loose side piece that fell off in the intervening years while in a box.
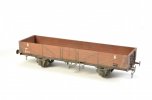
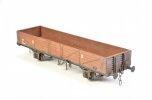
Looks reasonable for something I originally built probably 15+ years ago!
Matt
Progress has once again stalled as I've been occupied with yet more 1/48 aircraft building (a Bf-109 this time!), however I have found the time to repaint and weather another old build - this time a Parkside Tube wagon.
I remember seeing this kit being reviewed in BRM (I think) and buying one shorly afterwards.
Minimal effort made to bring it up to standard by adding a few bits and bobs to the underframe to make it more interesting (not necessarily 100% accurate!), and to reattach a loose side piece that fell off in the intervening years while in a box.


Looks reasonable for something I originally built probably 15+ years ago!
Matt
Hi all,
Another random project, but one that will have a place on the layout. I was looking for a quick and easy building to make - I bought some separate parts from Lcut a while ago with no real plan in mind.
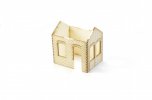
As intended, the door is in the end wall whereas I wanted it at the front so the parts were modified accordingly.
I also wanted to clad it in embossed sheet and use different windows so the parts were duly hacked further. At this point, it would have been just as easy to make the shell myself!
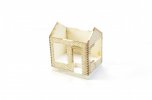
It's also had a base of 5mm foamboard added so I can bed in into the scenery in the future.
Fast forward, and it's been "bricked", a door, windows and roof added, and the whole lot painted.
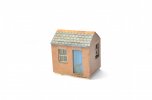
I also "opened" the side window to suggest a bit of life.
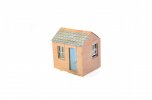
A nice easy, and more importantly, quick project to while away a few evening hours.
Matt
Another random project, but one that will have a place on the layout. I was looking for a quick and easy building to make - I bought some separate parts from Lcut a while ago with no real plan in mind.

As intended, the door is in the end wall whereas I wanted it at the front so the parts were modified accordingly.
I also wanted to clad it in embossed sheet and use different windows so the parts were duly hacked further. At this point, it would have been just as easy to make the shell myself!

It's also had a base of 5mm foamboard added so I can bed in into the scenery in the future.
Fast forward, and it's been "bricked", a door, windows and roof added, and the whole lot painted.

I also "opened" the side window to suggest a bit of life.

A nice easy, and more importantly, quick project to while away a few evening hours.
Matt
Captain Kernow
Western Thunderer
This is a super little project and I've enjoyed looking through the thread just now. Your buildings are really good and your colour interpretation and weathering is spot-on, too.I agree that a loop is needed, however my main reason for building this layout was to actually build something.
I also like the idea of having a run round loop, but I'm not totally persuaded that the whole loop needs to be on display. It is possible to have part of the loop 'off scene', thus saving you valuable scenic space for other stuff.
The problem with small layouts like this (and my Bethesda Sidings is only 4' 6" long) is that the loop is going to be pretty short, which could be said to limit operating potential. On the other hand, with a short scenic section, you aren't going to want to run really long trains anyway.
I've toyed with the idea of saying that the entire loop is 'off scene' (thus avoiding the need to actually build one). My idea would be for the train to arrive in the yard, loco first, perhaps shunt off any wagons required into any 'kick-back' sidings and then propel back out to the fiddle yard, ostensibly to 'run round'. The train would then propel back into the scenic section and shunt up and down, pottering about for as long as you like doing that kind of thing.
Thank you @Captain Kernow! Appreciate you taking the time to look through my random thread and comment. Wholeheartedly agree about the loop, and if I started again I'd include one, but I'd probably have to make the whole layout a bit bigger.
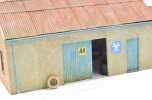
Been working on what is likely to be the last "large" (comparatively speaking) building on the layout. I'm unsure what's it's purpose is, probably a garage or some form of local industrial lockup!
Construction is card, just because I had some to hand. I'm not a massive fan of the cliché of having a "semi open door with some stuff shoved in the gap to disguise the emptiness", but it seemed appropriate this time! Oil drums just posed for now.
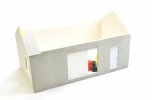
Concrete is just regular filler sanded right down to reduce the texture.
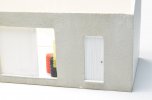
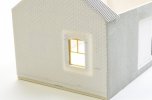
And the end walls are brick - this building is loosely based on a prototype and I liked the combination of brick and concrete walls and corrugated roof. The "glow" won't be visible once there's a roof in place.
Matt
Been working on what is likely to be the last "large" (comparatively speaking) building on the layout. I'm unsure what's it's purpose is, probably a garage or some form of local industrial lockup!
Construction is card, just because I had some to hand. I'm not a massive fan of the cliché of having a "semi open door with some stuff shoved in the gap to disguise the emptiness", but it seemed appropriate this time! Oil drums just posed for now.

Concrete is just regular filler sanded right down to reduce the texture.

And the end walls are brick - this building is loosely based on a prototype and I liked the combination of brick and concrete walls and corrugated roof. The "glow" won't be visible once there's a roof in place.

Matt
Last edited:
Hi all,
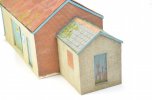
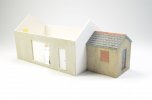
Bit of progress to share. I decided to add an additional structure to the side of the main building. The only difference being I've given it a slate roof whereas the main garage will be corrugated.
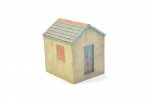
I also wanted to represent a bricked up window for no reason other than it was a feature I fancied - I think it turned out OK.
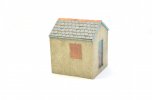
The wonky guttering is unintentional - the glue set before I noticed but I decided to keep it how it is.
Here's the whole thing together.
Matt
Bit of progress to share. I decided to add an additional structure to the side of the main building. The only difference being I've given it a slate roof whereas the main garage will be corrugated.

I also wanted to represent a bricked up window for no reason other than it was a feature I fancied - I think it turned out OK.

The wonky guttering is unintentional - the glue set before I noticed but I decided to keep it how it is.
Here's the whole thing together.

Matt
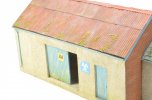
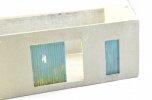
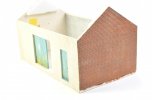
Bit of progress.
I wanted to represent the doors as being faded and peeling. The white bit is my attempt at representing an old and faded poster that has worn and partially peeled away from the door. The prototype building I'm using as inspiration has something similar.
I've also made a start on the brick end wall.
Matt
Edit: about 4 mins after posting this, I decided I did not like the peeling poster so it's now been painted over.
I wanted to represent the doors as being faded and peeling. The white bit is my attempt at representing an old and faded poster that has worn and partially peeled away from the door. The prototype building I'm using as inspiration has something similar.

I've also made a start on the brick end wall.

Matt
Edit: about 4 mins after posting this, I decided I did not like the peeling poster so it's now been painted over.
Last edited:
Captain Kernow
Western Thunderer
I have to say that I thought the peeling poster looked quite effective, sorry!
Hi Captain, thanks for the comment - hopefully the overpainting (with a subtle twist) will look reasonable when it's all finished!I have to say that I thought the peeling poster looked quite effective, sorry!
Hi all,
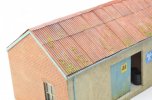
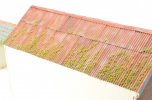
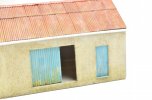
Bit more progress to share. The corrugated roof has been started - still some more to do though til I'm happy with it.
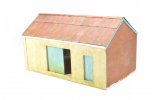
I usually use Modelu guttering on my models but it's quite fragile and prone to being damaged. This time, I used half round plastic rod - not as detailed and slightly overscale, but far more robust. Also a quick picture of the repainted door.
Matt
Bit more progress to share. The corrugated roof has been started - still some more to do though til I'm happy with it.

I usually use Modelu guttering on my models but it's quite fragile and prone to being damaged. This time, I used half round plastic rod - not as detailed and slightly overscale, but far more robust. Also a quick picture of the repainted door.

Matt
Captain Kernow
Western Thunderer
Exquisite.
I particularly like the sash window at the left-hand end.
I particularly like the sash window at the left-hand end.


