Robs little hut

Heather Kay

Western Thunderer
Dare I ask - are you and Heather authorised to operate at the same level of pedantry?

I did my time in a design studio attached to a litho print shop, under an ex-Fleet Street proof reader. Syd the Proof would not let you get away with anything, no matter how much you argued the case. Even now I can spot a hyphen that ought to be an en dash at 15 paces.
 

daifly

Western Thunderer
And I've spent over 40 years working in an occupation and environment where precise use of the language is essential.
 

Steph Dale

Western Thunderer
And I've spent over 40 years working in an occupation and environment where precise use of the language is essential.

Hmm, I think there are a few of us here who could kiss goodbye to our professional reputations if we didn't take good care over unambiguous use of the English language. Although for some reason I still find it harder to spell when trying to post from my mobile phone or tablet!

Steph
 

taliesin

Western Thunderer
I was able to make a start on the chimney yesterday before work, this first picture shows three parts glued together
photo-7.jpg

and here it is positioned on the end of the hut just for effect,
photo-6.JPG

I suppose it would be possible to cut out the bit of the wall between the locating slots if a small smoke generator was required, and put a metal tube down the centre, cheers Rob
 

alcazar

Guest
Pedant mode on:
"never have thought so"
Pedant mode off.....


LOL.......of course, I was pulling Heather's leg.

I have to say, on the car BBS sites I use, I've given up correcting people's grammar and spelling. It's an uphill battle and the number of folk who claim to be dyslexic is amazing...

Plus you get abuse for doing it.

My own pet hate is text speak. I don't mind abbreviations like LOL IIRC etc but text speak....I tend to lose the will to live.

Back on topic: the hut is nice, a pity "O" gauge offerings are sooooo dear.
 

taliesin

Western Thunderer
I have been able to move things on a little bit and now have a semi completed chimney, i forgot to mention earlier that some components like the chimney are MDF rather than plywood, anyway here it is.
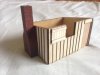
The second picture sees it placed on the side along with the roof to gain an idea of how it will all look when finished.

photo-7.jpg photo-6.JPG

Now comes the water proofing. I have for many years volunteered on a Railway in a particularly wet part of North Wales and as we all know wood, especially the modern kiln dried stuff really does not like water.
I was advised there that sealing everything with thinned varnish was the way forward, basically thinned down about 50% so that it soaked in and keep applying it after drying until it stops soaking in and sits on top like a normal coat of varnish. Some of my work there is now over 10 years old without any rot so its good enough for me.
I will treat various parts like this, the chimney inside out. the entire roof, inside the hut and the top and bottom of the floor along with the window frame. As the original was creosoted i will treat the outside with some wood preservative, possibly it will need re-coating every so often mimicking real life.
cheers for now, Rob
 

taliesin

Western Thunderer
Finally enough varnish has been soaked up, i am sure the chimney is now heavier than when i started,
this first picture shows the end of the hut,
photo-7.JPG

and this one the chimney
photo-6.jpg

After i was happy that everything was "sealed" in varnish i painted both items with my chosen brick colour and allowed it to dry which was followed by a thinned mix brushed over which would find its way into the grooves to represent the cement. Finally some brick colour was wiped over again with a small piece of sponge, a bit like the "dry brushing" technique but using sponge rather than a brush. At some stage it will have a very dark but thin mix washed over to represent years of soot and general crud and finally a coat of Testors Dullcote to seal it all,
cheers for now, Rob
 

taliesin

Western Thunderer
Another day and a tad more progress, i have washed over the chimney and wall with a thin dark mix to give a bit of age to it and coated them with Testors Dullcote, once dry i fixed it with wood glue then slopped in some Araldite to give both strength and prevent the ingress of water.
Compare this picture with the last one and make up your minds about the weathering, the jury is out at this end :confused:
photo-6.jpg

Next the roof, i have an idea about how to replicate the felt which i will reveal is successful :D, if not my lips are sealed, cheers Rob
 

taliesin

Western Thunderer
Today has seen a bit more progress, battens have been fitted to the outside along with the window shutter,
photo-7.JPG

the roof is next, cheers Rob
 

Attachments

  • photo-6.JPG
    photo-6.JPG
    90.6 KB · Views: 1

AdamF

Western Thunderer
This is looking top-drawer :thumbs: I am following with a lot of interest. The brickwork on the chimney is fantastic, with the daylight coming through some of the pointing! Weathering looks pretty spot on to me.
 

taliesin

Western Thunderer
This is looking top-drawer :thumbs: I am following with a lot of interest. The brickwork on the chimney is fantastic, with the daylight coming through some of the pointing! Weathering looks pretty spot on to me.
The daylight through the bricks is good fortune really, it's just the way the components fitted together :), glad you like the weathering though, cheers Rob
 

taliesin

Western Thunderer
And now for the roof, supplied in the kit is a piece of plywood to represent the roof. This received the thin varnish treatment to seal it and then put to one side whilst i dealt with the chimney.
According to the kit instructions the original was felted so to replicate this i cut strips of 3M tri-m-ite paper which were then glued onto the roof with a bit of overhang which were later folded over and glued down over the edges and onto the underside. After letting everything dry i then trimmed the underside so the wooden tops of the sides would be glued to the wooden bottom of the roof later on. Out came the thinned varnish again to seal the paper and any cuts underneath followed by two coats of black paint. This all looks a little "new" so i washed a gungy mix over the roof to give a more weather beaten look. Once dry i sprayed dullcote over it to seal it and to tone things down,

photo-6.JPG

Hopefully i have described it in a way that matches the end result, btw the cut out to the left is for locating the chimney, cheers for now, Rob
 

Bob

Western Thunderer
Looking good, especially that weathered brickwork. It really seems to be a high quality kit and I'm impressed.
Nice idea of yours for the roof felting:thumbs:.
 

taliesin

Western Thunderer
Thanks for the kind messages guys, a bit more progress has seen the outer walls treated, now although we tend to think of creosote as being brown it appears to me that over the years things that have had many years of exposure to the elements and presumingly many coats of creosote actually appear at first glance to be black, so with this in mind,

photo-7.JPG

It does actually have a hint of brown to it but could be taken at first glance to be black. Having given the brickwork and roof some "age" i thought the wood needed that dark look. That slight glossiness soon disappears with exposure to moisture, on the home straight now but more to come, cheers Rob
 
Top