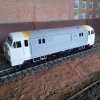
7mm Ressaldar's kit building swansong - Class 22

LarryG

Western Thunderer
It is obviously my cack hand approach that appeals to you. I'll try to maintain the standard.

Regards

Mike
Hi Mike. Re-reading my post, I could have put it better. I wasn't getting at your building skills, but I'm sure you realize that. It's just that some unattractive (to me) prototypes make attractive models.
 

Ressaldar

Western Thunderer
View attachment 148338 Hi Mike,

Agree with LarryG that your Class 22’s looking really good!

It’s a pity that MM1 don’t still supply the lost-wax castings with the kit rather than the 3D printed alternatives, but that’s why the price of the kit has recently been reduced. Lost-wax castings being expensive with long lead times.

Still good to see you’re being innovative, which is all part and parcel of kit building.

There’s a nice reference of 6326 in the book ‘Heyday of the Hydraulics’ by Hugh Dady, taken by the author himself showing some side bogie detail. I photographed it using my phone from my copy for your reference. Hopefully, Hugh Dady and the good folk that administer westernthunder.co.uk won’t mind.

Best regards,

Matt.

Hi Matt,

Totally agree about the castings and the kit is still expensive with the 3D option.

Ŕegards

Mike
 

Ressaldar

Western Thunderer
The lost wax brass lamp irons are wrong too!
Dave

Hi Dave,

as I said above, I’m happy with the lamp irons so will be leaving them ‘as is’. Looking at photos of other 22s, the MM1 vertical handrails with the combined horizontal strip along the bottom seems to be correct for quite a few members of the class - shows how you must find a good photo of your prototype to get the detail right.

regards

Mike
 

Ressaldar

Western Thunderer
Lots of effort without too much progress really but that said, I now have a running model

P1010794.JPG

it had a good run this afternoon on the Club layout and with another good session tomorrow night, that will suffice the running in prior to fixing the MX645 and speakers. Having said that, there is still a lot of detail work to do, that will be reported next week.

regards

Mike
 

Ressaldar

Western Thunderer
Hi Chris,

I think that it is the ‘go fast’ stripes on the roof that does it for me! There is certainly a lot to do yet before thinking about the transfers.

regards

Mike
 

Ressaldar

Western Thunderer
Have made progress on the bogies over the past few days following some useful running in sessions on Thursday and Friday

P1010795.JPG

P1010796.JPG

the sand pipes and the brake pull rods as supplied were deemed not fit for purpose so were discarded. Nickel silver wire was used for the sand pipes, simply bent to shape and glued in using the cast in holes. brass strip of suitable size was used for the brake pull rods and drilled out to slip over the spigots on the brake hangers. Unfortunately, the brake hangers were not of a consistent shape which resulted in just having to align the pull rod in line with the spigot. There is a rebate already formed in the area below the bush for the drivers so this was used for the main fixing point for the rods and the outer end of the rods was fixed to a spigot that I put in on the main chassis block to enable the sideframes to still be removable. As you can see at the bottom of the lower picture, it worked fine on the delrin side , there was just enough room between the bolt holding the plate in position and the side of the chassis, unfortunately, the bolt holding the plate on the other side was in the way which would have resulted in a sharp bend having to be formed on the pull rod so that rod is simply glued to the underside on the chassis, it will not be seen when in the running position.

This morning I painted all of the work described above in order that the pipe runs could be fixed in position already painted (white) I had intended to use single strand hard drawn telephone wire for all of the pipe runs in lieu of the 3D printed pipes provided but on close inspection I decided to use the 3D pipes as they did look ok. However, I did use the telephone wire on the cylinders on the ends of the bogies and also on the long runs over the top of the frames (these are not included in the kit), this took a lot longer than I thought, then the 3D pipes were glued on and 'jointed to the long runs.

P1010797.JPG

P1010798.JPG

The joints will be disguised with the weathering. I shall tackle the other bogie tomorrow.

regards

Mike
 

Ressaldar

Western Thunderer
Spent this morning completing the power bogie with it's brake pipes and having set the bogies up for the photos, realised that I have now inadvertently 'joined' the frame sides to the chassis block with the continuous pipe between the two cylinders on each end. I will cut the pipe midway and sleeve over the cut with a piece of outer casing from some track power wire - there must be a joint somewhere in the vicinity on the prototype to suit, not that it would ever be seen.

P1010799.JPG

P1010800.JPG

P1010801.JPG

So thoughts now turn back to the cabs, particularly the lights. I have now received my order for 2mm lighthouse LEDs for the running and red lights and discovered that I have no supplies of 2mm id tube, plastic or brass for the bezels, so an order has gone off to Eileen's. Therefore back to the body and chassis, the etched brass screens, the main fan and the chassis itself all need priming so out came the Acid 8, followed by a swift exit from the workshop leaving the extract fans working overtime!

regards

Mike
 
Last edited:

Muddysblues

Western Thunderer
@Ressaldar , hello Mike hope you are okay, quick question, what are the brass etched screens you mentioned in your previous post ?

have these been produced by MM1 now ?
Best regards
Craig
 

Ressaldar

Western Thunderer
Hi Craig,

all well here thanks, hope the same applies in sunny North Wales.

If you look back to post #48 you will see the gaps in the roof and also the large area on the side (another one on the far side). I will be fixing them tomorrow - all but the two large side screens as they are black, the rest are blue and therefore can go on now in readiness of the main painting. Yes, they are included in the kit.

There is a photo showing all of the kit parts in post #18.

regards

Mike
 
Last edited:

Ressaldar

Western Thunderer
Small progress this morning with the fitting of the grills into the apertures on the roof

P1010808.JPG

they were carefully rolled on a bed of kitchen towels using the shank end of a 1/4" drill bit. the large one and the rectangular one fitted from above and the smaller ones from below, this just leaves the side grills which will be fitted after the blue paint goes on and the whole thing will then be weathered.

regards

Mikw
 

Muddysblues

Western Thunderer
Hi Craig,

all well here thanks, hope the same applies in sunny North Wales.

If you look back to post #48 you will see the gaps in the roof and also the large area on the side (another one on the far side). I will be fixing them tomorrow - all but the two large side screens as they are black, the rest are blue and therefore can go on now in readiness of the main painting. Yes, they are included in the kit.

There is a photo showing all of the kit parts in post #18.

regards

Mike

Hello Mike, thanks for your reply, sorry I was getting mixed up !! When you said screen etches, I was thinking windscreen etches, as this kit doesn't come with any, and I would say it is a prominent bit of detail that is missing, when I get back into my builds, I will look at bodging something up in plasticard, and see if they will take a small rivet press dent, and spray up silver.

The build is coming on nice Mike :thumbs:

Stay safe
Craig.
 

Ressaldar

Western Thunderer
Hello Mike, thanks for your reply, sorry I was getting mixed up !! When you said screen etches, I was thinking windscreen etches, as this kit doesn't come with any, and I would say it is a prominent bit of detail that is missing, when I get back into my builds, I will look at bodging something up in plasticard, and see if they will take a small rivet press dent, and spray up silver.

The build is coming on nice Mike :thumbs:

Stay safe
Craig.

Hi Craig,

If you look at the photo in post #31 you will see that the aluminium window surrounds are already cast in and they are not too bad a representaion in my opinion, so you won't have to do any bodging.

regards

Mike
 

Ressaldar

Western Thunderer
Time to try things out running wise with the brake pipes on top of the sideframes

20210916_102922.jpg

20210916_102942.jpg

no need to have worried but will still give it a good blow at the Club tonight.

Not much else happening as I'm waiting for bits and pieces to be delivered, I have also returned the MX645R to YouChoos (without taking it out of the blister) as I did not trust myself soldering the additional wires onto the micro pads and am awaiting an MX699ks with its screw terminals and more outputs and built in stay alive.

regards

Mike
 

Ressaldar

Western Thunderer
The straight forward stuff is done and it is now time to put on the thinking cap - nose end lighting????

First thing to understand is that whatever solution that you end up fitting, you have to realise that it is sacrificial in as much as when the cab is fitted to the body, there is no way back for any maintenance as you cannot get into the back of the nose once the desk/floor assembly is glued into place. So the first thing to consider is what type of lighting is best/most reliable - I have gone for SMDs and have my fingers well and truly crossed, more of that later!

P1010815.JPG

Firstly, there was a casualty on the front end of Cab B, one of the 3D printed lamp irons had done a disappearing act and there was no chance of retrieving it from the floor (if that was where it had gone) luckily, I had a couple of packets of Laurie Griffin's diesel lamp irons so the remaining three 3D printed versions were removed and the LG version substituted.

Then it was a case of working out how the route indicator boxes could 'work', obviously the infill from the casting had to be removed so I drilled a 2mm pilot hole right in the middle and was surprised as to the thickness of it. Then I realised that if I cut it out leaving an edge all round, the blinds could be fitted from the front using canopy glue - I have the 'blinds' from Precision Decals and I will be sandwiching them between two 10 thou layers of clear plasticard with the inner layer scratched all over with a fibre glass stick to frost it to act as a diffuser.

My original idea for the white and red running lights was to use 2mm dia. lighthouse LEDs with the protruding end rounded off. but the rear end of the LED fouled the desk/floor module so another solution was needed. The solution also firmed up my mind to use the SMDs. I cut the top off of the lighthouse LEDs flush with the base and the resulting cylinder not only protruded the right distance at the front, but the rear was flush with the inside of the nose casting. I tried the SMD at the end of the red cylinder and there was light bleed showing through the casting, so I then drilled a 2mm dia. hole in an offcut of 20thou black plasticard which I had cut to shape to allow for the desk/floor casting and superglued the SMD over the hole on the rear face. When this was offered up to the hole there was no light bleed anywhere - big sigh of relief. At present, I am using a 1.5K resistor on each light, this is still not giving me the light level that I am after, so there is some more tinkering to do in that department.


P1010812.JPG

one set of SMDs as they appear from the inside of the nose.

P1010813.JPG

and turned over 'facing front' the red light has the yellow lead.

The next job is to prime the nose ends and when dry spray with yellow warning paint, that will allow me to paint the aluminium window surrounds prior to glazing and with the glass in, the light assemblies can be installed followed by the desk/floor unit (with driver at one end) and then the cabs can be fitted. The buffer beam is blue so this will be done with the rest of the body then the buffers which are black will be fitted along with the pipework around the coupling aperture.

I have now received the MX699ks from YouChoos so this will be installed during the work outlined above, especially if things start to go pear shaped along the way, it will provide a good diversion whilst I contemplate a solution.

I mentioned 'fingers crossed' earlier - in jest, however over the last six months or so I have been increasingly suffering from fingers locking - very similar to having cramp and it always happens when I have tools in my hands. Individual 'cramps' only last for a few seconds but the sensations move across my knuckles in a random order and as such, the overall pain lasts for minutes at a time and it always happens at a critical moment. It eventually goes and I am able to continue for a few more hours until the next episode.

More to come shortly.

regards

Mike
 
Top