7mm OzzyO is back building a Dave Parkins' kit (and some JLTRT Coaches as well). Now on to some MMP 16ton wagon kits.

OzzyO

Western Thunderer
Hello all,

I'm having a short break from building the PoS while I get some parts namely ETH gear and the communication gear for the end of the coach. So, I thought that I'd make a start on Ian's JLTRT, BG.

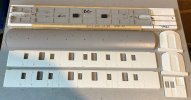
What's in the box as a start the resin parts, I'll photo the other castings as I have to open the bags.
So, from the top, the floor pan, roof, body sides, to the right body ends and part of the guard's compartment.
IMG_8363.JPG

The etches, I'm a bit surprised that no window guard rail are on the etch like in the PoS kit.
IMG_8364.JPG

I started with the angle trusses and had the same problem with folding them as on the PoS. The brass is a bit thick at 18 thou but with a half-etched line and then scoring them it was out with the hammers again.
IMG_8366.JPG

After the bending? I got this.
IMG_8367.JPG

After I got it something like straight and flat it was onto some assembly.
IMG_8368.JPG

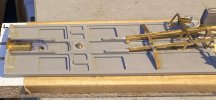
Then fitting it to the floor pan, to get this.
IMG_8369.JPG

A close up showing some of the bits that need a bit of work. I'm thing about adding some pins (or bits of brass wire) down the backs of the uprights to add more support for the truss.
IMG_8370.JPG

It looks like I don't have to add the bottom lip of the solebar on the BG as what I can work out from photos it looks like the solebars were flat faced.

ATB

OzzyO.
 

AJC

Western Thunderer
It looks like I don't have to add the bottom lip of the solebar on the BG as what I can work out from photos it looks like the solebars were flat faced.

Something true of all mark 1 carriages, I thought? Or at least, on the outside, anyway - I've never needed to look closely at one inside of the frames!

Adam
 

Dave Holt

Western Thunderer
There are some very good drawings of the Mk1 underframe in the BR Mark 1 Coaches book by Keith Parkin, published by Pendragon/HMRS. The solebars were channel section but with the flanges facing inwards.

Dave.
 

OzzyO

Western Thunderer
Hello all,

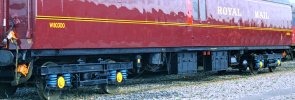
I've been looking at my collection of photos PoSs and the best one to show the solebar is this one.
R (1) 4 - Copy.jpg
Yes, I know that it's in preservation, but it would be a very big job to replace a solebar and then put it on the wrong way around.
But I will agree that most MK1 coaches did have flat faces to the solebars.
The full vehicle in all its splendour.
The photos are not mine and only used to illustrate a point.
R (1) 4.jpg
R (1) 7.jpg

ATB

OzzyO.
 

djparkins

Western Thunderer
Hello all,

I've been looking at my collection of photos PoSs and the best one to show the solebar is this one.
View attachment 175169
Yes, I know that it's in preservation, but it would be a very big job to replace a solebar and then put it on the wrong way around.
But I will agree that most MK1 coaches did have flat faces to the solebars.
The full vehicle in all its splendour.
The photos are not mine and only used to illustrate a point.
View attachment 175170
View attachment 175172

ATB

OzzyO.

These photos shows a flat face to the outer solebar. The inner face is a channel - as on your MMP kits.

David ParkinS
 

OzzyO

Western Thunderer
These photos shows a flat face to the outer solebar. The inner face is a channel - as on your MMP kits.

David ParkinS
Hello David,

yes, I know how it should be but things do change, like the coach has B4 bogies. When you look at this photo and blow it up it does look like a channel section with a bottom flange on the outside. It "may" have been that the first batch of POSs 80300 - 305 had the channel section fitted the wrong way around, or that they used I beam instead of C section?
R (2) 4 - Copy.jpg

Or has the coach had a repair done on this side?

ATB

OzzyO.
 
Last edited:

djparkins

Western Thunderer
Hello David,

yes, I know how it should be but things do change, like the coach has B4 bogies. When you look at this photo and blow it up it does look like a channel section with a bottom flange on the outside. It "may" have been that the first batch of POSs 80330 - 305 had the channel section fitted the wrong way around, or that they used I beam instead of C section?
View attachment 175192

Or has the coach had a repair done on this side?

ATB

OzzyO.

But I don't think it is channel OzzyO,

To me, what you could be thinking of as the lower flange of the channels is actually a trick of the light owing to the discolouration of the solebar at the borrom of the nearer end - contrast this with the end further away.
 
Last edited:

OzzyO

Western Thunderer
Hello all,

thanks, to the Davids I did know that Mk1s had a flat face on the solebars but the photos at the S.V.R. had me thinking that the channel section was on the outside face on the early POSs.
The photo that daifly posted has convinced me that it's the flat face to the outside, so out with the acetone and get the plasicard off.

ATB

OzzyO.
 
Last edited:

OzzyO

Western Thunderer
Hello all,

I received my drophead buckeye coupling on Saturday from Ellis Clark trains and very nice they look with no spring visible for the moving part of the jaw.
The only problem I had with them is that the head is a bit on the stiff side when you want to drop it for the first time, but after a bit of use all is well.
In the photo is one of the Kadees that I was thinking about using it's a country mile to big.
IMG_8380.JPG

ATB

OzzyO.

 

OzzyO

Western Thunderer
Hello all,

the problems of modelling when you have a head full of candyfloss and snot.
Without thinking I just fitted both of the guards' bottom footboards in place with brass wire at the back to add support. Now to figure out how to remove one without destroying the step or the second support.
Floor 006.JPG

It's also looking like I will have to move the position of the vee hangers from where the small bracket is on the trusses.

ATB

OzzyO.
 

OzzyO

Western Thunderer
Hello all,

not a lot to report this week. I did manage to remove the errant bracket from the step and then lost it to the black hole that's my workshop floor. But a bit of scrap etch came to the rescue.
Floor 006b.JPG

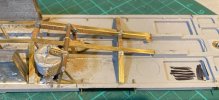
I also moved the step a bit more towards the vac. cylinder. I did have to move the small bracket on the trussing, looking at this photo I may have got the vee hanger a bit to far towards the buffer beam. Maybe I should have also filed off the rivets on the vac. cylinder as well. The joy of kits that one part fits all. Also kits that don't have positive locations for parts.
Floor 006a.JPG

The underframe coming along from the fuse box - regulator side.
Floor 007.JPG

And from the dynamo side. I think that I'm going to have to do something about the step and how it overhangs the battery box.
Floor 008.JPG

I have modified how I'm sorting out the buffer beam on this one in that I'm using four rivets rather than three like I did on the POS.
The floor pan is held down onto my working plank by a screw into each of the bogie fixing pivots.
Floor 009.JPG

ATB

OzzyO.
 

OzzyO

Western Thunderer
Hello all,

just spotted this on the other side.

Posted 46 minutes ago
I am very sorry to have to tell you that Russan Limited, trading as Eileens Emporium has ceased trading and appointed liquidators.

We have done our best to send out all the stock we have for pre-paid orders. I am sorry that we were not able to complete all of them.

Any clains against the business should be sent to:
Christine Vaines, Begbies Traynor, Suite C 11 Kingsmead Square, Bath, BA1 2AB | T: 01225 316 040 | Email Christine.Vaines@btguk.com

A very sad day for some of us.

OzzyO.
 

oldravendale

Western Thunderer
That is sad, sad news indeed. I've bought from Eileens for many years and wish Derek the best in a truly difficult time for them all. Although readers of this forum are almost certainly aware I'll just mention that Hobby Holidays continue in business and you'll find no more helpful person than Phil.

Brian
 

djparkins

Western Thunderer
Hello all,

just spotted this on the other side.

Posted 46 minutes ago
I am very sorry to have to tell you that Russan Limited, trading as Eileens Emporium has ceased trading and appointed liquidators.

We have done our best to send out all the stock we have for pre-paid orders. I am sorry that we were not able to complete all of them.

Any clains against the business should be sent to:
Christine Vaines, Begbies Traynor, Suite C 11 Kingsmead Square, Bath, BA1 2AB | T: 01225 316 040 | Email Christine.Vaines@btguk.com

A very sad day for some of us.

OzzyO.

Yes - sad. I suspect that compounding the current downturn and ever-rising costs is an added factor. That of the decline in modelling among their traditional customer base in favour of RTR, resulting in a further fall in demand for stock in recent years.
 

OzzyO

Western Thunderer
Hello all,

not much to show this week. But I have added the 0.5mm supports for the running boards under the doors and more bits to the under frame.
Floor 010.JPG

A close up of the supports.
Floor 011.JPG
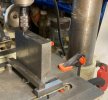
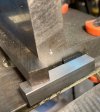
I was going to drill them by hand but then I thought 20 holes to drill what could go wrong? So I made this Heath Robinson set-up, it keeps the holes the same distance from the top of the floor plate.
Floor 012.JPG

The black bit that you can see is a "small" Neodymium magnet approx. 15 X 10 X 2mm, this is just to hold the short lengths of tool steel in place on the ends of the L angle block.
Floor 013.JPG

All the best for Christmas and New year

OzzyO.
 

OzzyO

Western Thunderer
Hello all,

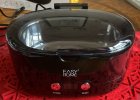
the wife and I went to Aldi today to get some more shopping. I had known about these for a while and thought well I have got two bigger ultrasonic cleaners them why should I get another one.
U Sonic 00.JPG

Before I knew it it had jumped into the trolley and looked so at home, that it came home with us.
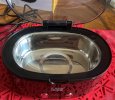
Then it was lets see what I have got, out of the box this is what you get.
U Sonic 01.JPG
U Sonic 02.JPG

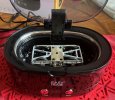
It will take a BR1 bogie in 7mm so that saves me having to get one of the big ones out.
It will also take the bogie in the plastic basket.
U Sonic 03.JPG

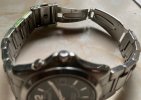
For its first test it was my watches wrist band, a before photo.
U Sonic 05.JPG

and after. Some bits of grot but on the whole OK.
U Sonic 06.JPG

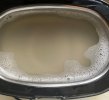
The water after cleaning, all I was using was hot tap water and 5 squirts of orange Clit Bang. This same water was used for all of the following tests.
U Sonic 07.JPG

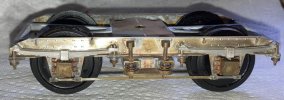
The first bogie before cleaning.
U Sonic 10.JPG

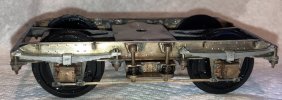
After cleaning. This bogie was cleaned in the plastic basket for 280 seconds wheels down then for 280 seconds with wheels up. Then a quick rinse in hot clean water, not in the cleaner. God knows what it will do to the steel that Slater's use.
U Sonic 11.JPG

The same bogie from above.
U Sonic 12.JPG

The second bogie, this was done for 480 seconds on its wheels without the plastic basket.
U Sonic 13.JPG

and from above
U Sonic 14.JPG

When it came to empty the tank I put a sheet of kitchen roil in a funnel to catch any bits that may have come off. But all I got was this!
U Sonic 15.JPG

At £20 it does the job on "small" parts in O gauge (if a bogie is small), the only down side is that it does not have a water heater but the ultrasonic effects will keep the water warm.

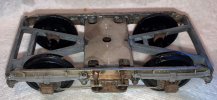
The bogies are a pair of JLTRT brass ones.

ATB

OzzyO.
 
Do be careful with white metal parts in an ultrasonic cleaner. I have a large heated one that can do a whole loco body and I've noticed the smooth finish on some castings takes on a rougher texture and there is a sludge in the bottom...
 
Top