4mm On Heather's workbench - on a Holden to…Yarmouth?

Heather Kay

Western Thunderer
Lumme, doesn’t time go quickly?

No piccies, sorry. Just a progress report.

There hasn’t been much.

:))

Actually, there has been some. Discussions about how to get the coaches painted has led to the notion the paint shop might as well assemble the things rather than try and ship them back down south to me. It’s a right pain living this side of London when most clients are the other side. I’m happy with that solution, as it makes logistics simpler all round (apologies for the buzzwords!).

So, my aim now is to get the models as sub-assemblies progressed as far as possible so they can be nailed together once the bodies are decorated.

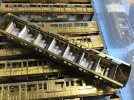
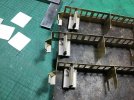
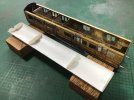
Today, then, saw me gluing in the false floors, and opening up the holes for the buffers. I have to say the buffer castings are shocking. I hope I have picked the best ones for the brake ends. The ones in the middle of the consists aren’t seen all that clearly. I hadn’t fitted the buffers before, because being whitemetal with the consistency of chilled butter they are very likely to be knocked and snapped off. I just have to be even more careful now.

I also experimented with interior fittings, which proved successful. Another step along the road.
 

James Spooner

Western Thunderer
Lumme, doesn’t time go quickly?

No piccies, sorry. Just a progress report.

There hasn’t been much.

:))

Actually, there has been some. Discussions about how to get the coaches painted has led to the notion the paint shop might as well assemble the things rather than try and ship them back down south to me. It’s a right pain living this side of London when most clients are the other side. I’m happy with that solution, as it makes logistics simpler all round (apologies for the buzzwords!).

So, my aim now is to get the models as sub-assemblies progressed as far as possible so they can be nailed together once the bodies are decorated.

Today, then, saw me gluing in the false floors, and opening up the holes for the buffers. I have to say the buffer castings are shocking. I hope I have picked the best ones for the brake ends. The ones in the middle of the consists aren’t seen all that clearly. I hadn’t fitted the buffers before, because being whitemetal with the consistency of chilled butter they are very likely to be knocked and snapped off. I just have to be even more careful now.

I also experimented with interior fittings, which proved successful. Another step along the road.
Heather,

Kean Maygib make sprung GER carriage buffers with brass bodies that I use as a replacement for those supplied with the kit, if that is of any help.

Nigel
 

Heather Kay

Western Thunderer
Kean Maygib make sprung GER carriage buffers with brass bodies

That would have been an option. The coaches are destined to be fixed rakes with Dingham couplers at the outer ends, so I’m not sure sprung units would be worth the effort.

The cast things are okay as far as visuals are concerned - with the standard Three Foot Rule.
 
Somewhere to sit.

Heather Kay

Western Thunderer
More steps to completion.

IMG_3629.jpeg

Filling out the compartments and seating. Another tedious job (ain’t they all?) but nearly done.

IMG_3630.jpeg

The final interiors are for the composites. The compartment at the cheap end was originally a luggage space, but it was converted to truncated third class seating in the mid-1920s. I’d been puzzling how to deal with things for ages and ages, then I stumbled across a seating plan in the GERS journal. Spare brass compartment sections were adapted to make the rather convoluted corridor extension, and offcuts of the Ratio moulded seating sliced about to fit.

Once I’ve sorted the compartments out, I’ll clean them up and prime them. Basic colours only for these, nothing fancy pants. Then next week can be all about roofs.
 
Fitting roofs

Heather Kay

Western Thunderer
To cap it all - roofs!

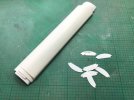
Back in the dim and distant, Past Me thoughtfully deployed her Silhouette cutter to make roof bracing pieces. It had been decided we could use the provided vacuum-formed roofs, but more on that shortly.

IMG_3663.jpeg

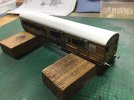
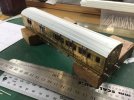
The first task was to check the roof mouldings for fit against the bodywork. Then to trim to length and square up the ends. I did this by holding the roof on the body with quite an overhang at one end. I carefully drew a pencil along the outside edge of the top of the coach end to leave a mark under the white plastic roof. A sharp scalpel blade was used to carefully trim almost up to the mark, with finishing by file and sanding stick, checking against an engineer's square. Once happy one end was pretty square, the process was repeated to trim the moulded part to length. I allowed about a 0.75mm overhang each end.

IMG_3665.jpeg

I’ve cut way too many roof braces, but I didn’t know. Blocks of scrap styrene are used as support. At the outer ends, the idea is the roof is a tight fit between the ends, so it’s held by friction. I think they will require a little glue once final assembly is done. Each brace is glued in, pressed down carefully to ensure the roof meets it - each moulding is ever so slightly different. Hopefully, the braces will hold the profile adequately. Past Me didn’t account for the internal parts getting in the way, so a little surgery has been required here and there.

IMG_3666.jpeg

One roof done. Unfortunately, although I have enough mouldings for all 16 coaches, nearly half are gash*. It looks like they’ve been trimmed from the sheet so they’re not deep enough to fit the profile without gaps along the sides. Annoying. I can still finish up the remaining roofs with suitable detailing like rain strips, carriage board clips and ventilators, while we hope replacements will arrive and actually fit.

Ah, ventilators. The Great Eastern Railway is sort of famous for being careful with the pennies. Looking through the photo references, it seemed that many coaches were missing lots of roof vents. Were they removed during their service lives, or were they never installed in the first place. It seemed to me it was different if a coach was built with gas or electric lighting, or was converted later. I needed a pattern.

IMG_3667.jpeg

Eventually, some kind of pattern appeared. Smoking compartments (which also provided an answer to another question) and the lavatory seemed to be favoured with the luxury of a roof vent. The rest of the passengers had to make do with door droplights and louvred vents. Incidentally, I’ve never thought about how roof vents actually worked. Did they draw air into the coach, or encourage air out of it? Anyone know?


*Gash. I believe in the Royal Navy, this term was used for refuse and detritus that would be ejected over the side into the Oggin. In the print world, it referred to material that was essentially rubbish - some typeset galley with an error in it, for example - but kept in case it was useful for patching up other errors on artwork. Every paste-up artist, me included, had a "gash drawer" near their drawing board.
 

James Spooner

Western Thunderer
View attachment 211018

Hmm, I think that’s okay. Just another 15 to go (after replacements and extra styrene strip have been arranged, at least).
Hi Heather, that is looking very good! One variant I have used is to make the bottom eaves out of one flat piece of plasticard (effectively creating a false ceiling in the coach) and sanding down the formed roof to fit, then gluing the roof to the false ceiling. This has the benefit of giving greater stability and a large gluing area to attach the roof to the body. I know there are pros and cons and some prefer to keep the roof separate from the sides but on these coaches the underframe unscrews from the body, giving access and the end handrails are soldered into the ends of the coach but then go right up and back down through the roof, making it difficult to remove anyway.

Nigel
 
Top