4mm Life in a Northern Town - Ever more York

Eastsidepilot

Western Thunderer
I've done a bit more. The rendered wall has had the signwriters at it. Normally for painted lettering I cut a mask with thin tags for the centres of Os A's and the like. This time letters with an enclosed centre were just cut out as an outline shape and I painted in the missing bits in wall colours when the lettering was dry. Lots easier this way I feel.

View attachment 168490

Framer's tree surgeon will occupy a yard to the left of the grocers shop. The shop itself will be named for my late and much loved great aunt who brought up my mum from an early age.

View attachment 168491

If I'm honest I'm not a hundred percent convinced by the roof pitch. I've a feeling that it should perhaps be a bit steeper but it's what the kit comes with and it would be a right pain to alter.
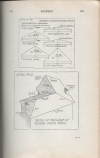
Bit late to this party :D and depending on how pedantic you are about buildings, roof pitches are dependant on the covering being used as shown in these pages from Jaggard & Drury's 'Architectural Building Construction'
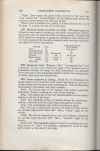
Scan_20221119 (2).png
Scan_20221119 (4).png

Col.
 

Neil

Western Thunderer
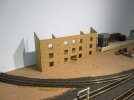
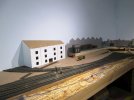
Brrrr, the UK is cold and the garage even colder so all work has been happening in my indoor playroom. Last week a large flat parcel arrived containing a flat pack, laser cut, low relief warehouse. As you might have guessed I'm congenitally unable to build anything as intended so after putting the basic shell together ....

yk 325.jpg

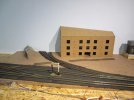
..... I took what was intended to be the rear and cut it about to extend one end and fashion the roof.

yk 326.jpg

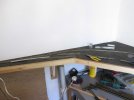
I intend to cut a new rear wall from some thin ply I have knocking around and attach it with screws to a pair of blocks glued to the side walls. From the above photo, hurridly taken so frostbite didn't set in, you can see that I will tighten the curved siding using the piece of set track and will also add a disused track in front of the warehouse, burried in cobbles and tarmac.

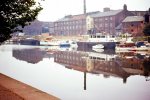
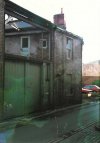
Finally here's a photo, harvested from Pinterest (I think) of the real riverside in York and the building the kit will vaguely represent.

terry avenue 2.jpg
 

Neil

Western Thunderer
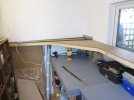
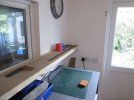
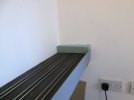
It's a sunny Easter bank holiday weekend so what could be more natural than sawing up some two by one and a load of mdf? Northern Town's hidden sidings in their first incarnation stretched out for all of five feet and by the time pointwork was taken into account the longest siding had a usable length of four feet. I'd always intended to extend them out and a bit of strategic over ordering of materials for the upstairs bathroom refurbishment provided the stuff I needed.

yk 334.jpg

Here the original five foot fiddle can be seen along the back wall complete with the sponge rubber overrun protection. The new build stretches towards the camera .....

yk 335.jpg

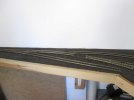
.... and finishes by the door. Rather than have a wide yard with many separate sidings, the notion is that I'll split the three sidings into three foot sections and rack trains up behind each other on two of the roads leaving the third empty. The empty road will be able to handle the return traffic from one outbound road by which time it will be clear and can handle returns from the second outbound road. Sufficient I think for a good session without the need to shuffle stock.
 

Jon Gwinnett

Western Thunderer
Also it occurs to me that with your block section approach, something like the Peco loco lift (particularly its rather better engineered new version) might come in handy for reformatting trains - drive train into section ending in lift box, whip loco off and replace at on stage end of train. Voila!
 

Neil

Western Thunderer
Also it occurs to me that with your block section approach, something like the Peco loco lift (particularly its rather better engineered new version) might come in handy for reformatting trains - drive train into section ending in lift box, whip loco off and replace at on stage end of train. Voila!

That's a possibility as I may end up with a loco lift to use as a virtual turntable instead of trying to squeeze one into the corner where the tracks curve round from the old hidden sidings into the new.
 

Neil

Western Thunderer
here in mid Wales it's wet, cold and horrible so rather than playing in the garage I've been playing indoors. You may remember the laser cut, mdf warehouse kit, lurking naked on the layout; now it's lounging on my workbench upstairs. It's a good way through being clad in brick plasticard.

yk 336.jpg

yk 337.jpg

I've also added a lucam from 80 thou plasticard covered in planked plasticard. It's just taped in place here, final gluing in place will follow the basic painting of the walls.

yk 338.jpg
 

Neil

Western Thunderer
Quite a lot has happened over the last week and a half; I don't usually get this much done, I don't know what's come over me. The new substructure for the enlarged and improved staging was covered with my usual 4mm yoga mat material, stuck down with Evo-stick.

yk 339.jpg

I managed to stretch the leftovers from the rest of the layout so there are a few more joins than I would have liked but it's the off scene area when all's said and done.

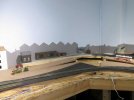
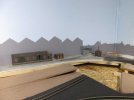
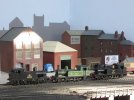
On the layout proper I've extended the grey silhouette backscene form the Baile Hill tower on the Bar Walls around to where Terry's warehouse will be placed.

yk 342.jpg

yk 341.jpg

yk 340.jpg

On Wednesday I picked up ten lengths of Peco flextrack from my mate Nick's stall on Machynlleth market; enough to do the staging and leave some over for future projects.

yk 343.jpg

As well as the three long storage roads I've squeezed in a loco siding (the front track) so that when my mates bring toys to play with it's easy to rail them here.

yk 344.jpg

I took the snaps yesterday, today I've got one and a half long sidings in and with wires to them and in my upstairs playroom I've another warehouse building under construction, this long gone one from Skeldergate.

Skeldergate warehouse 1.jpg

Finally I've attended to the ergonomics of the signal box. The box diagram was flat to the wall above the point levers and awkward to keep in view while supervising my mates getting up to all sorts of mischief on Friday evenings.

yk 345.jpg

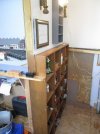
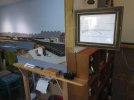
I didn't want to mount it above the levers because I wanted to keep the view of the layout uncluttered and having it sticking out to the right would compromise access to the storage shelves underneath and to the staging sidings. Earlier this week I had a sudden rush of blood to the brain and I decided that I'd hinge it so it could be out for use and folded flat when not.

yk 346.jpg

Remarkably pleased with myself for working that one out.
 
Last edited:

Neil

Western Thunderer
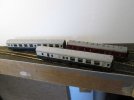
About half an hour ago I finished the staging sidings. I still seem to be working at a pace despite doing nowt yesterday (dreadful weather) and gardening this morning (lovely weather). Earlier on in the week I finished laying the track, here's the loco siding being checked for clearance with some coaching stock.

yk 348.jpg

Should be OK as long as Patrick doesn't roll up with his Big Boy. The plummet protection strips had their nail holes filled, sanded back and then all painted grey.

yk 349.jpg

You can see the wires poking out for the isolating sections, ready to be connected up. I also thought it prudent to install some over run protection.

yk 350.jpg

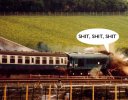
While we might still see accidents at least all the debris will be contained.

shit shit shit.jpg

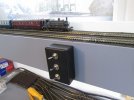
At dinnertime today (in the north there is no such meal as lunch) postie shoved a parcel of switches and project boxes through Fred's cat flap, so this afternoon I installed them on the layout.

yk 352.jpg

The switches bridge the section gaps when pointing to the staging sidings exit and isolate when pointing to the dead end.

yk 351.jpg

I sort of surprised myself that it all worked first time. When I left school I trained as a sparky so a/ I know what I'm doing but b/ I can still make stupid mistakes.
 
Last edited:

Neil

Western Thunderer
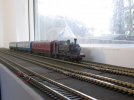
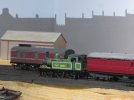
Last week I went shopping on the internet and bought a little green loco. I've been after one for a while but finding one in the right condition and at the right price has taken some time. It's one of a pair painted in NER-ish green by BR in the late fifties. In an ideal world I would have renumbered it for the York station carriage pilot, but I didn't want to risk rubbing through the paint so I'm supposing that Newcastle's pilot was transferred south rather than York's heading north to the Tyne.

yk 357.jpg

It's had some light weathering applied as the real thing was kept fairly clean and I don't want to be running stuff straight of the box.

yk 356.jpg

Worryingly it does look as though I'm becoming a bit of a hoarder.
 

Neil

Western Thunderer
I've had a week or so of things going a bit wrong.

After saying that I couldn't easily shift the numbers on the J72 (I'd tried white spirit remembering that this was supposed to loosen such things on early Bachmann models) I thought I'd apply some extra weathering to the tanks. Unfortunately while white spirit doesn't lift the numbers it attacked some of the lining to the bunker side. Bugger. Out with the lining transfers and I managed an invisible repair. So to seal the repair I wafted over a coat of Halfords matt lacquer which I believe has an acrylic base on that side. It curled the tank side lining and broke up the BR crest, though the NER crest and the numbers were untouched. Out with the lining transfers again and an old sheet of Pressfix BR lion and wheel transfers. This time I masked off everything apart from the transfers I'd applied and no further damage was done. Fortunately the repair is undetectable but it took several days to get the model back to where I'd started. There are no photos of this debacle.

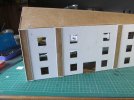
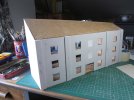
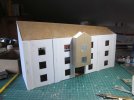
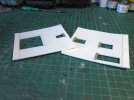
The next cock up hasn't avoided the camera, putting together a low relief warehouse for the right hand end of the layout hasn't gone well.

yk 358.jpg

You would think that by now I'd manage to get things right pretty much from the off, particularly as plastic is my favourite medium. Never mind the local model shop (sixty mile round trip) has provided some beefier stuff for the walls and my mates picked up some more brick and slate textured sheet at the Bristol show so I'm good to go for Mk.2.

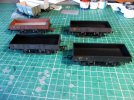
Finally something that's gone a bit better. I added some cheapo Dapol grampus bodies to an order from Hattons as I had a few stashed chassis I thought would be suitable. They were a mix of new Hornby, old Hornby and Mainline or Airfix? Well they almost fit just needing the top lip of the solebar notching out to avoid the door bangers. Wheels out, coupling mounts built up and a waft over with Halfords matt black. An afternoon at the computer had the transfer artwork done. Here's where I'm at so far.

yk 359.jpg
 

Captain Kernow

Western Thunderer
I do sympathise with the problems, Neil!

Following a recommendation some time ago from Rob 'Sheepbloke' Gunstone, I now use Humbrol Matt Acrylic Varnish from a spray can for most jobs. It also takes weathering powders well.

I am well impressed with your ability to produce transfers on the computer - that's way beyond my pay grade! Respect!
 

Jon Gwinnett

Western Thunderer
A “plus 1” from me for Humbrol rattle can Matt varnish. I’m not sure any varnish is foolproof (and I’m the fool to prove it!) but with reasonable precautions (shaken until your arm feels like it’s going to fall off, avoid spraying on humid/damp days) then it performs as reliably as any other I’ve tried, including the much lauded Dullcoat, which I found to be incredibly moisture sensitive, not much use on damp island in the North Atlantic…
 

Neil

Western Thunderer
Thanks Chaps, actually a 'like' isn't a bad response to have because I've learned something from the failures and it's sharpened up my approach, I may have taken it for granted that all I did would work out. I've said earlier on that I'm not pursuing a finescale approach to Northern Town but I would like my non finescale stuff to be well put together.

Re. Humbrol Acrylic varnish, I've heard (and read) horror stories of it all going wrong, I've also had problems with Dullcoat attacking Modelmaster lining transfers which seem immune to the Halfords stuff. There are reported ideas that it may be the propellant rather than the varnish causing problems. I'm beginning to think that caution with early Bachmann models is the best policy and that test pieces for all repaints are worthwhile.
 

Jon Gwinnett

Western Thunderer
Hmm, that example looks very extreme, but I’ve never experienced anything like that, and I’ve used it on a mixture of enamel and acrylic paints. But all varnishes are notoriously temperamental
 

Richard Gawler

Western Thunderer
I once ruined a model with Humbrol acrylic varnish and part of my trouble was the way the aerosol looked just the same as the can of enamel varnish. Indeed I have bought the wrong one in a shop before now.

I knew I could put enamel on top of acrylics or enamels, so I put the problem varnish into the bin. I don't miss it, but I still leave newly-painted models to stand for a week+ before applying any varnish at all.
 

simond

Western Thunderer
Would it be worth evo-stik-ing your curly walls to a bit of plywood, leave to set under a suitable pile of books (bit of cling-film to protect books, perhaps) and if it’s ok, then fret out the doors and windows?
 
Top