JLTRT Class 40s conversion to S7

richard carr

Western Thunderer
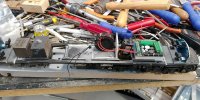
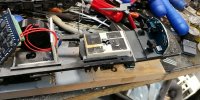
I'm taking a little break from the 9fs and tidying up a few lose ends, two of which are a pair of JLTRT Class 40s that I bought on ebay back in 2019. Both are finished in BR Blue one is 40075 a discless disc head code example and the other is 40135 in its final configuration with water tanks removed . The paint work and weathering finish on both locos is excellent. Both of course are finescale so the little job now is to convert these to S7.

20211012_200630.jpg

20211012_200712.jpg

When I collected the locos from the seller at Kettering I did ask why he was selling them and he replied that they wouldn't stay on the track, the pony wheels regularly derailed, fortunately I have a solution to that problem.

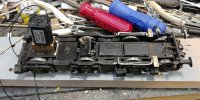
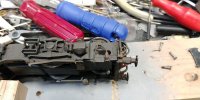
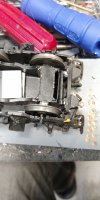
40135 is powered by a pair of ABC power bogies, these aren't going to work with conversion so the first thing is to remove them.

20211012_200650.jpg

This just involves undoing a few screws and removing the pick up and motor wires from the decoder.


20211012_201403.jpg

20211012_202625.jpg
 

richard carr

Western Thunderer
SOme progress has been made so I now need to get some S7 wheels ready for the first loco.
The S7 Group have been producing diesel wheels for a few years now and they are nice, they are made by slaters but with a few tweaks for S7 and aimed at specific loco types. The 3 foot 9 inch wheel that a class 40 needs is really aimed at a class 47 so comes complete with the 4 lifting holes, but you won't be able to see those once the wheels are behind the bogie frames.

I have though identified a few issues with these wheels, not so much the wheels but the axle and the axle screw.

Here is a wheel fitted to an S7 axle with the screw fitted you can see that the screw cannot go fully home it should be flush with the boss of the wheel.

20211031_183321.jpg

This means the wheel is lose on the axle end and you can pull away from the axle like this

20211031_183452.jpg

That isn't something anybody wants.

To fix this I find that 3 things are needed, first the square end to the axle needs to be shortened by 0.7 mm so it looks

20211031_184128.jpg

like this. You then need to thin the neck of the screw, I do this by putting it in a mini drill and taking a file to it to just thin the area where the tapered head begins, I then shorten the screw by about 2mm.

20211031_183754.jpg


Have any other S7 members had a similar problems, can't we get slaters to sort this out ?

Richard
 

Ian@StEnochs

Western Thunderer
I have had a similar problem when thinning standard O wheelsets down to S7 standards. My solution has been to countersink the end of the axle on the lathe. This retains the square but gives space for the head of the screw. Sometimes the countersink needs deepening too but I do that on the vertical drill. I have two countersink bits one I use only for the brass and the other for the steel.

The latest Slaters screws have quite a thick head so I usually turn a wee bit off the face so that they sit flush or just proud of the wheel depending on prototype. The hex socket is much better than on the old screws and doesn’t give me the same problem with the key slipping.

Ian
 

Eastsidepilot

Western Thunderer
If the threaded bore is not long enough for the screw and you don't want to cut the screws down then you'll need a 6 B.A. tap but check that the counter bore is long enough for the tap first !

Col.
 

Tim Humphreys ex Mudhen

Western Thunderer
Richard,
I've had a couple of instances of this and its been due to the screw thread bottoming out in the hole. Solved by filing a little off the screw thread.
atb
Tim
 

richard carr

Western Thunderer
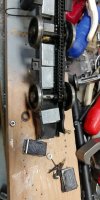
WOrk has been progressing on the conversion, the 2 bogie chassis's are now complete, heres the motorised chassis.

20211204_120851.jpg

One thing I would always recommend doing is to get some weight into the chassis, I have already added the first piece of lead and two more will go in beside the radial truck and a piece at the back. You really do need some on the motorised chassis to balance off the weight of the motor.
Here's the non motorised chassis

20211206_132800_HDR.jpg


20211206_132811.jpg

The other thing you need to do with a conversion to S7 is to file back the sides of the frames, it really is tight otherwise.

20211204_120859.jpg

20211204_120916.jpg

The final thing I'm doing is making up some new screw couplings, for some reason, the builder didn't used those that are supplied with the kit, the kit ones are accurate and look really nice much better than the ones that came with the model, fortunately I have a few spare from TAA wagon kits.
 

richard carr

Western Thunderer
I have now moved on to converting 40075, unfortunately it has not been as well put together as 40135, there is a fair bit of damage to the bogie side frames, to point where I will need to make a call to Laurie at MM1 and order some new ones.

20211222_110029.jpg

The body and the insides are fine, again with nice ESU decoder.

20211222_110934.jpg

I have had to hack away at the decoder support as the only way to get the second bogie off.

20211222_111800.jpg

The bogie looks quite good here but once you look closely you can see it could have been put together better.

I'm not sure who's gearboxes these are but they run very smoothly

20211222_112120.jpg
You can see the damage around the extended axle of the pony wheel.

20211222_112143.jpg

Another view of it

20211222_112419_HDR.jpg

The inner bogie falls apart removing the wheels and bearings, but fortunately I don't need those.

20211222_112425.jpg

The outer frames are still intact but only just.
 
Top