Hunslet Works in 7mm

Andy Ross

Western Thunderer
Not really an update, but today I collected Flying Scotsman from Ellis Clarks on my way home from a site visit.

Why Flying Scotsman. Prior to her first visit to the US she visited Hunslet for an overhaul.

The first picture shows her in the yard for an open day.

cotsmaninYard.jpg.d953e6d36c78f3a5cefa933cfc2242ad.jpg

I could not resist taking a photo of the model in the same place on the layout, albeit without all the people.
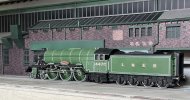
IMG_6579.jpeg.3976dd9293067a109372f17e5a538247.jpg

What do you think?

I have also included a couple of general shots of the model.

IMG_6590.jpeg.0661d337dd0cf62c546a3b393f05aa85.jpg

IMG_6580.jpeg.a9d10e5ab4ac5213bf826f430dfc5f85.jpg

The model is a DjH factory build and Ellis Clark have arranged for the DCC and Sound fitting, although I have not tried it yet.


Andy
 

Andy Ross

Western Thunderer
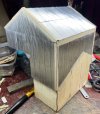
Over the weekend I decided that I needed to put the sheeting on the tower. I had made a new wood structure as the original was too tight were is slotted in and it was handed so it lined up at the baseboard and this needed reversing.

The reason I wanted to get it done was because I had planed to take the baseboard to the club rooms on Wednesday night and fit it to the main board.

I was I two minds on how to do this - I had some corrugated metal sheet that I had used for the short section on the main building. This comes from Goodwood Scenics. Or I could see if I could 3d print the panels. I went for the metal sheets.

IMG_6624.jpeg.5bbeded9f941c975ee0a64bb55e70852.jpeg

This is glued on using a thick layer of No More Nails so it filled the groves on the back and shoulders help prevent dints.

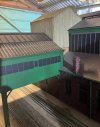
By Tuesday evening it was done and painted - I have to say this came out better than expected.
All it needed was a gutter and a fall pipe.

IMG_6630.jpeg.9093313a8a37f1cbbc01c209ecdf5d14.jpeg

Wednesday night as planned the baseboard was taken to the clubrooms. With help from Nick Easton, the main baseboard was put on its proper legs and and the rest of the layout was put up.

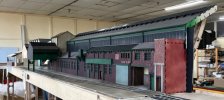
This was the first time I had put the whole layout up at it proper hieght since I had made the false boiler shop wall and roof. I have to say it makes the layout look a lot bigger and imposing.

IMG_6633.jpeg.530417cc12a26c9e190b66b2fc4396ec.jpeg

IMG_6634.jpeg.964bbc79b2f6b5712a623114398493a7.jpeg

You can see how the wall is cantilevered over the back of the baseboard.

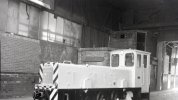
I only had the quarry class with me and I took several shots in different position down the yard, including one with the loco in a similar position to the Hudswell loco.

TestTrack-Hudswell.jpg.e7839901be43ec1ef4daccafc773bc6e.jpg

IMG_6649.jpeg.e8d2600278972f09528efdf0add7838a.jpeg

IMG_6655.jpeg.1ec16049765c2010fcff5dcf0415df89.jpeg

The high voltage cables have come out really well and the metal guard covers finish it off.

IMG_6660.jpeg.569342567b98fe465122d81a9de78efb.jpeg

IMG_6658.jpeg.0b6bfd8e70787c7c4a7a699c70ddd22b.jpeg

There are still some minor details to add to the main building wall but I need to concentrate on getting the other main structures finished.

IMG_6665.jpeg.f18b074fb5e3a2811df78ea9608f67e9.jpeg

I also need to concentrate on how this is packed for taking to shows and still get it all in the car.

Andy
 

Andy Ross

Western Thunderer
All looking mighty impressive, Andy.
What are your plans for the near end of the boiler shop?
Dave.
I am afraid the world comes to an end and we go onto an open fiddle yard. The ends all want painting black. At the moment the fiddle yard is just a straight piece track which will be used for the first two shows. I have drawn up a small three road sector plate version that will be done for York at Easter.
 

John57sharp

Western Thunderer
This is glued on using a thick layer of No More Nails so it filled the groves on the back and shoulders help prevent dints.

By Tuesday evening it was done and painted - I have to say this came out better than expected.
All it needed was a gutter and a fall pipe.
Andy can I ask what colour(s) you used on the corrugated iron please? It looks about right for something that I’m about to paint.

Cheers
John
 

Andy Ross

Western Thunderer
Andy can I ask what colour(s) you used on the corrugated iron please? It looks about right for something that I’m about to paint.

Cheers
John
The paint was Army painters spray colour primer. I think I used Skeleton Bone. Which is quite light. I then used a wash called strong tone in the airbrush and just kept adding until it looked right.

Hope this helps
 

Andy Ross

Western Thunderer
So after completing the pictures I needed to take for a magazine article it was time to move on.

The original plan with the two bridge section was not to have any supports as in reality they were supported by the adjacent building or by supports just off scene. They had been designed to be cantilevered over the track so they should not of needed supporting. But I have decided to be more practical and I moved the supports for the power house to be just on scene and I have now made some crane track supports for the other bridge. I have made these from some spare etches I had for the main building and I hope will not spoil the overall aspect of the layout.

IMG_6703.jpeg.d9fa6b700f4b7bfb4da55c294a37814f.jpg

These have been tried in place and are now being painted.

I have also started adding more cupboards and desks to the workshop.

IMG_6699.jpeg.9eb87aa2d2e9c9a5a6b61bdfe6629bc0.jpg

On Wednesday I took the cranes down to the club to see if they were still ok after being in the case for over 12 months. This was a bit of a disaster as the track was far dirtier than I expected and I could not get it clean without some wet and dry. So when we did try them it was all a bit spluttery.

So today I went back to the club and with the right materials, I cleaned everything properly, including the cranes and we are all working again.

https://youtu.be/lFHsChySIfQ


The plan now is in the next few weeks the cranes will be painted.

Next job is putting the sheeting on the crane bridge section so this can be fixed in place.

I am so please with the photos I took of the yard section I have added another one below.

Quarry1b.jpeg.30ec2337e61183558d6a387a0fc882ff.jpg

Andy
 

Attachments

  • 1785102892167.gif
    1785102892167.gif
    43 bytes · Views: 2
Top