You are using an out of date browser. It may not display this or other websites correctly.
You should upgrade or use an alternative browser.
You should upgrade or use an alternative browser.
G.W.R. BLT: Almost there.
- Thread starter jonte
- Start date
jonte
Western Thunderer
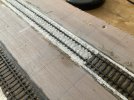
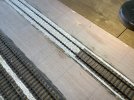
And so, the first of two base coats of acrylic Payne’s Grey is brushed on:
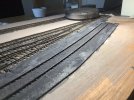
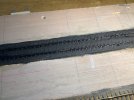
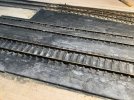
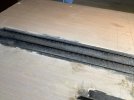
The running lines will then be masked and air-brushing can be commenced.
I shall spare you any further updates on this aspect of the build until it’s finished, but in between, time permitting of course, I’ll bring news of the signal I started.
jonte


The running lines will then be masked and air-brushing can be commenced.
I shall spare you any further updates on this aspect of the build until it’s finished, but in between, time permitting of course, I’ll bring news of the signal I started.
jonte
Roger Pound
Western Thunderer
Ah! Paynes grey. What a wonderfully versatile and most useful colour. I found it very helpful when rendering black(ish) locos in my water colour days - now well past. I have also found Amish grey a useful mixer too, it may assist you in shade variations within the ballast. Good luck, my friend 
Roger

Roger
jonte
Western Thunderer
Thanks, RogerAh! Paynes grey. What a wonderfully versatile and most useful colour. I found it very helpful when rendering black(ish) locos in my water colour days - now well past. I have also found Amish grey a useful mixer too, it may assist you in shade variations within the ballast. Good luck, my friend
Roger

My next step will be to add a shade of mid grey followed by light (Tamiya Sky grey) grey, and take it from there.
Thanks for the tip re Amish grey; not aware of that one

Just wish I could get some relief from the arthritis for an hour or so, as it kills the enthusiasm somewhat. Reluctant to pop the pill but it’s a last resort

Cheers for now,
Jon
Roger Pound
Western Thunderer
I know exactly where you are coming from with that, Jon. At the moment I am stopped dead in my tracks with it, plus a flu-like chill! All projects on holdJust wish I could get some relief from the arthritis for an hour or so, as it kills the enthusiasm somewhat. Reluctant to pop the pill but it’s a last resort
Cheers for now,
Jon
 !
!Cheers,
Roger.
jonte
Western Thunderer
Back to signalling; well, this post-hung ground signal anyway.
The steel arm, after the motion bracket had been soldered to the rear, and the axle/spindle (from some brass wire) soldered on:
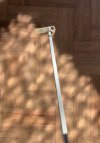
Despite using tiny offcuts of solder, the right hand detail on the arm has been infilled.
The post has also had the moulded details removed as mentioned in my last.
The rear:
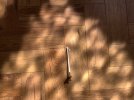
Incidentally, I wonder if any other modeller has managed to solder a stainless steel sewing needle (used to hold the two sections of the arm together while soldering) to the brass arm?……
Here, the right hand arm detail has been been restored with a fine drill bit in a pin vice. The lower right hand ‘hole’ has been drilled right the way through, and through which the fine operating wire will be connected (this was found in a Finney kit and is fine enough to pass through the Comet hand rail brackets through which the wire will pass to prevent distortion in operation):
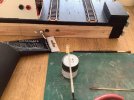
Due to the orientation of the arm in the photo, the operating wire hole can be seen top-right ((apologies, bottom-right).
The whole assemblage has been cleaned in a solution of CIF and is currently drying pending priming.
The arm and post will be painted before fixing the ‘Ring’ to the face of the arm.
Finally, by using the existing axle hole on the Ratio signal post, it looks as though the arm is placed a little too high, so I’ll have to try and counter this with the Modelu finial.
Cheers for now,
jonte
The steel arm, after the motion bracket had been soldered to the rear, and the axle/spindle (from some brass wire) soldered on:

Despite using tiny offcuts of solder, the right hand detail on the arm has been infilled.
The post has also had the moulded details removed as mentioned in my last.
The rear:

Incidentally, I wonder if any other modeller has managed to solder a stainless steel sewing needle (used to hold the two sections of the arm together while soldering) to the brass arm?……
Here, the right hand arm detail has been been restored with a fine drill bit in a pin vice. The lower right hand ‘hole’ has been drilled right the way through, and through which the fine operating wire will be connected (this was found in a Finney kit and is fine enough to pass through the Comet hand rail brackets through which the wire will pass to prevent distortion in operation):

Due to the orientation of the arm in the photo, the operating wire hole can be seen top-right ((apologies, bottom-right).
The whole assemblage has been cleaned in a solution of CIF and is currently drying pending priming.
The arm and post will be painted before fixing the ‘Ring’ to the face of the arm.
Finally, by using the existing axle hole on the Ratio signal post, it looks as though the arm is placed a little too high, so I’ll have to try and counter this with the Modelu finial.
Cheers for now,
jonte
jonte
Western Thunderer
Due to Family gathering yesterday, today was free to do a spot of modelling.
Prior to our gathering, I conducted a spot of priming: acid etch on the brass; primer on the plastic parts:
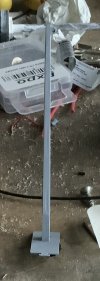

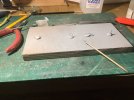
From left to right in the last photo: MSE lamp bracket; MSE signal ring; Comet (medium) knobs; Modelu square post finial. Finally, in the foreground can be seen a Modelu signal lamp. The hole in the bottom makes a handy location for a cocktail stick to aid spraying.
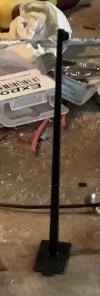
Now, sporting an undercoat of Humbrol Matt black (no.33):
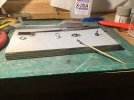
I’ve also made a little more progress with the ballasting; after a second coat of Paynes’, a layer of Tamiya mid grey has been applied. The next coat will be a mixture of Tamiya mid grey and Tamiya Sky grey, followed by thin enamel washes (sorry, Roger, I couldn’t find any Amish grey acrylic ):
):
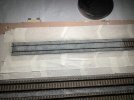
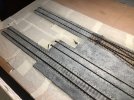
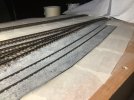
Next time, I’m fabricating the operating lever and bracket from more MSE parts.
Happy Easter.
jonte
Prior to our gathering, I conducted a spot of priming: acid etch on the brass; primer on the plastic parts:


From left to right in the last photo: MSE lamp bracket; MSE signal ring; Comet (medium) knobs; Modelu square post finial. Finally, in the foreground can be seen a Modelu signal lamp. The hole in the bottom makes a handy location for a cocktail stick to aid spraying.
Now, sporting an undercoat of Humbrol Matt black (no.33):


I’ve also made a little more progress with the ballasting; after a second coat of Paynes’, a layer of Tamiya mid grey has been applied. The next coat will be a mixture of Tamiya mid grey and Tamiya Sky grey, followed by thin enamel washes (sorry, Roger, I couldn’t find any Amish grey acrylic
 ):
):


Next time, I’m fabricating the operating lever and bracket from more MSE parts.
Happy Easter.
jonte
John57sharp
Western Thunderer
Good to see you progressing Jon. Happy Easter to you too
jonte
Western Thunderer
Good to see you progressing Jon. Happy Easter to you too
Thanks, John.
Jon.
jonte
Western Thunderer
With enamel washes still to be applied, this is the result of a top coat of Tamiya mid grey mixed with sky grey, approx. 1:4:
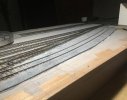
There seems no definitive for ash ballast that I can find for Great Western branch lines, so I’m treating this as some sort of half-way house between almost coal-like and grey/beige varieties of the few photos I can find (allowing for any age-ing of the photos, of course).
Needs washings to tone, but I’m going to call it ‘finished’.
Sincerely hoping it’s been of interest to those who kindly expressed an interest, even if it’s a resounding, ‘no’.
jonte
jonte
Western Thunderer
I took the following shots in daylight which I trust shows that there is a little more texture to the ash present in the photos, which I’m not sure was picked up on in the earlier shot I posted, taken last night.
The front siding:

Contrasted with the headshunt, whilst also of ash, hopefully shows deposits from locos whilst standing:
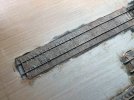
I now have to reinstate the colour to the rails and apply washes to the ballast on the running lines to darken down the sand colour.
jonte
The front siding:

Contrasted with the headshunt, whilst also of ash, hopefully shows deposits from locos whilst standing:

I now have to reinstate the colour to the rails and apply washes to the ballast on the running lines to darken down the sand colour.
jonte
Roger Pound
Western Thunderer
Don't fret about the Amish Grey - mine was from an Artist Supply shop in Blackpool. I found their variety and the quantity size available excellent for my purposes. Regrettably the dreaded Covid had it's effect and they cut out their retail side and went wholesale only. It may have re-opened a retail section, but I have not been to find out as yet!
As for your ballasting - persistently pursuing perfection......... ! What more can one say?
Roger .
.
As for your ballasting - persistently pursuing perfection.........
 ! What more can one say?
Roger
 .
.jonte
Western Thunderer
Don't fret about the Amish Grey - mine was from an Artist Supply shop in Blackpool. I found their variety and the quantity size available excellent for my purposes. Regrettably the dreaded Covid had it's effect and they cut out their retail side and went wholesale only. It may have re-opened a retail section, but I have not been to find out as yet!
As for your ballasting - persistently pursuing perfection.........! What more can one say?
Roger.

Thanks, Roger.
Perhaps; perhaps not, but I doubt any of it could be said more poetically

Thanks for the enlightenment re the Amish, Roger. Always good to determine a source.
Jon
jonte
Western Thunderer
The railways had a plentiful supply of ash, for ballasting and general infill. The colour could vary, depending on the source of the coal and how much it burnt and clinkered.
Thanks, Phil

Puts my mind at ease.
Jon
jonte
Western Thunderer
Whilst fiddling with signals - fiddle being the operative word - I got on with the painting of the track.
Starting with the best of intentions to follow the example set by fellow member @PjKing1 , I let fly with the powder, a dark earth as I recall:
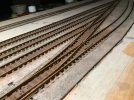
This looked promising as a base, but when I popped out to Hobbycraft to purchase the necessary tacky stuff to stick it down with, it was just my luck to receive a, “sorry, mate, we’re out of stock”. What followed was a helpful attempt on the part of the assistant to secure one for me, however, a convoluted method which involved ordering two for some sort of discount, popping back to the store to collect both before returning one to benefit from the discount, I ended up watching his lips move as I deceived to bail out to The Rangearound the corner. Before I did, the guy provided an option in the form of a rather large aerosol full of Matt acrylic varnish which he assured was basically the same ‘stuff’. Cut a long boring story short, I ended up back at H/craft to pick up the alternative as my jaunt to The Range proved fruitless…….
But could I get the darned stuff to stick the powder down? Could I embuggerance: after the first ‘blast’ there were just bare sleepers presenting themselves; the powerful jet had blown the lot into the atmos, and I hadn’t realised just how far until the next visit by my granddaughter, which left my wife totally perplexed as to how the soles of her tiny feet were so dark brown…..
After this I tried again, this time with short bursts from various distances, which at best left very little adhered to the track and at worst, no difference at all, as I guessed the spray had dried before hitting the track. Launching the stuff at a passing van with a Liverpool Football club flag fluttering from one of its unwashed windows, I decided to opt for the airbrush, for which I realised I could adjust the pressure of the spray. But this was another frustrating venture: the acrylic varnish had gone off in the tin, and even after popping out to buy a replacement, I discovered that my recent overuse with acrylics had gunged up the needle thing inside the gun. Stripping it down and cleaning it, I decided I was long overdue a replacement anyway, and in any case, my patience had worn thin, so putting it all down to experience, I dug out my old tins of enamel paint, with their mud-like contents, and gave the whole lot a re-prime.
Sorry, Paul: I really did try, but you know how these things can sometimes go, mate In any case, I could never have fully adopted your wonderful method with its most excellent results, as Peco Streamline Code 100 rail could never, ever - apologies the slight transition to Taylor Swift, there - present the same dashing effect as your EM scale stuff ……It simply has to be as near to black as can be whilst still having some nuance of brown/rust if it’s to be as elusive as possible
After hours and literally hours of washes, mixes, more washes - and sometimes starting again - and using Mr Williams’ books and various sites on this very subject, this is what I finally came up with:
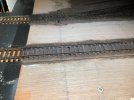
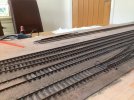
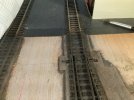
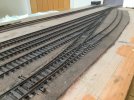
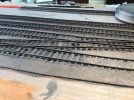
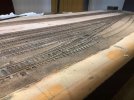
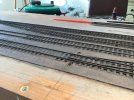
I’ve loads more, but I think these are enough - so’s not to bore you, reader - to give an all round idea of where I eventually arrived with the task.
Am I happy?
Not really. For instance, I wanted to display a contrast between the colour of the rails of the mainline with those of the sidings, but the lighter the tone got, the bulkier those girder like rails seemed, so sadly, I had to tone them down until pretty much the desired effect was lost. Hey Ho.
I also don’t like the effect created when the lights are switched on: they tend to make the whole ensemble too light by showing up the lighter (and very dilute) washes below. I’ve tried to show some of the above with layout (LED) lights on, LED (warm) lamp on solely and no lights at all, and I’m hovering between no light and LED lamp. I’ll either live with it, or get rid of the LEDs (incidentally, the warm setting on the layout lighting is worse than the cool! Here’s a couple that show with lights off:
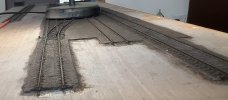
Which I prefer, and lights on:

….on the warm setting which I don’t.
Otherwise, apart from adding spills and coal/ash droppings which I’ll wait to determine when I run a couple of layout locos over it, I’m leaving it there.
Elsewhere, I’m still working on the signalling, and have started a second which will be in lieu of the ground signal at the terminus end of the loop.
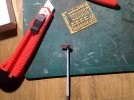
The signal first posted to date with some of the fitting fitted:
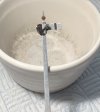
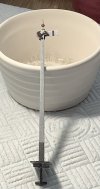
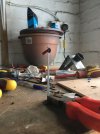
I made a bit of a blunder with the face, adding a black stripe that shouldn’t have been there for this type of signal,which I only realised after consulting Stephen’s volume one on the subject of signalling - I’ve learnt yet another valuable lesson here regarding research, even for a run of the mill BLT like this
My first attempt:
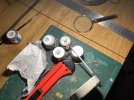
Wrong!
This time, correctly amended:

The best result thus far from building this signal, was that I managed NOT to melt the plastic Ratio post, after all, whilst soldering on the backblinder , which bodes well for the others.
I wasn’t so lucky with other (minute) working parts from the MSE range, but I’ll leave that for another day.
As you can probably tell from the date of my last posting, this signal construction isn’t the hastiest of processes, so whilst poring through some old photos in my album, I hit upon an idea that could speed things up slightly, without the added worry of melting plastic parts in the process, and it came in the form of a totally scratchbuilt - and as always - unfinished SR rail built post type I’d started long ago. Rail built on the GWR you may ask? Sacrilege? Well, no actually, as the starter at Cirencester at one point was one such example and on which the track plan is based, so I seized upon the idea.
With some of the SR clutter removed and a temporary fix of the chosen signal arm, another from an MSE fret (steel arm type):
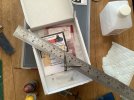
According to Stephen’s book, this plain arm type - all red again - on a short post would be used to regulate traffic from the main onto a loop, so this provided ample excuse to use it.
Since then, I’ve made the attachments, primed with Acid etch and primer, and begun the painting process.
I’ll attach these in the next post as I’ve run out of photo allowance for this one.
Cheers for now.
jonte
Starting with the best of intentions to follow the example set by fellow member @PjKing1 , I let fly with the powder, a dark earth as I recall:

This looked promising as a base, but when I popped out to Hobbycraft to purchase the necessary tacky stuff to stick it down with, it was just my luck to receive a, “sorry, mate, we’re out of stock”. What followed was a helpful attempt on the part of the assistant to secure one for me, however, a convoluted method which involved ordering two for some sort of discount, popping back to the store to collect both before returning one to benefit from the discount, I ended up watching his lips move as I deceived to bail out to The Rangearound the corner. Before I did, the guy provided an option in the form of a rather large aerosol full of Matt acrylic varnish which he assured was basically the same ‘stuff’. Cut a long boring story short, I ended up back at H/craft to pick up the alternative as my jaunt to The Range proved fruitless…….
But could I get the darned stuff to stick the powder down? Could I embuggerance: after the first ‘blast’ there were just bare sleepers presenting themselves; the powerful jet had blown the lot into the atmos, and I hadn’t realised just how far until the next visit by my granddaughter, which left my wife totally perplexed as to how the soles of her tiny feet were so dark brown…..
After this I tried again, this time with short bursts from various distances, which at best left very little adhered to the track and at worst, no difference at all, as I guessed the spray had dried before hitting the track. Launching the stuff at a passing van with a Liverpool Football club flag fluttering from one of its unwashed windows, I decided to opt for the airbrush, for which I realised I could adjust the pressure of the spray. But this was another frustrating venture: the acrylic varnish had gone off in the tin, and even after popping out to buy a replacement, I discovered that my recent overuse with acrylics had gunged up the needle thing inside the gun. Stripping it down and cleaning it, I decided I was long overdue a replacement anyway, and in any case, my patience had worn thin, so putting it all down to experience, I dug out my old tins of enamel paint, with their mud-like contents, and gave the whole lot a re-prime.
Sorry, Paul: I really did try, but you know how these things can sometimes go, mate
 In any case, I could never have fully adopted your wonderful method with its most excellent results, as Peco Streamline Code 100 rail could never, ever - apologies the slight transition to Taylor Swift, there - present the same dashing effect as your EM scale stuff ……It simply has to be as near to black as can be whilst still having some nuance of brown/rust if it’s to be as elusive as possible
After hours and literally hours of washes, mixes, more washes - and sometimes starting again - and using Mr Williams’ books and various sites on this very subject, this is what I finally came up with:


I’ve loads more, but I think these are enough - so’s not to bore you, reader - to give an all round idea of where I eventually arrived with the task.
Am I happy?
Not really. For instance, I wanted to display a contrast between the colour of the rails of the mainline with those of the sidings, but the lighter the tone got, the bulkier those girder like rails seemed, so sadly, I had to tone them down until pretty much the desired effect was lost. Hey Ho.
I also don’t like the effect created when the lights are switched on: they tend to make the whole ensemble too light by showing up the lighter (and very dilute) washes below. I’ve tried to show some of the above with layout (LED) lights on, LED (warm) lamp on solely and no lights at all, and I’m hovering between no light and LED lamp. I’ll either live with it, or get rid of the LEDs (incidentally, the warm setting on the layout lighting is worse than the cool! Here’s a couple that show with lights off:

Which I prefer, and lights on:

….on the warm setting which I don’t.
Otherwise, apart from adding spills and coal/ash droppings which I’ll wait to determine when I run a couple of layout locos over it, I’m leaving it there.
Elsewhere, I’m still working on the signalling, and have started a second which will be in lieu of the ground signal at the terminus end of the loop.
The signal first posted to date with some of the fitting fitted:


I made a bit of a blunder with the face, adding a black stripe that shouldn’t have been there for this type of signal,which I only realised after consulting Stephen’s volume one on the subject of signalling - I’ve learnt yet another valuable lesson here regarding research, even for a run of the mill BLT like this

My first attempt:

Wrong!
This time, correctly amended:

The best result thus far from building this signal, was that I managed NOT to melt the plastic Ratio post, after all, whilst soldering on the backblinder
 , which bodes well for the others.
I wasn’t so lucky with other (minute) working parts from the MSE range, but I’ll leave that for another day.
As you can probably tell from the date of my last posting, this signal construction isn’t the hastiest of processes, so whilst poring through some old photos in my album, I hit upon an idea that could speed things up slightly, without the added worry of melting plastic parts in the process, and it came in the form of a totally scratchbuilt - and as always - unfinished SR rail built post type I’d started long ago. Rail built on the GWR you may ask? Sacrilege? Well, no actually, as the starter at Cirencester at one point was one such example and on which the track plan is based, so I seized upon the idea.
With some of the SR clutter removed and a temporary fix of the chosen signal arm, another from an MSE fret (steel arm type):

According to Stephen’s book, this plain arm type - all red again - on a short post would be used to regulate traffic from the main onto a loop, so this provided ample excuse to use it.
Since then, I’ve made the attachments, primed with Acid etch and primer, and begun the painting process.
I’ll attach these in the next post as I’ve run out of photo allowance for this one.
Cheers for now.
jonte
jonte
Western Thunderer
I’ve just realised that the signal arm I said was ‘wrong’ in the above was in fact the right one!
This was the wrong one:
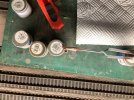
As can be seen above, the arm has now been repainted in the correct ‘all red’ colour, the ring yet to be attached:
As promised, this is where I’m up to with the rail post type referred to:

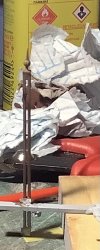
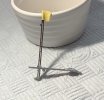
Incidentally, all signals will be powered by the operating units, using servos, provided by Heathcote Electronics, of which I have purchased sufficient components to operate one thus far, and about which I shall report in due course.
Thanks for looking.
jonte
This was the wrong one:

As can be seen above, the arm has now been repainted in the correct ‘all red’ colour, the ring yet to be attached:
As promised, this is where I’m up to with the rail post type referred to:


Incidentally, all signals will be powered by the operating units, using servos, provided by Heathcote Electronics, of which I have purchased sufficient components to operate one thus far, and about which I shall report in due course.
Thanks for looking.
jonte
John57sharp
Western Thunderer
Good to see this coming long. I think you have just ably demonstrated that one man’s powders are another man’s enamels or something like that, I hope you can reach something you are happy enough with. You‘re also helping me (and others) decide on a way forward….
I really like the signals and it’s something else for me for the future.
cheers
John
I really like the signals and it’s something else for me for the future.
cheers
John
jonte
Western Thunderer
Hi John, and I hope and trust I find you well.Good to see this coming long. I think you have just ably demonstrated that one man’s powders are another man’s enamels or something like that, I hope you can reach something you are happy enough with. You‘re also helping me (and others) decide on a way forward….
I really like the signals and it’s something else for me for the future.
cheers
John
Many thanks for your kind words, which make much sense; I must admit I hadn’t thought of it that way

I’m not sure my bodgings will prove of use - for instance, not only do I still have to finish the signals, but also actually make them work, as it’s all very new to me too. However, with the kind assistance of Heathcote Electronics (exceptionally helpful and prompt with their responses) it should make the task a little easier. I’ll keep you posted!
Thanks again, and if there’s anything I can help you with just ask, mate, even if it’s only a ‘don’t do as I did’

jonte

