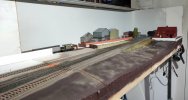
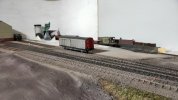
4mm Fryers Lane

Mark F

Western Thunderer
I've added a layer of 50mm thick extruded polystyrene sheet to the baseboard extension ready to start forming the scenics. This was glued in place and allowed to set overnight last night.
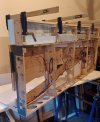
20221001_172040.jpg
A quick check this morning confirmed the glue was doing a reasonable job of holding the polystyrene in place and that adding it had helped to stiffen the extended baseboard as I'd hoped it would. Time to get the power tools out!
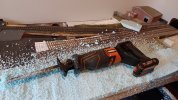
20221002_132641.jpg
After a bit of a tidy up, it looks like the tide is in.
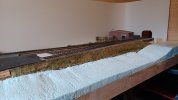
20221002_155841.jpg
I'll get some ready mixed plaster/filler during the week ready for more messy stuff next weekend.
 

Mark F

Western Thunderer
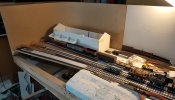
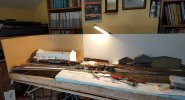
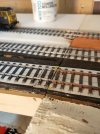
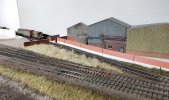
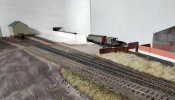
Time for an end of year progress update. Work on the layout has moving along at a steady pace, track laying on the new board is nearly finished (hoping that I'll get chance later today to put the last couple of track panels down).
IMG_20221231_092920.jpg

IMG_20221231_093059.jpg

So far, it all seems to be working out as planned. The headshunt (at front, where I've not laid the track yet) works out to be exactly the same length as the fiddle yard. The track in the fiddle yard is aligned so that the first two tracks form the other half of the loop, but the remaining three will only align with the mainline. This means all arrivals have to use the headshunt and traverse the full length of the layout before setting back into the loop to run round and shunt. Wagons to be despatched to the fiddle yard will then be formed into a train in the headshunt, imposing a limit on the length of the train and ensuring that it will fit in the fiddle yard. Despite the relatively simple layout, I think it should be a fun little shunting puzzle.
 

Mark F

Western Thunderer
Progress continues with getting the layout ready for its trip down to Taunton next month.
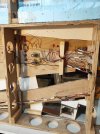
Wiring completed (or so I thought) and track feeds all tested - quite a relief to see something moving on the layout!
IMG20230203195520.jpg
IMG_20230205_214704.jpg

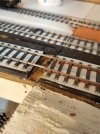
I thought I'd get away with using the the plastic track base at the baseboard joints - I should have known better. Ply and rivet added for strength.
IMG20230214165911.jpg
IMG20230214170340.jpgIMG20230214210549.jpg

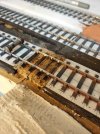
Groundwork in the yard. I'm (slowly) infilling between sleepers with DAS clay.IMG20230218154723.jpg
 

Allen M

Western Thunderer
Hi Mark
A comment about your wiring.
Mine is like yours. The problem could arise if there is a fault in the future and you then have to decide which wire it is.
I suggest a bit of marking up to help (unless you have a complete diagram) find the right one. This could be a label on part of the loom and/or a word on the baseboard where the wire goes through or is terminated.
Regards
Allen
who spent 50 years in manufacturing plant electrical engineering and knows how to do it 'properly'
 

Mark F

Western Thunderer
That new Peco Bullhead looks fantastic Mark...
Funny you should say that. For the first time in about 30 years I have actually used some Peco track components.
IMG_20230306_155900.jpg
Their bullhead fishplates are really useful, being significantly less prone to breakage than the Exactoscale ones. For future builds I'll only be using the Exactoscale ones where I need to ensure an isolation gap.
 

Pencarrow

Western Thunderer
Funny you should say that. For the first time in about 30 years I have actually used some Peco track components.
View attachment 182083
Their bullhead fishplates are really useful, being significantly less prone to breakage than the Exactoscale ones. For future builds I'll only be using the Exactoscale ones where I need to ensure an isolation gap.
Slippy slope. You'll be on settrack next...
 

Mark F

Western Thunderer
Hi Mark
A comment about your wiring.
Mine is like yours. The problem could arise if there is a fault in the future and you then have to decide which wire it is.
I suggest a bit of marking up to help (unless you have a complete diagram) find the right one. This could be a label on part of the loom and/or a word on the baseboard where the wire goes through or is terminated.
Regards
Allen
who spent 50 years in manufacturing plant electrical engineering and knows how to do it 'properly'
A fair point Allen and thanks for the advice.
It's all colour coded. Red and black for track feeds and different colours for each of the switches for the turnout servos and uncoupling magnets, it just looks a mess .
If this was a group project and anybody other than me was likely to need to do fault finding and repairs, I'd definitely document it. There was a diagram for the wiring on the original layout, but I've not updated it with the changes (one additional wire to switch the new turnout).
 

Mark F

Western Thunderer
This afternoon I took advantage of having a few hours of annual leave entitlement to use up and made a bit more progress with the layout.
A bit of greenery has started to appear.
IMG_20230331_174938.jpg
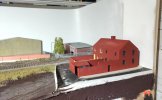
Some paint on the pub and its neighbouring property.
IMG_20230331_175003.jpg
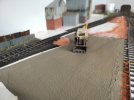
The extended and realigned siding 1 now ballasted. A few boundary walls springing up.
IMG_20230331_175151.jpg
IMG_20230331_175209.jpg
IMG_20230331_175234.jpg

Slowly but surely it's all coming together.
 
Top