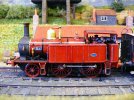
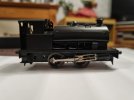
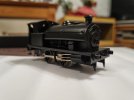
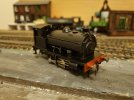
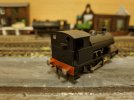
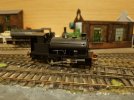
A Hornby standard 4mt in em.

Overseer

Western Thunderer
It's a Manning Wardle I think from the Isle of white railway.
Looks like it was meant to be one of the 1864 Beyer Peacock locos for the Isle of Wight Railway. Beyer Peacock also built some very similar locos for New South Wales and South Australia (the SAR ones were 5'3" gauge).
 

34091 Weymouth

Western Thunderer
Looks like it was meant to be one of the 1864 Beyer Peacock locos for the Isle of Wight Railway. Beyer Peacock also built some very similar locos for New South Wales and South Australia (the SAR ones were 5'3" gauge).

That's the one, couldn't remember off the top of my head what it was. The instructions are long gone for the kit.
 

Dave

Western Thunderer
Definitely an I.O.W. Beyer Peacock. It will be the Golden Arrow Models kit, I expect. I built one for my fictional light and mineral railway.

By the way, are the NCB hoppers the same design as BR's 13-ton Diag. 1/142 hopper? Or even BR wagons that were sold to the NCB?
Ra-003.jpg
 

34091 Weymouth

Western Thunderer
Definitely an I.O.W. Beyer Peacock. It will be the Golden Arrow Models kit, I expect. I built one for my fictional light and mineral railway.

By the way, are the NCB hoppers the same design as BR's 13-ton Diag. 1/142 hopper? Or even BR wagons that were sold to the NCB?
View attachment 174389

That's lovely Dave. It's the golden arrow kit, what motor gearbox did you use for it BTW as I've not bought one yet.

The ncb hoppers are the dave bradwell etch. I've no idea if I am honest. I think these are a true ncb hopper & I think dave does both types. I know he's does both weights of ncb hopper.

Si
 

34091 Weymouth

Western Thunderer
It was a High Level 60:1. I think it was a Roadrunner plus. It was certainly one of those with the waggly bit on the end as I drove it off the rear axle.
Cheers Dave for the info. I'm glad it's a high level, I'm not keen on branchlines boxes & if I remember it mentioned those in the instructions.

Si
 

34091 Weymouth

Western Thunderer
Whilst I had the rsh running yesterday I still wasn't happy. It felt like the mesh of the gears were solid. At first I thought that the worm was tightly meshed against the first gear. After a quick look around this evening I discovered the issue.
Flux splatter had caused a bit of rust to build under the final gear at the bottom of the gearbox. Thankfully I could split the gearbox down without having to take it our of the chassis & after a good clean & oiling of all the pins & gears it had that tiny little bit of play when a gear was wiggled.
She soon fired to life again but this time even slower.

I'm certainly going to look more at fluxes. Richard aka Gadgie on the forum uses fluxite. I'm going to give it a whirl & see how that works. It's a sod when you use gibson wheels or any steel is nearby as it rusts very quickly with the flux I use & it's not as corrosive as others I've used In the past.

I've ordered some 3mm / TT sized transfers for this model just solely because I think the 4mm scale ones are to big. I've written a little list of things to do on the model. When I get close to the end I have a list to tick off so I know I have got all the details completed. With a bit of luck the model should be built, painted & weathered by the weekend.

Si
 

Daddyman

Western Thunderer
Can't remember if you mentioned what flux you use. I used to use Carr's Yellow, which had the advantage of not damaging tools or steel parts on models, but I always had the impression it was hard to remove splatter; it was also very expensive. I've just moved over to London Road Models' own flux which is a third of the price of Carr's at £3 a jar, works just as well, doesn't rust tools or steel parts, and seems to be easier to clean up.
 

34091 Weymouth

Western Thunderer
Can't remember if you mentioned what flux you use. I used to use Carr's Yellow, which had the advantage of not damaging tools or steel parts on models, but I always had the impression it was hard to remove splatter; it was also very expensive. I've just moved over to London Road Models' own flux which is a third of the price of Carr's at £3 a jar, works just as well, doesn't rust tools or steel parts, and seems to be easier to clean up.

Cheers Daddyman,

I know John well, I'll give him a shout & order some.

Si
 

simond

Western Thunderer
All fluxes, by their nature, are reactive, they have to be, in order to remove oxide layers from whatever it is that you’re soldering. Only electronics fluxes will be truly non corrosive, and even some of them have to be washed off or they can be sufficiently conductive to cause circuit malfunctions.

I’d suggest that doing the soldering and washing after every session, and not putting the steel bits (or motors & gearboxes) anywhere near the model until the soldering is finished, washed, dried and cleaned is the best way to go. I do recognise that might be a lot more difficult in smaller scales than in 7mm.

if you want a cheap, washable flux, citric acid mixed with water (and ipa, optionally) is easy to get, eg at Wilco, in the home brew aisle. It goes a bit sticky, but washes off easily with a drop of hot water.
 

34091 Weymouth

Western Thunderer
Thank you for the advice Simon. I think I might have a couple of tests with different fluxes to see which I get on best with. I've always used Simon Varnhams flux. It's always been good, I used it in my 7mm days.
 

34091 Weymouth

Western Thunderer
Time for an update on the RSH.

On Tuesday I wrote a list of the parts left to fit to the model in preparation for the next workshop session. Wednesday evening I hit the floor running & had a super productive evening. I started out with a pile of castings & wire that needed fitting. Funnily enough it didn't take long to have everything on the model & it getting a thoroughly good scrub with some cif cleaner.

After a good dab down with some kitchen towel & left to dry out on the radiator I found myself in the garage spraying on some upol acid8. It's great rattle can primer & gives good adhesion to brass. After 40 minutes I went back into the garage & gave it a good coat of matt black. Aerosol matt is more of a satin finish which is good enough to get transfers to stick too.

It went into the airing cupboard overnight in a box to cure....

Whilst eating breakfast I've just popped it back onto the chassis. I think that's looking rather sweet now.
20221117_061119.jpg
20221117_061127.jpg

I've still the the bufferbeams to blow in & the brakes to fit but she's nearly ready for service.

Music this morning comes courtesy of this band.


Si
 

Richard Gawler

Western Thunderer
Please which brand of matt black paint is this? I have used Halfords enamel spray "matt black" (RAL9005) but it is so very dark and I can hardly see my model.
 

34091 Weymouth

Western Thunderer
Please which brand of matt black paint is this? I have used Halfords enamel spray "matt black" (RAL9005) but it is so very dark and I can hardly see my model.

Richard, its a halfords matt black. It is from a smaller can, can't remember if it was a fancier paint or just me being tight. I'll give you the code when I get home.

Maybe it's just the light in which you view the model, coupled with the light/camera of my phone. Do you use a grey primer as a base layer?
If you weather your model it should lighten a bit once a touch of weathering is added & a coat of varnish.

Si
 

Richard Gawler

Western Thunderer
Yes I used the grey Upol number 8 primer. I am on the lookout for some RAL 9004 Signal Black, this won't be quite so intense. But as you say, a little weathering should bring my model to life, and indeed a little satin varnish.
 

34091 Weymouth

Western Thunderer
Yes I used the grey Upol number 8 primer. I am on the lookout for some RAL 9004 Signal Black, this won't be quite so intense. But as you say, a little weathering should bring my model to life, and indeed a little satin varnish.

Richard, if you need a specific shade of black find yourself a automotive paint supplier. My nearest is in Halifax & I can get any can of spray paint made up in any finish for about a tenner. I make swatches & take them in, they match them to a book or use a ral code etc to make the can up whilst I wait.

Worth hunting one down.

Si
 

34091 Weymouth

Western Thunderer
What's felt like an hour my wife's reminded me has been most of the evening. I've fitted the brake gear to the chassis & painted those in, i blew the bufferbeams in with some vallejo air paint with the airbrush. This makes it a 5 minute task. I do like acrylic based paint when it comes to basic colours. It makes the job quicker & easier to do.
I've now fitted the couplings & buffers also which brings the bodywork to a close. I've just the sandboxes to paint & fit to the chassis now & that'll be everything fitted to the model. I scratched off the paint from the pipework & whistle etc to give a bit of detail. It'll hide again no doubt when I slap some weathering on but it'll give the definition of the detail rather than it being hidden in black paint.

20221117_203504.jpg20221117_203513.jpg20221117_203455.jpg

I'm already thinking about the next build. This time a 2 axle hunslet diesel which is destined to be Norwood coke ovens no1.

I've also got most of the bits now to build a second austerity, this is going to be a hornby body, rt models chassis & I'm going to have a bash at springing I think or at the very least it'll be compensated. I just can't decided whether to do number 59 which was ex Lambton railway or one of the well kept austerity locos from Backworth in that lovely blue colour.

Decisions, decisions

Si
 

34091 Weymouth

Western Thunderer
I was hoping the transfers from railtec might have arrived today. I was hoping to complete 82 but I'm still waiting for them to arrive so I started a new project.

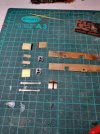
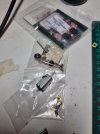
The next build is Norwood coke ovens no1 which is a Judith Edge 233hp Hunslet. This should be a relatively quick build as there's not much to the kit when you look at the etches.

20221118_204800.jpg
20221118_204805.jpg

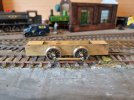
I've cleaned up the frames & spacers ready for assembly tomorrow. Mike doesn't provide em spacers in this kit as the prototype has narrow frames. The kit provides nice resin cast axle boxes to fit on the outside of the frames which will space the wheels correctly in both em & s4. I need to make a order with gibson for some buffers for the build but I'm going to wait for those as I want some wheels for a hawthorne Leslie & a big barclay so I need to save a few penny's.

I'm using the suggested high level gearbox & a set of markits wheels because this kit needs 4844p which seem to be my bogie wheels. I've also gone with some high level hornblocks rather than the compensation system that comes with the kit. I'm not overly keen on the twin beam arms, I've tried them before & I just can't get on with them & the rsh I built has hornblocks this way which work fine.

The aim this weekend is to get those frames built to a rolling chassis.

Music's been varied today but this is a absolutely excellent song & a the album is pretty good too.


Cheers

Si
 

34091 Weymouth

Western Thunderer
This morning I have successfully assembled the frames to a rolling chassis. Another session should have it built & into primer.

20221119_112445.jpg

Dead easy kit to construct so far, typical of Mike's designs. I think I might have this kit built in the next few weeks as there's not much to the etchings & it's a rather simple design.

Si
 
Top