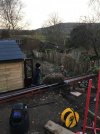
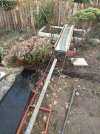
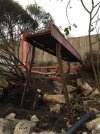
1/32 Devoran Quay

Simon

Flying Squad
A sunny day here in Bath, so I thought I'd start concreting.

IMG_0190.jpg

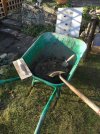
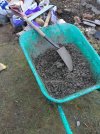
Not like last time with a cement mixer, hand mixing in a wheelbarrow instead. So here's a "paint drying" sort of post, I quite enjoyed it, not least that I am re-using the sand that was under the hideous patio that the train set is largely replacing.

IMG_0218.jpg

IMG_0220.jpg


IMG_0222.jpg

IMG_0227.jpg

IMG_0228.jpg


IMG_0230.jpg

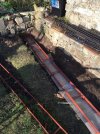
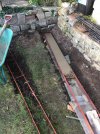
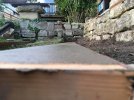
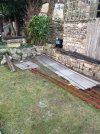
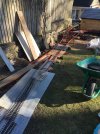
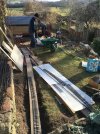
All covered up, using more of the very useful polycarbonate sheets that came off the greenhouse I demolished.

That took two barrow loads of a 3:1 mix, its always surprising how much concrete any project eats up!

IMG_0234.jpg
 
Last edited:

Simon

Flying Squad
A glorious day of sunshine and almost warm weather was perfect for a "Two Dave's" day in the garden today.

More concreting done, laurel bush removed, broken rose arch removed and "headshunt bridge" welded into place.

"Branch" track base concreted and covered, remaining running lines and main junction are shuttered ready for concrete.

IMG_0271.jpg

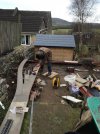
Dave removing laurel, Dave contemplating headshunt conundrum.

IMG_0274.jpg

Two running line sections concreted, mixing up for the next section.

IMG_0276.jpg

Headshunt of doom set in place, two Daves discuss....

IMG_0282.jpg

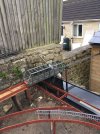
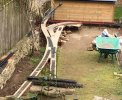
It would have been better with the track curving the other way, but the consensus is that the track ought to be lifted and relaid anyway, not least as it has high speed super elevation running through it! The "light railway" is going to branch off to the right before the bridge and head off up the newly cleared flower bed.

IMG_0283.jpg

This however is exactly the effect I wanted to achieve in re-using the bridge, it is stupidly big and heavy and I love the way it is now going to become slightly lost in the landscape. Quite apart from anything else, it is at least no longer generally getting in the way around the place!

IMG_0285.jpg

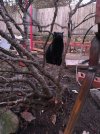
Anyway, "Tink" the cat from next door seems pretty impressed with the result!

IMG_0289.jpg

I am feeling pretty motivated, more concreting within the week hopefully!

Simon
 

Simon

Flying Squad
On a bit of a roll, this afternoon I shuttered up the next section up to the end of the siding as pictured. This took a while because it is all at this stage a bit "up in the air".

IMG_0491.jpg

Concrete mixed next, great to be using up the sand that was below the patio slabs and hopefully good for my circulation!

IMG_0492.jpg

The slight problem was that I ended up floating the last section pretty much in the dark, which isn't ideal(!) Especially as this is the section that contains the changes of level and start of the steeper gradient down to the quay. I am nonetheless moderately hopeful, I just hope that all of the various bits of plywood timber and plastic sheet currently covering the new work doesn't blow away in what feels like a windy evening.

I may try and do a bit more tomorrow, weather (rain) depending.

And Dave is booked for Monday for more base construction welding, the "light railway" curving off the headshunt and up the flowerbed.

Oh dear.....
 

Simon

Flying Squad
I managed a load and a bit and completed everything I had shuttered up, and all in time to go for a short walk at 4.30, when the weather brightened considerably - it had been a bit "unhelpful" earlier.

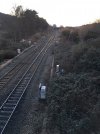
Here's the "big railway" just cross the valley, still a bit of sunshine in the sky.

IMG_0504.jpg

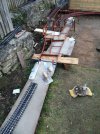
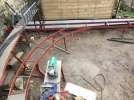
Here's the "small railway" all prepared for concrete.

IMG_0502.jpg

With all the recent rain, the "dock" is now more or less full. Gawd knows what it all weighs!

IMG_0501.jpg

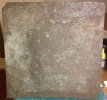
I have come up with what I think is a cunning plan for the dockside walls, using large pieces of Chinese slate as pictured below, with vertical timbers placed across the joints. I figure this might give a quick, easy and possibly quite effective representation without the hassle of joints, blocks and all that scale agonising type stuff.

IMG_0509.jpg

I think I might also get Dave to put a few more cross pieces in the base leading down to the dockside tomorrow.

I'm determined to get as much of the hard landscaping done before the "planting season" starts:confused:
 

Simon

Flying Squad
A productive day in the garden, extra cross pieces welded in, line down to quayside shuttered and concreted in, curved track base framework for "light railway" fabricated and fixed into place.

Extra cross pieces cut and put into place prior to being welded into quay line frames, yesterday's work up to bridge on left.

IMG_0516.jpg

Junction area now fully concreted. That right hand track in the distance is calling out for a tunnel...

IMG_0517.jpg

Tink comes out from next door to see what is going on.

IMG_0518.jpg

Dave cutting angle iron for the new track base supports.

IMG_0524.jpg

No more photographs as floating up the concrete etc took up all of the light. The high level headshunt base was also further anchored by being welded to a piece of angle iron driven into the ground at the lower level.

Feeling a bit shattered now...
 

mickoo

Western Thunderer
Probably a silly question, what stops the concrete deck just dropping through once the shuttering is removed, I can see the odd cross brace but I would have expected more or are you laying a steel mat over the braces when you concrete.
 

Simon

Flying Squad
Just friction and the mechanics of it, plus the cross struts. I think the fact that nearly everything is curved makes it even more impervious to movement.

On the last line, I messed up a mix and wanted to remove a section, so I attacked it with a lump hammer - it didn't move!
 

Simon

Flying Squad
Not needed, I think steel and concrete move by similar amounts, but over the lengths involved here it just doesn't matter. The whole steel structure is also quite "triangulated".

All that said, I did detect very slight movement of the end of the concrete and steel track base where it butted up to the large steel lift out bridge on the last line. This bridge that now forms the "headshunt in space"(!)

Here is a shot taken lunchtime of the latest "floating" session.

IMG_0528.jpg

Now if I was building HS2...
 

mickoo

Western Thunderer
Just friction and the mechanics of it, plus the cross struts. I think the fact that nearly everything is curved makes it even more impervious to movement.

On the last line, I messed up a mix and wanted to remove a section, so I attacked it with a lump hammer - it didn't move!
I'm surprised/impressed, knowing my luck I'd knock the steel work with the mower and the whole track bed would slump to the ground :))
 

Simon

Flying Squad
Hah!

Pride comes before a fall, or have I just been hexed from the East? (No,of course I haven't)

To explain, today I set about shuttering and concreting the dockside track base, which went quite well, in that I started fairly early and had finished before the rain set in and other commitments cut in to the day.

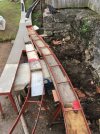
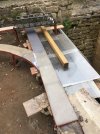
Setting out the shuttering took a long time, with a lot of cutting and fitting of a jigsaw of bits of old floorboard and plywood, but here it is all ready to go. Note the curved section at left which heads "up the hill" to the main line.
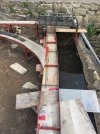
IMG_0543.jpg

In this second picture you can see where the curved base has cracked, I stupidly put a lot of force on it when setting up the shuttering and it gave just as Mick thought things might. On reflection, it was still a bit "green", but also this track base is quite a lot wider than previous sections, allowing the concrete to be more easily put into tension. The dock line is also wide, so I mixed up the concrete with some SBR in order to make it tougher and more durable. I then dropped SBR down and around the cracks in the previous section to see if this sets things better. I will either way pack some stone etc under this piece!

I left a bit of excess mix dropped into the corner of the next section in order to gauge how effective the SBR admix is.
IMG_0553.jpg

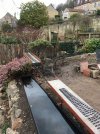
Quite satisfying looking up the dockside and under the main line(!)
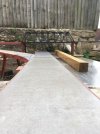
IMG_0554.jpg

And finally a shot showing the whole "system" so far floated up.
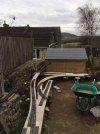
IMG_0558.jpg

I will let that all really go off before disturbing anything.

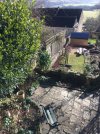
The next job might be moving the large rose which is where I want to have a stream running behind the signalbox, ha ha ha

Apart from digging out, I want to plant it outside the kitchen door against my new trellis fence, which requires lifting a large slab which is fairly well fixed....

It'll be nice when it's finished, I hope!
 

Simon

Flying Squad
I uncovered and de-shuttered the last cast at lunchtime today and took some reviewing snaps of it all.

Trial laying out of track pieces.

IMG_0574.jpg

IMG_0566.jpg

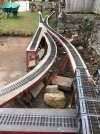
"Light Railway" frame heading into new territories, the headshunt bridge looking as though there are Crumlin like aspirations towards next door's garden...

IMG_0576.jpg

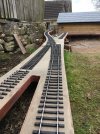
Another view of the "new territories"...

IMG_0579.jpg

Just look at that gradient.....

IMG_0584.jpg

IMG_0572.jpg

Feeling moderately encouraged.
 

Alan

Western Thunderer
I'm really enjoying watching the progress around your garden. I'm intrigued by the height of the apparent entry into the shed.
 

Simon

Flying Squad
Thank you Alan. The height is set so that I will be able to run a track (hopefully a simple traverser of sorts) across the width of the shed (eight feet) which effectively acts as a staging track or fiddle siding to the outside section.

In the shed it sits above my lathe and I will access it by standing on a piece of "portable staging". I'd use a simple kick stool, but I'm certain I'd manage to fall off it and injure myself!

It has to be "at height" because the garden drops away from the house pretty steeply.

Ironic, because in the last garden, the track was lower than my shed floor!

I will be attempting the aluminium connecting section soon, about which I am pondering....

Simon
 
Top