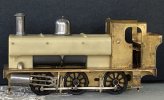
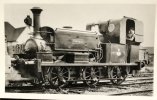
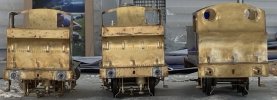
Crymlyn A Shop Techniques. GWR 1366 class.

davey4270

Western Thunderer
STOP PRESS just in case anyone is following this build closely. I forgot to fit the cylinder drain cock operating brackets.
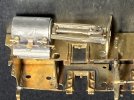
IMG_4981.jpg
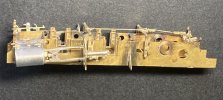
This little etching was folded up and fortunately the superglued in drain cocks came away with a gentle twist with a pliers. It is simply held in place by the drain cocks which pass through the etched holes. Unfortunately, one of these whose mounting spigot had been shortened to fit was too short and was replaced by a spare.
This cylinder assembly has been Araldited in position, but I have not fixed the slide bar support bracket to the frames in case some minor adjustment is necessary.
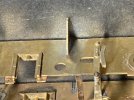
IMG_4982.jpg
I also added the footplate support brackets which I had previously overlooked. These align directly underneath the rear tank support brackets.
 
Last edited:

davey4270

Western Thunderer
What a difference a few fittings make.

IMG_4997.jpg
The twins' domes have been Araldited in position. With these and the lower boiler in place the locomotives are beginning to look quite chunky.

IMG_4996.jpg
A neat touch, no mention of it in the instructions, is a white metal disc that fits neatly inside the dome. This can be screwed in place on the tank top and the dome simply glued in position.
I didn’t want a trapped space that might hold solvent fumes, so I drew a pencil line around the dome, removed the screw and spacer and opened up the hole to allow the space under the dome to breath into the boiler space. The dome being Araldited in position and the glue gently scraped off with a cocktail stick before it set solid. This removes about 99% of the glue as you can easily damage the resin tank.

IMG_4998.jpg
The second cylinder on the first twin (
1f914.png
I’m confusing myself now) has been Araldited in position and the drain cock activating mechanism fitted. The pair of steam chest drain clocks have also been soldered to these. The vacuum pump cylinder has been fettled to be a tight sliding fit and will be left in position when the frames are painted. It can then be removed to help fit the vacuum pump rod and reattached with a spot of thread lock.

IMG_4995.jpg
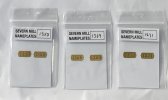
I managed to source plates for the twins and another for a future project. I understand that Seven Mill have finished production due to etchers no longer meeting his high standards and he is selling off remaining stock.
1358 is a Port Talbot Railway 0-8-2T almost identical to the Barry Railway H class and I have a set of etchings from the Redcraft stable for a future project. I don’t have any castings for this so if anyone can help, please let me know.
 
Last edited:

simond

Western Thunderer
I suspect that etched plates might have become something of a luxury - Guilplates also seem to have stopped production.
 

davey4270

Western Thunderer
I suspect that etched plates might have become something of a luxury - Guilplates also seem to have stopped production.
Yes, I ordered a couple of sets from him last year and he supplied one set from stock with a refund for the others. Ill health prompted retirement I believe.
247 developments have a limited range.
 

adrian

Flying Squad
STOP PRESS just in case anyone is following this build closely. I forgot to fit the cylinder drain cock operating brackets.
I am following closely but not close enough to realise the omission. It's a loco I'd like to build at some point but your trials and tribulations in building the kit are putting any of my plans firmly into the scratchbuilding route.
 

davey4270

Western Thunderer
I am following closely but not close enough to realise the omission. It's a loco I'd like to build at some point but your trials and tribulations in building the kit are putting any of my plans firmly into the scratchbuilding route.
These brackets were mentioned in the instructions, my bad!
I think the instructions could do with updating especially with pictures of the sprues identifying the parts. Many of the original kit’s white metal components have been replaced with cast brass.
 

Phil O

Western Thunderer
247, will etch 4mm plates to order, no doubt that if asked Brian will also do 7mm. It can take a while, as he waits until he has a sheet full of plates, before getting them etched.
 

davey4270

Western Thunderer
247, will etch 4mm plates to order, no doubt that if asked Brian will also do 7mm. It can take a while, as he waits until he has a sheet full of plates, before getting them etched.
Thanks Phil, I’ve already obtained them from Severn Mill. He has ceased trading as he can’t find etchers to do the fine tolerances he requires. They seem only to be interested in bulk quantities and not to fine tolerances. He is now only selling off plates from stock so if you need any for future projects, get them now. I was fortunate in obtaining the 2 plates for this project and 1358 for a future build I have in stock.
69FB8F7F-3DC0-4ECB-BA2D-0AC269040B87.jpeg
 

davey4270

Western Thunderer
There's far too many things distracting me from the true path these days so little progress to show on the twins.

IMG_5035.jpg
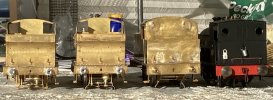
However, Lauris Griffin's beautifully detailed lamp iron castings have been fitted. Unfortunately, only 5 of the "cranked" type irons are cast on each sprue and with some of the smaller tank locomotives requiring an extra 2 on the front (one on the tank front above the smokebox door and another central on the buffer plank giving clearance for the door to open) you will need a sprue a sprue for each locomotive. Fortunately, none of these 3 models needed the cranked irons on the front so 2 sprues were sufficient to fit the lower rear irons to these 3 models. from left we have 1366, 1371, 704 and 1143. With every picture telling a story (apologies to Rod Stewart) we find the rear cab sides of 1371 slightly bent in, no problem as the rear cab sheets aren't yet fitted, 704 not sitting level and 1143's coupling chain twisted. Doh! 1143 has returned to Crymlyn A Shop for minor attention to its injectors and replacement cab windows. These were originally Glue 'n' Glaze but have turned opaque over the years. These are easily removed by poking sharp tweezers through the film and turning in one direction until the whole thing peels off the rims. The hardest task is picking the blob off your tweezers!

IMG_5033 (1).JPG
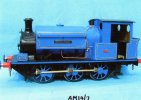
Nothing to do with the twins but I'd really like a kit of this specimen. It is a larger locomotive than the model available from Minerva.
It was one of the coal fired locomotives used in the exchange sidings. These were more powerful than the fireless locomotives but were not allowed in the refining areas for obvious reasons.

IMG_5034 (1).jpg
CSP have recently rereleased a model of a fireless locomotive and the Crymlyn A Shop foreman is considering trying one of these at Graig Wen colliery. Has anyone had any experience with this kit?
A couple of the fireless locomotives. They were charged from the 175psi HP steam main and apparently this could last for several hours. They were used for shunting in the refining areas. Note the charging valve on the front of the locomotive with a pipe leading to either side.
 

daifly

Western Thunderer
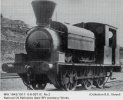
MW 1943/17 was, according to Fred Harman (Locomotives of MW Vol 2), designated a 'Special' and was originally a Ministry of Munitions loco at the Stratton Filling Factory near Swindon. Llandarcy had quite a mixed fleet of industrial locos according to the IRS West Glamorgan book.
Dave
 

davey4270

Western Thunderer
MW 1943/17 was, according to Fred Harman (Locomotives of MW Vol 2), designated a 'Special' and was originally a Ministry of Munitions loco at the Stratton Filling Factory near Swindon. Llandarcy had quite a mixed fleet of industrial locos according to the IRS West Glamorgan book.
Dave
Unfortunately there were only 4 Thomas Hill Vanguard 350hp shunters there during my employment although one of the Fireless locomotives, Sir Charles, is preserved somewhere in Swansea. It used to be in the grounds of the old museum (Institute). I drove and shunted with these locomotives when I worked in the railhead section in the early ‘80’s. They were powered by Rolls Royce straight 8 Diesel engines through a hydraulic torque converter on the rear axle which was coupled by outside fly cranks. Locomotives 5 & 6 were supercharged while 7 & 8 were normally aspirated although strangely they were all rated at 350hp!
 

daifly

Western Thunderer
David. This little K Class MW 595/76 ought to be up your street!
MW595:76 Swansea C J Wills St Helier.jpg
Photo currently for sale on eBay. The owner is major LCC contractor CJ Wills and is being used on their temporary railway at the St Helier housing development in Morden/Carshalton c1930.
Dave
 

davey4270

Western Thunderer
Just fitted CSP Model’s exquisitely cast fire iron brackets to the twins. A small spigot passing through the bunker rear sheet allows easy soldering from the inside with minimal outside solder overflow to clean up! Far better than soldering folded strips of brass to the outside and cleaning up.
Now a request for information. 704 on the right is a camera shy ex Llanelly & Mynydd Mawr Railway side tank. I only know of 3 pictures with none showing the bunker rear. Would it carry the fire irons on the L/H tank top and not need these brackets on the bunker rear?
The models are on an uneven surface so aren’t sitting level.
1CC250B6-11E7-4507-BA6F-C36212F883A8.jpeg
 

Mikemill

Western Thunderer
Regarding Name -Number plates, Guilplates were very good but sadly no longer trading, the plates on the G3 Saint were made by Diane Carny Loco Plates all custom art work, excellent quality and very reasonable cost.

Mike
 

davey4270

Western Thunderer
Regarding Name -Number plates, Guilplates were very good but sadly no longer trading, the plates on the G3 Saint were made by Diane Carny Loco Plates all custom art work, excellent quality and very reasonable cost.

Mike
Thanks Mike but I have obtained plates from SevernMill for 1366 & 1371 while fortunately obtaining plates for 704 from Guilplates some time ago.

David.
 

daifly

Western Thunderer
Now a request for information. 704 on the right is a camera shy ex Llanelly & Mynydd Mawr Railway side tank. I only know of 3 pictures with none showing the bunker rear. Would it carry the fire irons on the L/H tank top and not need these brackets on the bunker rear?
David
I've just stumbled on drawings by Don Townsley of 704. No idea how accurate it is but there is one of the bunker rear.
Dave
 

Attachments

  • MR 1981_08 GWR no.704 LMMR Victory.pdf
    1.6 MB · Views: 30
Top