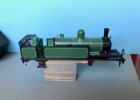
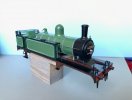
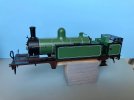
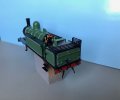
Chas Levin

Western Thunderer
I like the tender drive, can it be more simple.

GN boilers are notoriously small, so on the B3 single I opted for tender drive. I used a Mashima with a High level box on each end which can pull the proverbial house down although was a squeeze fitting into the tender.

Hello Dave, yes, tender drive can be more simple, but the examples (Hornby and Roco) I've had before have had two problems: one is an intermittent tendency for the loco motion and wheels to revolve more slowly than the speed of the loco dictates - to skid, in other words - which looks a bit poor as it goes by; the other is an occasional tendency to crab on curves, because the loco body is being pushed.
Did you have to deal with either of those problems on your builds? If not, did they simply not arise, or do you have solutions for them?
 
Last edited:

Chas Levin

Western Thunderer
What a lovely model of a great looking prototype.

I mistreated the earlier less detailed version many many years ago, I'm afraid it didn't really live to tell the tale....

Simon
Hello Simon, I hardly dare ask what you did to it... 16V DC? Pulling 100 wagons? Speed trials? Hope you gave it a decent burial :)
 

Dave Sutton

Active Member
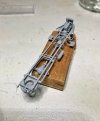
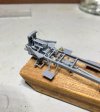
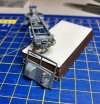
The good thing about GN singles is a complete lack of motion. I couldn't find a pic of the B3 (and it's packed away with the house move) but I did find an A5 which had the first attempt at motorising. The lack of weight and space to put more meant that motorising the Engine wan't really an option, so the tender it was. Any spare space in the tender is filled with liquid lead.190.JPG

198.JPG189.JPG
 

Chas Levin

Western Thunderer
Interesting photos Dave, thank you. Particularly interested in the A5 because I've always liked the look of them very much and would like to model one - is that a 3D printed body? If so, was it one you made or is it one that's commercially available?
 

Dave Sutton

Active Member
The A5 print was by Jason Liversidge (GNRS website aficionado) and printed by Shapeways, but J took all his items off when SW went a bit nuts with their pricing.
 

Chas Levin

Western Thunderer
The A5 print was by Jason Liversidge (GNRS website aficionado) and printed by Shapeways, but J took all his items off when SW went a bit nuts with their pricing.
Oh dear - yes, I must admit that when I last looked, their prices did look a tad high. Do you have a way to get in touch with him - or did he make them available by any other means perhaps?
 

Yorkshire Dave

Western Thunderer
Hello Dave, yes, good idea, thank you: they look in decent condition and it does run nicely, but you're right I'm sure about the tendency to stretch and it may well be that they're not gripping as they should: are suitable spares still avavilable do you know? Would it be from Hornby, as they now own both Rivarossi and Jouef?

Traction tyres of various diameters are available as spares whether it be Roco, Jouef, Rivarossi, Hornby et al. Just make sure you order the correct diameter. :)
 

Chas Levin

Western Thunderer
Finally, with the completion of the black lining along the lower valance edges and the black beading of the cab door tops (both done using a DaVinci 10/0 brush, the same one I've been using since buying it, terrific brush) all the painting's finished on the GNR C2 - well, bar a few tiny touching-in spots - which I'm very pleased about and pleased with the results, too:

LRM C12 20220621 (1).jpgLRM C12 20220621 (4).jpgLRM C12 20220621 (6).jpgLRM C12 20220621 (7).jpgLRM C12 20220621 (8).jpgLRM C12 20220621 (9).jpg

Usual remarks about extreme close-ups - it looks neater at normal size and viewing distance!

Next will be coat of Klear over the light green areas (to accept transfers in the panels and also to get nearer to matching the gloss of the other colours) and the transfers themselves, plus the usual things like coal, crew, lamps and so forth...
 

Chas Levin

Western Thunderer
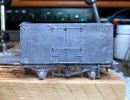
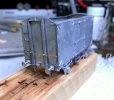
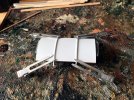
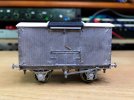
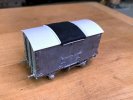
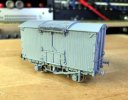
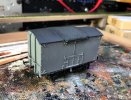
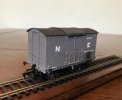
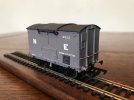
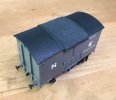
Time for another quick build from the photo archive, this one a D&S 12 Ton NER Covered Van, the one with the roof door, a feature I thought would make it stand out in a goods train. The roof aperture covering on the prototype was canvas (or something similar) which I tried to replicate with a piece of cotton glasses cleaning cloth. Fairly successful I think, and I might do another one or two as they do look interesting in amongst other more usual roof types. It runs very smoothly in spite of the rigid chassis, largely by virtue of the weight...

D&S_152 NER 12T Van - Apr-May 2019 (2).jpg
D&S_152 NER 12T Van - Apr-May 2019 (3).jpg
D&S_152 NER 12T Van - Apr-May 2019 (4).jpg
D&S_152 NER 12T Van - Apr-May 2019 (5).jpg
D&S_152 NER 12T Van - Apr-May 2019 (6).jpg
D&S_152 NER 12T Van - Apr-May 2019 (8).jpg
D&S_152 NER 12T Van - Apr-May 2019 (10).jpg
D&S_152 NER 12T Van - Apr-May 2019 (20).jpg
D&S_152 NER 12T Van - Apr-May 2019 (21).jpgD&S_152 NER 12T Van - Apr-May 2019 (12).jpg
 
Last edited by a moderator:
M

Mick LNER

Guest
Chas,
Bit late for this one . The end handrails should be straight not bowed , it appear in photos I have , to just touch the two stanchions in the centre, no need for Handrail Knobs. A drop of superglue will hold the wire in place.
The ones I have done, I have just used lightly crumpled tissue paper for the sliding top section. I maybe wrong but I dont think the tarpaulin? used on them was very thick.

Nice wagon.
 

Chas Levin

Western Thunderer
Chas,
Bit late for this one . The end handrails should be straight not bowed , it appear in photos I have , to just touch the two stanchions in the centre, no need for Handrail Knobs. A drop of superglue will hold the wire in place.
The ones I have done, I have just used lightly crumpled tissue paper for the sliding top section. I maybe wrong but I dont think the tarpaulin? used on them was very thick.

Nice wagon.
Thanks Mick - duly noted for the next one I build! I built it a while ago but from memory, I found a picture or two where it appeared in the picture (and I do stress, 'appeared'!) that there was a slight bow to the rail and I used handrail knobs even though at the time I realised they gave probably too great a curve.
Re. the top sliding section yes, not sure it really gave the right texture and 'tarpaulin' is of course the right word, not 'canvas'. I did go for a slightly more prominent textured effect than strictly prototypical though, because I wanted something I'd be able to see at normal viewing distance. I think another fault here was that the coats of primer and paint clogged the texture of the cloth too much: another learning experience that will benefit the next one!
Nice picture by the way, on your avatar / name thing on here: the A4 front end curves in blue and black must be one of the most attractive things in the whole of railway history! :)
 

Chas Levin

Western Thunderer
Hi Chaz,

Used spectacle lens cleaning tissues make great model tarpaulin/canvas material. It's remarkably tough too. I just stick it on with PVA to plastic or brass. The texture is much finer than your spectacle cleaning cloth, you also get the odd fine wrinkle too just like the real thing...
Hello Rob, yes, I think there's no getting away from the fact that trying to make fine detail visible - in 4mm scale - from normal viewing distance (particularly with 50-something eyesight) will inevitably result in it appearing too coarse when viewed more closely, or in enlarged photos. I think the better approach is to aim for scale accuracy and live with less visibility on the layout...
 

Chas Levin

Western Thunderer
Time to start a new project on here I think, rather than only posting previously completed builds, or photos of builds I'm covering in more detail elsewhere. The other thread I write on another channel is quite 'LNER and LNER constituents' oriented, so this seems the natural home for projects that don't have anything to do with those companies, especially having been told that people on here like variety of subject.

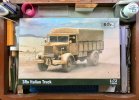
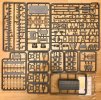
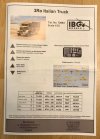
So, the next kit to occupy my modelling tray is this one, the mighty Lancia 3Ro:

IBG 3Ro 20220808 (1).jpg

The tray is of course partly a marital aid (now now!) in that it allows modelling to be done while sitting on the sofa watching TV, but it does limit the work to non-soldering, mainly - though not exclusively - non-painting and nothing that requires really critical steadiness. Not to mention no drilling, filing, sawing - little metalwork, in fact! Not a problem though - there are plenty of things to be done that fit those constraints.

This kit is intended as another civilian conversion of a military vehicle (there are some photos further up this thread of similar projects I've done in the past) but it's also an excuse to see what the Polish company IBG's kits are like. In my youth, I built enough Airfix WWII military vehicles to equip an entire Division but in those days (the 1970s and early 80s) there wasn't much about in London other than Airfix, leastways not in the model shops I knew. Occasional Revel and once in a blue moon a Hasegawa but I didn't see much else (though if anyone reading this remembers lots of other makers' products please would you jog my memory?) so this is quite exciting, even after all these years!

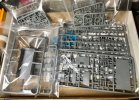
First impressions are excellent - this must be one of the most detailed single vehicle 1:72 kits I've ever seen:

IBG 3Ro 20220808 (2).jpg

IBG 3Ro 20220808 (3).jpg

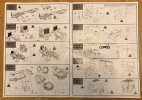
There's no skimping on the instructions either:

IBG 3Ro 20220808 (5).jpg

IBG 3Ro 20220808 (4).jpg

And there's a clue there as to how so many parts go into a 1:72 model - there's a huge amount of internal detail that'll never be seen but which we'll know is there!

A brief initial online read tells me that the 3Ro variant was produced from 1938 and that besides the diesel military model, civilian versions with gas and petrol engines were also produced, so possibly a very late 1930s version, for use as layout dressing for when I'm having and Continental running session. Other possible uses are for freight cargo, but I suspect this lorry is going to be so large and so high that it would foul the tunnels and bridges on my layout... We shall see!
 

Chas Levin

Western Thunderer
I made a start on the 3Ro chassis today - the instructions begin with the engine, but I'm looking into possible modification of that as it's the diesel that the military versions came with whereas the civvie ones had petrol and gas engines. From the look of the instructions the engine will be entirely hidden on the finished kit (unless the bonnet is made removable) but I thought I'd have a look to see what mods could be done to make it resemble the other types, before going with the one in the kit.
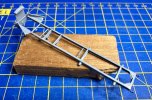
Here's the chassis so far:

IBG 3Ro 20220808 (7).jpg

All prety smooth, plastic has enough elasticy to allow removal from the sprue intact, but the occasional feed pip joins to a locating tab, which requires very careful cutting and everything is moulded extremely accurately (total absence of burr so far) so over-cutting one of the quite small fixing tabs woudln't help...
 
Last edited:

Chas Levin

Western Thunderer
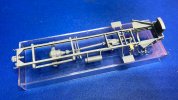
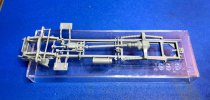
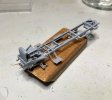
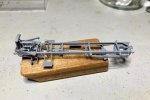
Progress on the IBG Lancia 3Ro has been slow but steady and the chassis now has more detail added to it:
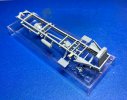
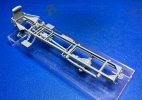
IBG 3Ro 20220829 (4) chassis.jpg
IBG 3Ro 20220829 (5) chassis.jpg
IBG 3Ro 20220829 (2) chassis.jpg
IBG 3Ro 20220829 (3) chassis.jpg

It's a far more detailed kit than any plastic vehicle I've built before, though I realise that may of course say more about the plastic kits I've built in the past: this is more like an etched brass kit in detail terms! When I built Airfix kits in my youth, I thought they were very detailed; then, when I built and converted a few in recent years, I was a little disappointed at the level of detail as I'd spent the previous few years building etched brass railway kits from companies like D&S and LRM and my standards had been raised. Likewise plastic railway kits from the likes of Parkside Dundas: great starting points but for something really detailed, you need to add quite a lot for yourself. No need of that here!!

And speaking of etched brass, this kit is in fact a mixed media one (I think that's the right term?) as it has a small etch too:
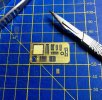
IBG 3Ro 20220828 (4) P-E parts.jpg

I've only used one part from the etch so far - the one you see detached in the picture above: here's a shot of it in place:
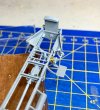
IBG 3Ro 20220829 (1) P-E parts.jpg

(Hm: looks like that might be a moulding line on the tank that in the out of focus foreground of that pic: I must check that...).

I've also found a couple of minor errors in the instructions, which I'll detail here in case they're helpful to anyone else building this kit, not in order to complain or criticise. I think this is a superbly designed and detailed kit which must have taken a huge amount of work to manufacture - the occasional typo is perfectly understandable!

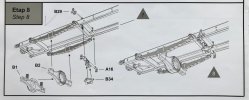
The first error is that two parts are identified as A16 and - obviously - only one is correct:
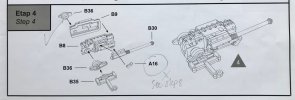
IBG 3Ro 20220828 (1) instruction typos.jpg
IBG 3Ro 20220828 (2) instruction typos.jpg

A16 is in fact the cross-bar type piece shown in Step 8, the second of the two preceding photos, not the very small item in Step 4 (that I believe to be an oil or filler tube). Because I decided to start with the chassis I'd found and used the Step 8 one before realising I was looking for another A16 - I haven't yet located it and if I establish that it's not there I'll fabricate one.

The second error is a simple typo - the part marked B39 in Step 10 should be marked A39 and it is present on the 'A' sprue:
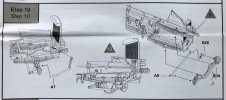
IBG 3Ro 20220828 (3) instruction typos.jpg

I've also found a lot of excellent photos of the civilian version of the 3Ro (factory code 464, the military one being 564) on this site: https://tanks-encyclopedia.com/lancia-3ro/, as well as a large amount of information about the production history of the vehicles, including details such as different cab sizes, modifications, cargo bay differences and so forth, so I'm fairly confident I can turn this into a reasonable convincing civvie truck. I've also decided to go with the engine in the kit, as it'll be under the bonnet, even if I make the bonnet removable! There was a certain amount of cross-fertilisation between military and civilian vehicles at various times, so it's not totally beyond possibility that a civilian truck might have had a diesel engine...

In terms of paint colours, I need to do some more research as all the photos of the 3Ro on that sight are B&W: several of the photos show very attractive two tone colour schemes however and it's clear that one colour is considerable darker than the other (the darker one is usually used for decorative areas or highlighting) but I'm not sure what colours they would have been. I know pre-war British commerical vehicles sported quite a wide range of very bright colours - grass green, pillar-box red, navy, primrose - so is it fair to assume that same was true on the continent?
 

Chas Levin

Western Thunderer
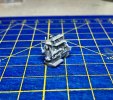
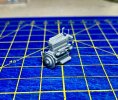
Reaching the point where the engine needs to be added to the chassis and having decided to go with the engine in the kit, I went back to the first step of the instructions and built - 19 pieces! I haven't built a 1:76 kit this detailed before so I don't know if that's a record or not:

IBG 3Ro 20220907 (1) engine.jpg

IBG 3Ro 20220907 (2) engine.jpg

It was a bit of a wiggle to get it seated properly once built, as my assembly of the chassis wasn't quite as accurate as I'd hoped and the radiator grille is about a 1/2 mm too far back, but I got there in the end:

IBG 3Ro 20220911 (1).jpg

IBG 3Ro 20220911 (2).jpg

IBG 3Ro 20220911 (3).jpg

IBG 3Ro 20220911 (4).jpg

I'll have to decide on the livery shortly, as some parts need painting before further assembly, so some more research on 1930s Italian commercial vehicle colours is needed...
 

Chas Levin

Western Thunderer
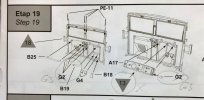
Some more mixed material work, but also, a couple more misprints in the instructions (disclaimer - I'm pointing them out in case it's helpful to others building this kit, not in order to criticise):

IBG 3Ro 20220925 (1).jpg

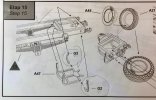
Below, you can see that parts 'G2' are the pair of curved spare wheel reatining clips visible in the photo above, so when you reach Step 19, for 'G2' read 'G3' - the tiny control knobs for the dashboard:

IBG 3Ro 20221001 instruction errors (1).jpg

IBG 3Ro 20221001 instruction errors (2).jpg

There's also a mistaken use of a sign for Step 13 with an arrow towards the dashboard in the Step 19 window: that dashboard is one piece and not in fact a step on its own.
Anyway, as you can see, the level of detail in a 1:72 kit is - to my mind - really superb, where all this sort of thing would usually be moulded. It'll also mean that painting it - whilst challenging - will produce a much more effective result.

I've also been looking at vintage Italian commercial truck colour schemes and as you would expect for early to middle twentieth century, bright colours are the norm - plenty of primrose yellow, bright red, racing green and Navy, duck-egg blue, white and pastel minty green!
 

Osgood

Western Thunderer
That is quite extraordinary for 1/72 scale!
And a 5 cyl diesel - I imagine a huge improvement over the original 2 cyl diesel (1933-39) and the 3 cyl (1935-39), the 5 cyl being offered 1938-47.
 
Top