Ben Alder
Western Thunderer
Time I started a bench thread here as I find it a useful reference point, not keeping notes of any WIP, and generally forgetting how I did things if I ever have to revisit them. To begin with I'm going to salvage some posts from the wreckage of the other place and add newer jobs as they occur. To start, a rebuild of the old Hornby CR coaches.
The latest incarnation of Hornby's Caley coaches suffer from the drawbacks of their origins; namely a representation of the two preserved coaches attached to their now dated Mk 1 chassis, still with no interior and those brass nuts holding the whole thing together. In the past I have attempted to blend the sides with a more appropriate vehicle, with none too much success, so when the Caley 123 train pack appeared I gave it little attention. It is the same old tooling, and although the engine now has a better motor, it has also acquired traction tyres, which is not a move forwards. However, the decoration is first class, and I got a set with the intention of doing an upgrade to the engine, but came to the conclusion that it was beyond practicallity- not for the first time BTW. The announcement of City of Truro finished any further ideas of modifying 123, but I was pleased with the coaches finish, and decided to do something with them.
What follows now is not for the purists- but it gives me an acceptable coach for a minimum of that most precious ingredient- modelling time- and once again involved my stockpile of old Airfix LMS bodies and chassis. Rather than adjust the length of the body and damage the finish, I decided to leave the body as it was. The first line was to join two Airfix underframes to the correct length, but it proved easier to keep the Hornby chassis and fit Airfix ends and roof, to hopefully give a more pre-grouping feel to the whole thing.
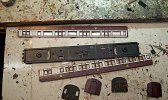
Trying out the new profile roof.
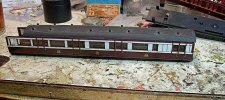
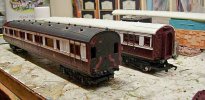
A comparative shot of the two different end profiles- I think it does make the character change.
An interior was also added, but I forgot to photograph this before I stuck the roof on, so here is one of a old Mainline coach that is also being titivated- the old Peco kits being used. To be honest, its hardly seen, but I know its there.
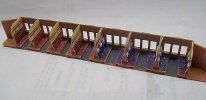
Two shots of the interiors as seen from outside- it is better than seeing straight through originally.
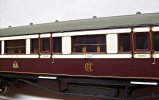
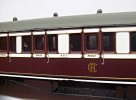
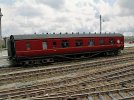
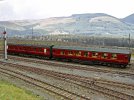
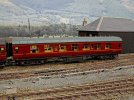
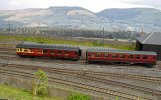
Some shots of the finished coaches in service, and showing a before and after comparison as well.
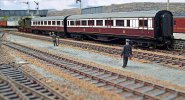
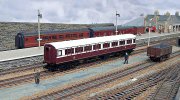
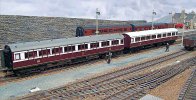
As I said, a very crude approach to coachbuilding, but it does make the most of the best bit of the original, the finish.
This was done twelve years ago and I left the BR bogies in place due to a lack of LMS ones at the time. They are currently semi dismantled waiting these replacements and I am swithering between four and six wheel ones. As they are overlong six wheeler would be better but the extra work involved might just result in four wheelers being used. We shall see....
The latest incarnation of Hornby's Caley coaches suffer from the drawbacks of their origins; namely a representation of the two preserved coaches attached to their now dated Mk 1 chassis, still with no interior and those brass nuts holding the whole thing together. In the past I have attempted to blend the sides with a more appropriate vehicle, with none too much success, so when the Caley 123 train pack appeared I gave it little attention. It is the same old tooling, and although the engine now has a better motor, it has also acquired traction tyres, which is not a move forwards. However, the decoration is first class, and I got a set with the intention of doing an upgrade to the engine, but came to the conclusion that it was beyond practicallity- not for the first time BTW. The announcement of City of Truro finished any further ideas of modifying 123, but I was pleased with the coaches finish, and decided to do something with them.
What follows now is not for the purists- but it gives me an acceptable coach for a minimum of that most precious ingredient- modelling time- and once again involved my stockpile of old Airfix LMS bodies and chassis. Rather than adjust the length of the body and damage the finish, I decided to leave the body as it was. The first line was to join two Airfix underframes to the correct length, but it proved easier to keep the Hornby chassis and fit Airfix ends and roof, to hopefully give a more pre-grouping feel to the whole thing.

Trying out the new profile roof.

A comparative shot of the two different end profiles- I think it does make the character change.

An interior was also added, but I forgot to photograph this before I stuck the roof on, so here is one of a old Mainline coach that is also being titivated- the old Peco kits being used. To be honest, its hardly seen, but I know its there.

Two shots of the interiors as seen from outside- it is better than seeing straight through originally.


Some shots of the finished coaches in service, and showing a before and after comparison as well.


As I said, a very crude approach to coachbuilding, but it does make the most of the best bit of the original, the finish.
This was done twelve years ago and I left the BR bogies in place due to a lack of LMS ones at the time. They are currently semi dismantled waiting these replacements and I am swithering between four and six wheel ones. As they are overlong six wheeler would be better but the extra work involved might just result in four wheelers being used. We shall see....

