Hi Dave, My kit has the smokebox door, one thing I did check after seeing that some kits came with cast brass ones rather than whitemetal Ian
It used to be whitemetal in the old days. I believe Dave told me he could buy them in a lot lower quantities in brass as he now only stocks the bits in smaller quantities if at all. He must have found someone to do the fireboxes in smaller quantities to as he used to have to buy large amounts of them to.
As this build is for a Horwich built engine, I've had to modify the cab side sheets: Have removed the vertical row of rivets down the centre of each cab sheet. Ian
I've moved on to looking at modifications to the firebox and boiler. Firstly the firebox, which does have differences compared to the casting from 20 years ago ! However, I decided that the cast mounting plate for the safety valves needed to go, to be replaced with brass sheet of the correct shape: You can see the differences here, with the brass replacement being fashioned on that from a view above 48305's boiler/firebox in the Wild Swan book on the 8F's. The replacement part in position awaiting soldering, after which I'll drill into the firebox and fit some 0.5mm rivets. Whilst at the East Anglian Model Railway Show I purchased this little lot. Thanks JohnK ! Ian
Although progress has been slow, work and that damned turntable, at last the safety valves are now in place atop the new mounting plate: The current job is filing away the cast firebox wrapper bands as these will be replaced with etched items, slightly modified. Ian
After filing, measuring and drilling..... Plus a little lathe work..... It's getting there, slowly ! Ian
Having ordered some nickel silver strip from Metalsmith (LankyTank) so as to make the coupling rods a more prototype width, and shape, I carried out some work on one of the connecting rods today. As can be seen, the three etches in the kit produce a rod that is overall too narrow. The prototype is 5 inches wide and 6 inches wide across the boss. Some 1 x 1.5mm brass strip was used to deepen the fluting as it is too shallow. As I had two sets of connecting rod etches, I have used the bosses off two pieces to widen the boss width. At the crosshead end I'll build the boss up once I know how the connecting rod lines up. Ian
Wow, has it really been so long since my lost post about the 8F ! The cylinders have started to take shape. Test fit of wrapper before soldering up. A short video can be found here: DSC_0008 Ian
Both cylinders now soldered up and clipped into place in the frames. 1613588138624 by Ian Allen, on Flickr I've started work on the leading coupling rods. First job was to build up the jointed end with some N/S and dress it to represent the radiussed curve. Modified rod on the left and original on the right. 20210217_183254 by Ian Allen, on Flickr Comparison of original etch at the top and modified etch below it. The big end has been filed so it is flush with the rod. On the 8F, the leading rods were set back to aid clearance behind the cross heads. 20210217_183335 by Ian Allen, on Flickr Next step is to solder some N/S to the jointed end of the rear etch and then solder the three pieces which make up the leading rods together and test fit before doing the same with the RH leading rod. Ian
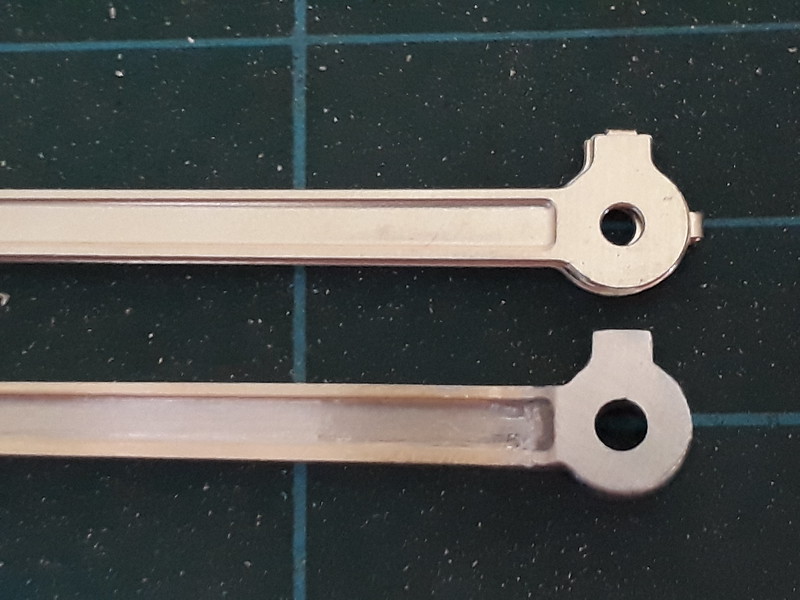
More work today on the leading LH coupling rod. Bottom etch is the rear piece of the rod with N/S soldered to the "little end". This is to help push the rod towards the loco centre line, so it is offset in relation to the other two rods. The "big end" of the same etch showing a length of N/S strip soldered to it. This piece is on the opposite side to that on the little end. Both additional pieces filed to follow the profile of the etch. 
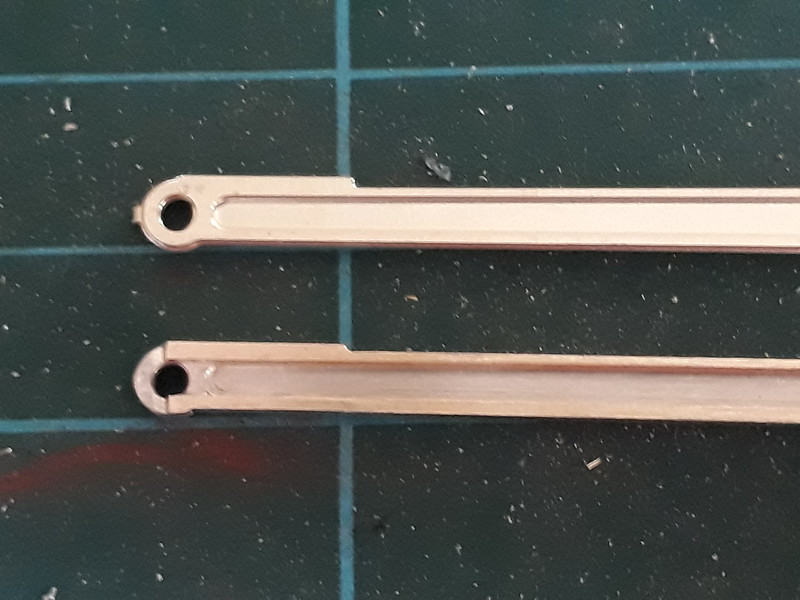
LH coupling rods, showing the modified leading rod lined up. Top view, which illustrates the leading rod being offset relative to the other rods. You can also see where the leading boss is now also offset too, as per the prototype. RH coupling rod to do next. Ian
Update on the 8F with the coupling rods now "completed". First run with the leading rods fitted, and no adjustment necessary. Ian
Thanks to Nick Dunhill for the very nice triangular flange pipe fittings he made up for me, which has led to the vacuum pipe between the frames being fitted, albeit possibly only temporarily. Ian