4mm An EM Workbench: plastic steels

Peckett: The Marshal

AJC

Western Thunderer
Real progress. I've added sandpipes, the front set mounted on the chassis, the rear on the underside of the footplate, but more to the point, that chassis as a whole has been primed, painted and wheeled. As such, I couldn't resist the opportunity to pop the body on to see how the eventual loco' will appear. Today's bright sunshine emphasises the rather scruffy job I've made of this - even by my standards this is a bit rough...


Peckett_021.gif

Peckett_022.gif

Peckett_023.gif

Once the paint has hardened off, it'll be time for mechanical set up and then sorting out pick ups before I look to final detailing of the body, prior to banishing the solder smears under paint.

Adam
 

AJC

Western Thunderer
A few Southern bits (quartering the Peckett having driven me quietly round the bend...). First the tricky, fiddly job of making a dozen bolster pins/posts for the Borail, a job which custom etching would be a better bet. Since I'm only doing one of these, however, I can live with it. Masokits do something ideal, were they a different shape, so I'm making my own, laminated from two layers of scrap etch - it's stronger and easier to work than thicker sheet would be and, experience suggests, should be more resilient - and lots of filing.

SR_Borail_003.jpg

Having layered up a few roughed out blanks, I've stuck them down for final finishing. Much work later...

SR_Borail_004.jpg

So long as I only do a couple at a time it's bearable. In between times, I'm correcting some of the issues with Bachmann's 25 ton SR brake. Numbering has come off, as have the overscale screw heads on the duckets and end sheet lamp irons. The chimney has been re-sited and the vents replaced with something nearer scale. All this and it's now got EM wheels...

SR_Brake_001.gif

Adam
 

AJC

Western Thunderer
A few hours later...

SR_Borail_005.jpg

I've formed a strip of shim around the foot of each pin to replicate the pocket these things sit in - see here: SR LSWR SECR BORAIL YLO YYO YNP YLP YNQ | ADS58007 MATCH TRUCK [2] - and trimmed to suit. I drilled a couple of holes at the top and soldered pins of 0.45mm nickel silver wire before supergluing the whole thing in place. Three down, nine to go. Tomorrow. They seem surprisingly secure which is good.

Adam
 

AJC

Western Thunderer
The SR brake is now ready for (and indeed, has had a bit as primer, here and there) painting and touching up. I must say it's quite refreshing to have got somewhere near finishing something...

SR_Brake_003.gif

Underneath all I've done is to add a safety loop over the brake linkage from a spare staple and add brake yokes and their safety loops (Bachmann supply these, but my model seems to have lost them - no matter). Side on, and it's a bit more obvious where the work has gone on.

SR_Brake_004.gif

The axleboxes have been sorted out with new covers of the right size, the springs opened out a little and three links fitted. Above the solebar, Masokits lamp irons have replaced the moulded ones at the end with the lamps - these have had a spigot soldered onto them which greatly increases the security of the lamp fixing (the side lamps are whitemetal castings from Lanarkshire Model Supplies). These are rather nice, as is the SR pattern tail lamp on the veranda end from Modelu. Meanwhile, the ends have been gently liberated from the body and the upper halves undercoated in white. In some cases, BR painted van end panels cream and bauxite regardless of the condition/colour of the van. I've no idea why this should have been or whether this was an affectation of a particular works. Here's another SR van so-treated: SR Brake vans - 4 wheeled ZTO ZTV ZPO ZPW ZTR ZXR ZTQ ZTP | DS55640 ZTO - I've seen pictures of ex-LMS, and BR standard vans with the same scheme and I reckon it looks interesting so why not?

SR_Brake_002.gif

Finally, here's the end showing the lamps.

SR_Brake_005.gif

Adam
 
Last edited:

AJC

Western Thunderer
I haven't managed to take a decent picture of the van in its fully painted condition, but here's the next occupant of the paintshop waiting its turn and, inter alia, the reason I wanted to model this particular wagon type. It's one of Mr Bulleid's better innovations, the cast steel bogie as rendered by Barry Parks of Cambrian. It's not bad at all, but I wasn't made keen on the axleboxes.

SR_Borail_006.jpg

The axleboxes were angled back with a large file, a strip of 20 thou' added and the the ears for the covers snipped out. A strip of 10 thou' went on top and some 5 thou' details superglued in place with bolt heads from the usual tiny cubes of plastic sheet.

In case anyone's wondering, the wheel centres were sculpted from Miliput since these wheels (Maygib, I think) were simply plain turnings. Not altogether satisfactory but it's done now.

Adam
 
Last edited:

AJC

Western Thunderer
The SR van has now been lettered and is ready to weather; nice quick job by my standards!

SR_Brake_008.gif

I like that the lamps from Modelu and Lanarkshire Model Supplies sit nicely together, which is as well. The three-quarter view emphasises the faults of the model - the over-thick spring hangers and W irons particularly - but it'll hide itself away perfectly happily in service.

SR_Brake_007.gif

The lenses have come out well, as supplied in the case of the white tail lamp, Kristal Kleer over plain for the side lamps. Once I've got the Borail fully painted, and the LMS horsebox lettered, I'll get the weathering paints out.

Adam
 

AJC

Western Thunderer
And speaking of the Borail, here it is. Most of these were in departmental use hence were painted black, Gulf red, olive green, though originally red oxide, etc., but some were in traffic use (though predominately for carrying rail) and hence were painted in the usual livery for unfitted wagons, or versions thereof. Grey, anyhow, and classified Borail SA under BR. Cambridge Custom Transfers do something suitable for these wagons, but only in the departmental colours, i.e., yellow lettering for black. On the same sheet, however, is lettering for BR-built Borails and so, after a bit of chopping about, here we are. Not 100 per cent of the lettering that some seem to have carried, but most of it.

SR_Borail_007.jpg

By the way - one of the earlier wagons of the same type (with diamond-frame bogies) appears early in this film:

I accept that the grey is a bit rough. No matter since the aim is to replicate something of the appearance of the wagon shown behind 'Wincanton' in this picture: Mod WC 34108 Wincanton , light near Woking Apr'67.

SR_Borail_008.jpg

Adam
 
Last edited:

Lyndhurstman

Western Thunderer
Nice work, Adam. It looks the part. And chopping those letters about would have done me in, just on their own!

That video is wonderful. Lots of lovely variety on the wagon front. And a mechanical horse (Scammell?) that's been well knocked about (4'45").

Cheers

Jan
 
  • Like
Reactions: AJC

AJC

Western Thunderer
Nice work, Adam. It looks the part. And chopping those letters about would have done me in, just on their own!

That video is wonderful. Lots of lovely variety on the wagon front. And a mechanical horse (Scammell?) that's been well knocked about (4'45").

Cheers

Jan

A sharp scalpel and the right light and it's *relatively* straightforward. Not easy, but straightforward.

The video is great, though leaves me with a hankering after a Bogie Bolster C and @jjnewitt does the bits, of course. And I have the bogies in stock. Temptation! Yep, the Mechanical Horse is a Scammell, though the platework - or what's left of it - must be courtesy of BR's road motor department. It puts me in mind of an episode of Father Ted...

Adam
 

simond

Western Thunderer
Thanks for posting the video. I had no sound, not sure if that’s how it was intended.

I got the distinct impression that it was an advert for rationalisation - it seemed to dwell on the negatives...

Best
Simon
 

AJC

Western Thunderer
There is a version (I've subsequently discovered) with sound. If I recall correctly, it's part of a sequence which includes another film (or two) which features Tinsley hump yard.


The case for rationalisation seems fairly strong to me; it's an awful lot of running round to get a wagon load of rebar and another half full of rail a scant handful of miles. Whether it was *quite* so clear cut on the ground is another matter. I suspect that in somewhere like Sheffield, it was, more or less. In the case of concentrating all freight for half of Somerset at Taunton, perhaps less so.

Adam
 

7mmMick

Western Thunderer
What a fantastic video Adam, thanks for posting. Ill book mark that as it's full of boat loads of information. Nice to see even at that late stage RCH wooden mineral wagons were still in use. Great modelling BTW, I always look here for inspiration, although i feel a little depressed each time as i haven't built a wagon in about two years!

Mick
 

AJC

Western Thunderer
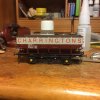
Way back when, regular readers may remember that I developed a sudden interest in 1960s promotional liveries in conjunction with Charringtons’ coal depots. Having established that the grey wagons with red panels familiar from various RTR iterations weren’t the whole story, it all went quiet. Well, yesterday’s post included an airmail envelope from Melbourne courtesy of @Overseer. Inside it were some extremely nice transfers for the Charringtons brand in red Helvetica, per the real thing. He’s done a fine job, I think.

69FC980B-8A53-4310-B97B-7DB3CC6B2218.jpeg

Note the upside down S which faithfully replicated the painter’s error on the original. I can finally get on and weather the thing. Fraser, thank you. Thanks are also due to @Peter Insole for finding the first decent colour shot of the real wagons. Here’s another (from a slide sold on eBay and used here purely for illustrative purposes, upside down s and all).

0367E04B-E53B-4170-B667-010AC1D38D47.jpeg

Adam
 
Last edited:

Overseer

Western Thunderer
Way back when, regular readers may remember that I developed a sudden interest in 1960s promotional liveries in conjunction with Charringtons’ coal depots. Having established that the grey wagons with red panels familiar from various RTR iterations weren’t the whole story, it all went quiet. Well, yesterday’s post included an airmail envelope from Melbourne courtesy of @Overseer. Inside it were some extremely nice transfers for the Charringtons brand in red Helvetica, per the real thing. He’s done a fine job, I think.

View attachment 82801

Note the upside down S which faithfully replicated the painter’s error on the original. I can finally get on and weather the thing. Fraser, thank you. Thanks are also due to @Peter Insole for finding the first decent colour shot of the real wagons. Here’s another (from a slide sold on eBay and used here purely for illustrative purposes, upside down s and all).

View attachment 82806

Adam
Adam
That was quick, especially after I took so long to print them. The wagon looks good. If you need more I think I would reduce the lettering size slightly. I used the BR diagram and a Parkside 7mm kit to work out the size then rescaled for 4mm. I printed some in 7mm at the same time so will build the kit and apply them to check where the difference is. The font is interesting, basically a version of Helvetica but the horizontal strokes of the letters are in odd positions, H is low while R is high.
 

AJC

Western Thunderer
Fraser, well it turned up on a Saturday and the spacing was spot on, as was the font, so it was a quick job to do. I’d agree that the height isn’t exactly right, but it’s pretty close and certainly close enough not to set up another repaint. The font on the grey wagons with the red panels, naturally, completely different.

Thanks again,

Adam
 

AJC

Western Thunderer
The latest project off the production line (haha) is a refurbishment of one of my earliest surviving models, built just after the kit came out (I think the kit was bought from Chris Challis at RailWells). Withdrawn from service a frighteningly long time ago with the disintegration of the plastic footboards I meant to simply replace those with metal ones and yet, and yet... handrails in 0.45mm wire, brakegear falling apart and lacking in detail? Could I live with that? No.

Like many such things, as a consequence, it's just sat in the bottom of a box file for ages though I did sort out the footboards - using perhaps the second or third set of L section bought for the job - and replaced the wheels (having pinched the originals to go under something else; finished that, whatever it was!). It emerged during a sort out and I've finally sorted out the detailing that's been wanted for the better part of a decade.

LMS_001.jpg

The lamps are from Lanarkshire Model Supplies and ModelU; the coupling was upgraded as part as the improvement operations. The originals had single thickness etched hooks and unsoldered links which had fallen apart. It now has an etched Instanter and double-thickness hooks from AMBIS.

LMS_002.jpg

Side on you can see the new strapping - reinforcement retro-fitted to the prototype - and the witness mark, just visible, where I'd put the axlebox covers on upside down. New handrails, too.

LMS_003.jpg

Much, much better, I think, and once it's all set, it'll be ready for a repaint and relettering. The track panel it's sat on, by the by, was intended to go on the SR Borail; I should have thought to check they'd fit - the bolster pins get in the way. I guess I'll find a use for it at some point...

The question, I suppose is whether this was worth the effort? The kit is still available, after all, and it relatively inexpensive and I could easily have started again and produced a neater, crisper result. Bachmann will sell you something very similar, of course, but I'm satisfied and the guilty conscience is salved, just a little.

Adam
 
Last edited:

PMP

Western Thunderer
Effort? Yep definitely was. I’d got a similar van, and got two of the Bachmann variants, so it sat on the shelf of doom for years. I eventually got fed up of it and finished it as a through braked version. Looking at your brass footboards, I missed an open goal on my upgrade!
 
  • Like
Reactions: AJC

AJC

Western Thunderer
Thanks Paul - the plastic ones lasted quite well but the brass versions will be much more durable. I have a couple of boxfiles of doom of my own from which some of these things occasionally surface (the Borail, in fact has been a medium-term occupant). Who knows what'll be next?

Adam
 

AJC

Western Thunderer
Well what was next, it turned out was a long term denizen, also an LMS brake. This, fairly obviously, had its antecedents with Mainline/Airfix and now Hornby which has been going so long that I reckon the original model was bought when I lived in Norwich a decade and more ago. The same might be true of the Bill Bedford chassis it's sat on: both have been in one of the 'in progress' box files for a very long time. One of the reasons for this were concerns about the springs and axleboxes. The former have been stripped off the original chassis which lends them more depth than their original location, while the axleboxes come from W irons intended for a BR CCT (ABS) - the accompanying springs will end up under another rescue project, an SR PMV from Parkside, so waste not want not.

LMS_004.jpg

The roof obviously isn't on permanently yet.

LMS_005.jpg

Something a bit fresher (I only bought the kit a fortnight ago!) is this LMS van body from Cambrian. As assembled, this converts an early-LMS unfitted van - a Midland design, modernised with steel ends - into an early fitted version. For some reason the fitted versions lacked the external strapping which I pared away leaving just the planks to which were added the bolt heads showing that the strapping was there but inside rather than out. This will eventually sit on an 8 shoe clasp brake chassis from Rumney Models. Hopefully sooner than a decade away...

LMS_van_001.jpg

Somewhere in the middle, and something you may remember from a page or two ago, is this milk tank. A few small details to the good, mostly on the solebar - it'd have been easier in plastic...

Milk_006.jpg

Yes, I've straightened the brakeshoe since I took this picture...

Adam
 
Last edited:
Top