The Snapper's DCC Workshop - July 2023 Update - use threadmarks to find - Little & Large

TheSnapper

Western Thunderer
Hi Mike

I can take a photo, but this diagram may be clearer:


Capture.JPG

Let me know if you need more

Cheers, take care

Tim
 

Ressaldar

Western Thunderer
Hi Tim,

many thanks for the speedy reply. I'll take a print of that and file it away for future reference - Dapol/Lionheart small prairie and 121 & 122 Bubblecars spring to mind as suitable installations.

Stay safe

Mike
 
Heljan 37/4

TheSnapper

Western Thunderer
Decorated a Heljan Triple Grey 37/4, as 37 413.
This will get a large Zimo decoder with Paul Chetter’s latest 37 sound and a big Tang-Band speaker.
37.3.jpg
Large Zimo decoders seem currently to be in short supply, so I decided to re-use one from another project.


I purchased the relevant soundfile from Digitrains and uploaded it to the decoder using my Zimo MXULF device.


Reblow37413 (Medium).jpg


Heljan’s later models have multi-coloured wiring but the 37 came with the original red & black scheme, so before removing their PCB, the wires need to be labelled.
All the red wires are common positive, and all lights tested OK.


37_4.jpg


To mount the decoder, I use Plastruct section (whatever is handy) glued to the chassis.
Rather than connect leads for motor, pickups & lights directly to the decoder, I now like to “anchor” them securely.


This also enables connection to the decoder with a single wire for motor, pickups & common positive .
For this, I use a piece of copper-clad sleeper, divided into 7 sections in this case. It does help to identify the sections with a label.
Decoder-1.jpg


The decoder is fixed to its mounts with 4 small screws, and all connections made.


Decoder-2.jpg


The large Tang-Band T1-1931S speaker needs to be well anchored down due to the low-frequency vibrations produced. It is screwed to a strip of wood (nicely inert MDF) which is fixed to the chassis with Devcon epoxy adhesive.
Obviously, the underside of the loco tanks is removed to let out all the lovely GROWL!
Class37 (Medium).jpg


richard carr

Western Thunderer
So Tim are you powering the fan and if so how ?

I do like the triple grey freight 37s the Heljan model really captures the look of the real thing if you ask me, it is even better than the JLTRT model even if it the JLTRT one is dimensionally more correct.

Richard
 

TheSnapper

Western Thunderer
Hi Richard

I bought the Triple-Grey on impulse as I was so impressed with the Large-Logo one I bought at Warley last year.
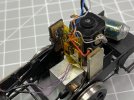
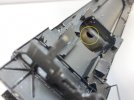
I also have a JLTRT one which I built some time ago, after being inspired by Brian Daniels' models.


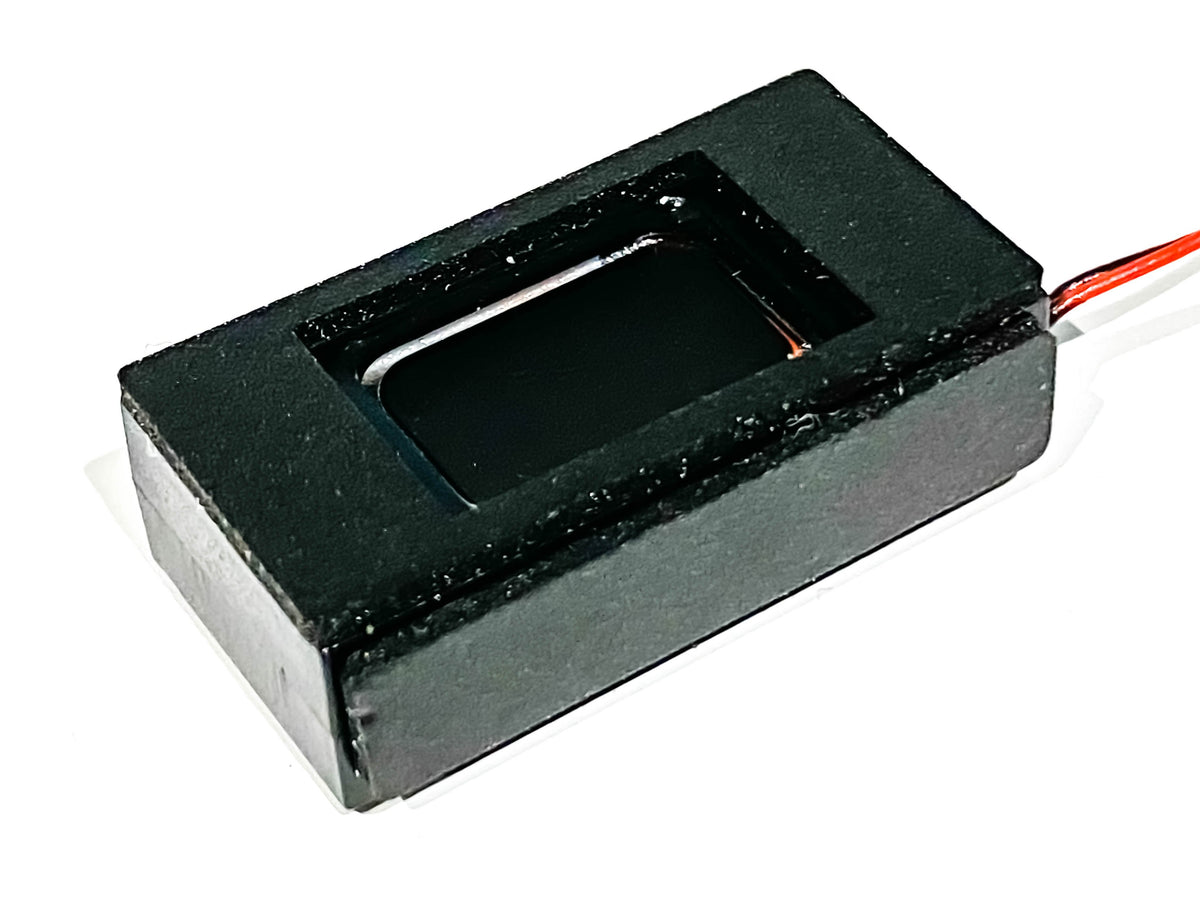
Strangely this one has the fan control incorporated on the Heljan lighting board - a newer design?.
The other one is separate, mounted on the roof, as used to be normal (?).


I am going to try powering it directly from the decoder on FO3 /F15, which is my usual button for fan sound.
If that is uncontrollable, I have a couple of spare "old" fan control boards which I can use.

Tim
 

richard carr

Western Thunderer
Tim

If that decoder is a MX699KV there is one variable voltage function output, if you set it to the lowest value which I think is 1.5 volts it works very well, otherwise the fan speed is far too fast if you ask me. You can easily use swiss mapping to put that function output on F15

If it isn't I would use one of your spare Heljan PCB (this is the newer way, the original way was all on one board) and use the potentiometer to get the spin speed that you want. It is possible to cut out the components from the big board and use those on their own if you want to save the others.

20200313_124459.jpg

Here's one I did earlier.

Richard
 

Jordan

Mid-Western Thunderer
....

If it isn't I would use one of your spare Heljan PCB (this is the newer way, the original way was all on one board) and use the potentiometer to get the spin speed that you want. It is possible to cut out the components from the big board and use those on their own if you want to save the others.

View attachment 122573

Here's one I did earlier.

Richard
Dumb Question time:- Is the potentiometer user-adjustable, even for 12v DC? Is it that blue component thing with the white plastic top to it? If it is adjustable - how?
 

Steph Dale

Western Thunderer
Yeah, Jordan, it's just a screwdriver trim pot. I remember setting up my first decent audio amp with a stack of these things then taking them out one by one and replacing them with fixed values. As a student it was cheap entertainment to pass the evenings and weekends...

The usual gags about needing to get out more only apply in the current circumstances, btw.

Steph
 
Last edited:
Little & Large - 9F & Dazzler

TheSnapper

Western Thunderer
The Snapper’s DCC Workbench – June2023 – Little & Large

It’s been quite a while since I posted anything new in this thread – looks like over 3 years to be exact.

Not that I haven’t been busy, with mostly run-of-the-mill installations, which I didn’t consider being worthy of writing about, to be honest. …. Except perhaps I ought to have mentioned that twin motored diesel that would only run satisfactorily when back-EMF was disabled, or the exquisite, professionally built (i.e., expensive) GWR “Armstrong” which required handling with kid-gloves, or the Dapol 121 which ran like a pig…etc.

However, I thought you might be interested in this pair, which were so challenging, in their different ways, and in how the difficulties were overcome.

Little& Large.jpg

The 9F is well-built from a DJH kit and the tiny loco on the right is a scratch built S&D “Dazzler.

The Large - DJH 9F

Removing the body of this big heavy beast revealed a massive Bühler motor, which combined with the weight of the thing (2.5Kg) immediately made me think that I would need to install a larger, more powerful decoder than the “normal size” we use for the majority of 7mm locos.

IMG_1167 (Small).jpg

Problem was that there was absolutely no room in the loco itself as the boiler was virtually sealed, except for a very small hole (more of this later)

IMG_1171 (Small).jpg

So, the only alternative was to mount the decoder in the tender, which incidentally was also sealed!

IMG_1168 (Small).jpg

Therefore, to accommodate the chosen Zimo MX699Ks narrow decoder & mounting board a large hole had to be cut in the tender “floor, with a lot of trial & error to ensure a good fit:

Comp1.jpg

Note the insulation tape to protect the side frames.

The loco picks-up on the tender wheels as well as all driving wheels, and already had a plug connection fitted between loco and tender, so wiring-in the track feed to the decoder was reasonably straightforward:

IMG_1185 (Small).jpg

However, an additional 4-pin plug was required to be able to connect the decoder to the motor & speaker, which is hidden when loco & tender are coupled:

comp2.JPG

Ah yes, the speaker! What to use & where to put it?
Certainly, the 9F need a largish speaker to sound convincing.

The only solution I could think of was to somehow make use of the boiler barrel as an enclosure with a speaker firing through the small hole as shown above.


The biggest speaker I could find to almost fit was slightly too deep at 15mm, so I bit the bullet & cut off the back (and the fixing “wings”):

Comp3.JPG

This was then fixed with epoxy & sealed into the loco body with the rear of the speaker firing into the small hole.

Comp4.jpg

Finally, to avoid a slightly “hollow” sound, I blocked off the chimney to the outside world, making the boiler, in effect, a sealed enclosure.

The loco runs & sounds great and was worth the extra work involved.

Note that, unusually, I have not yet fitted a “Stay-Alive” unit, due to the all-wheel pickup and sheer momentum of the model when running. We’ll wait & see if it needs one….

----------------------------------------------------------------------------------------------------------------------------------


The Little – S&D Dazzler

Despite having some knowledge and interest in the S&D, I had never come across this loco before; and it was one of a pair into which I had to install sound. Both were scratch built by a friend of mine – in fact I think he built 10 in total for himself and other people!

IMG_1227 (Small).jpg
With a sealed boiler and virtually no room available to hide things from view, obviously “normal” components could not be used, so the initial task was to find a sound decoder small enough to fit onto the front of the motor.

I went for a Zimo MS550 which is incredibly small and promised to be powerful enough to drive the tiny motor.

Comp5.JPG

Bear in mind, each square on the background grid is 1cm


This was fitted to the motor, and wrapped with Kapton tape for insulation:

IMG_1246 (Small).jpg

The capacitor tucks up above the motor when the body is attached.

Next task was to find a speaker that could be fixed unobtrusively on the frames and the 26 x 14 x 7 fom Roads & Rails fitted the bill. See here:


This fitted neatly onto a chassis cross-member and sounds great for its size

IMG_1245.jpg

Despite its diminutive size the loco runs well & sounds great.

I think the decoder is amazing for its size and the speakers is a revelation too.

.


Attachments

  • IMG_1246 (Small).jpg
    IMG_1246 (Small).jpg
    91.2 KB · Views: 3
  • IMG_1171 (Small).jpg
    IMG_1171 (Small).jpg
    70.1 KB · Views: 3
Last edited:

daifly

Western Thunderer
Tim

Did you write the text in WT or copy&paste from another source/word processor? If you've imported it from another place, you've brought over a lot of surplus formatting. Looking at the page code, there's a lot of formatting code that shouldn't be there.

Dave
 

TheSnapper

Western Thunderer
Hi Dave
Thanks for the reply.
The latter - I wrote the text it in Word 365.
Any way to get rid of it, other than re-writing?
Tim
 

daifly

Western Thunderer
Hi Tim
A 'quick' way is to simply copy the text from your post above and paste it into a plain text editor then copy it and paste it back.

Or copy from here and edit your original post by overwriting. It should also restore the default font and size too.

Text now deleted as Tim has used it!

Dave
 
Last edited:

TheSnapper

Western Thunderer
Hi Tim
A 'quick' way is to simply copy the text from your post above and paste it into a plain text editor then copy it and paste it back.

Or copy from here and edit your original post by overwriting. It should also restore the default font and size too............
Thanks Dave - now sorted (I think....!)

Tim
 
Top