Free 3D CAD

JimG

Western Thunderer
28ten said:
out of the freebies 123d looks the most promising although the interface is a bit confusing, but then im an old fart and I like a toolbar or even a ribbon  :))

I might be an even older fart.  :D  But true to fashion,  I constructed my own brick wall in 123D and started bashing my head against it.  In LT,  I much prefer working in full scale units then print to scale or make a scaled version for CNC work.  My 123D setup was in millimetres and could I find out how to change them?  I spent ages banging about trying to find if it was possible to "Format/Units" and spent ages on Google trying to get a hint.  I then decided to go and sleep on it. 

Came down next morning and decided to play one of the very fast Flash videos with the app. and right at the end of it saw reference to the "Snap Bar".  Spooled back and eventually found out where the Snap Bar was and how to get at it - about three or four layers down in the menu system.  So now I'm happy and can work in feet and inches. ;)

Jim.
 

Pugsley

Western Thunderer
28ten said:
How have you made the buffer? Did you do a revolve?
Depending on what you wish to do, you end up having to balance ease of use and cost, if you intend doing a lot of modelling then it is worth the money.
Yes, sketched the profile of the head and shank then revolved.

I didn't intend doing a lot of modelling but, thinking about it, it'll be very useful for the tank wagon projects.  I wonder if I'll be able to knock out a whole wagon in 30 days....  ;D :))
 

Pugsley

Western Thunderer
I'm getting there with the buffer now - the housing is now pretty much done:

[attachimg=1]

Well, this type is anyway.  There is another type that I'm going to do later which is only slightly different - it's amazing how many detail variations there are in the same basic design of buffer, once you start looking at them closely!

I'm slowly getting my head around this 3d malarkey, and getting faster all the time, but there is one thing I'm struggling with at the moment - I can't work out how to get the 'OLEO' lettering on the side.  Any suggestions will be gratefully received.
 

Attachments

  • buffer shank oleo.jpg
    buffer shank oleo.jpg
    64 KB · Views: 92

Dan Randall

Western Thunderer
Nice work on the buffer so far Pugs!  :thumbs:

I'm still learning about 3D myself, so I can't offer any advice on the OLEO lettering.  Stick with it though, as it's such a distinctive feature.  :)


Regards

Dan
 

Pugsley

Western Thunderer
Thanks both  8)

I've actually used Alibre for the buffer, but thanks for the decal tip - I'll have a look later and see if the same command is in there.
 

28ten

Guv'nor
I did a quick search and there seems to be decal command with Alibre. I take it that you found Alibre more user friendly than 123d?  The 123d interface just plain confuses me, I like to be able to see all the commands not this context sensitive stuff  :headbang:
 

Pugsley

Western Thunderer
Yes, I've found Alibre much easier to get to grips with, I really couldn't get on with the 123D interface.  I'll check out the decal comand later and let you know how I get on.

The whole thing needs modifying slightly, I'm not entirely happy with the lip where the diameter increases, it needs to be more pronounced than it is, I've also got one more row of diamonds on the step than I should have.
 

Pugsley

Western Thunderer
Managed to get the OLEO lettering on there, after spending a little time searching the Alibre forum.  What I ended up doing in the end was to create a plane, parallel to the edge of the cylinder, by offsetting it from the XY plane.  I then sketched the letters, before extruding the sketch into the casing, then creating a plane on the side face of the lettering extrusion.  I then created a sketch on the new plane, then did an extrude cut to profile the letters to the housing.

Here's how it looks now:
[attachimg=1]

I'm happy with how it looks, so now there's some studs to put on the back of the part, to locate it in the bufferbeam, and a pip to put on the top, then it's on to axleboxes.  I will modify this to represent the other type of OLEO 520mm buffer at some point, but this design is what I need to begin with.
 

Attachments

  • buffer shank oleov2.jpg
    buffer shank oleov2.jpg
    86 KB · Views: 68

Dan Randall

Western Thunderer
Very nice indeed.  :drool:

Am I right in thinking these are 7mm buffers or have I got my wires crossed?


Regards

Dan
 

Pugsley

Western Thunderer
Thanks Dan.  Yes, these are 7mm buffers, which are the first parts I've created for the acid tanks.  The axleboxes are the next thing that I'm going to have a go at.
 

Dan Randall

Western Thunderer
Pugsley said:
Thanks Dan.  Yes, these are 7mm buffers, which are the first parts I've created for the acid tanks.  The axleboxes are the next thing that I'm going to have a go at.

Thanks for clarifying that Martin.  :)  I've now read your description of how you did the OLEO lettering about eight or nine times and I'm still none the wiser.  :-[  I'm sure it's not your narrative, but just me being a bit thick (not unusual....!).  :))

Anyway, glad the 3D stuff is coming along nicely and look forward to seeing the axleboxes in due course.  :thumbs:


Regards

Dan
 

28ten

Guv'nor
Are you doing roller bearings?  I cant remember if you are casting these or prototyping them?
the lettering looks good BTW

Dan
its a totally different concept to Turbo/Auto cad - much easier when you get the hang
 

Dan Randall

Western Thunderer
28ten said:
Dan
its a totally different concept to Turbo/Auto cad - much easier when you get the hang

Damn, I was just starting to get the hang of TurboCAD 3D as well.... :headbang:

Actually, I've been having a play with Alibre this evening, but am struggling to make sense of it at the moment.  I should probably spend some time going through a few tutorials instead of just wading in like I usually do!  :)


Regards

Dan
 

Pugsley

Western Thunderer
Guv - Yes, it's the SKF roller bearing axleboxes that I'll be doing, for the Nitric Acid tanks.  Once I've done those, the next challenge will be working ESC Pedestal units  :eek: 
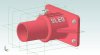
;D  I'll get the masters 3D printed, then make/have metal casings made from those.

Dan - It is a lot easier to use than TurboCAD, once you get into it.  It took me a little while to get my head round it, but now I have I find I'm getting a lot quicker with it.

A pretty picture of the assembled buffer:
[attachimg=1]

Unfortunately, as the head is the same part as the chrome shank, it's also chromed in this image.  Something to learn for the future  :D
 

Attachments

  • 520buffer.7.jpg
    520buffer.7.jpg
    133 KB · Views: 149

28ten

Guv'nor
Very nice. do you think you will get the quality from a 3d print? The reason I ask is because I will be needing some in 1/32 and im not sure about the 3d printing
 

Pugsley

Western Thunderer
Cheers.  I'm not sure about the quality of the 3D printing at the moment, but the new Shapeways Frosted Ultra Detail looks quite promising at a reasonable cost.  If that doesn't work, there are processes available with higher quality, but these come at a price.  It might be worth it for a one-off master though, I'll have to do a bit more research into it.
 

28ten

Guv'nor
Ill be following your progress with interest as I will need to follow the same sort of process. Im hoping I can offset the cost by selling a few castings and at least break even.
I have seen different opinions on the frosted ultra detail and im not sure how well things like the lettering on the buffers will come out. I certainly couldnt live with the banding seen on some kits....
 
S

Simon Dunkley

Guest
28ten said:
Very nice. do you think you will get the quality from a 3d print? The reason I ask is because I will be needing some in 1/32 and im not sure about the 3d printing
I was thinking the same, but on this score it might be worth consider having a single print made to the highest possible resolution using Finelines in the USA, and using that as a master pattern from which to produce 4 sub-masters, to be used as the basis of lost-wax casting, i.e. the four sub-masters on a sprue are used to create the wax, etc.
Buffer heads/stocks can be batch-turned by a sub-contractor.

Edited to provide weblink.
 

Pugsley

Western Thunderer
That's pretty much my plan Simon, although I was considering casting the heads as well.  Finelines is my backstop option if the FUD turns out to be not up to much.
 
Top