7mm Rob's workbench - Gladiator J6

Rob Pulham

Western Thunderer
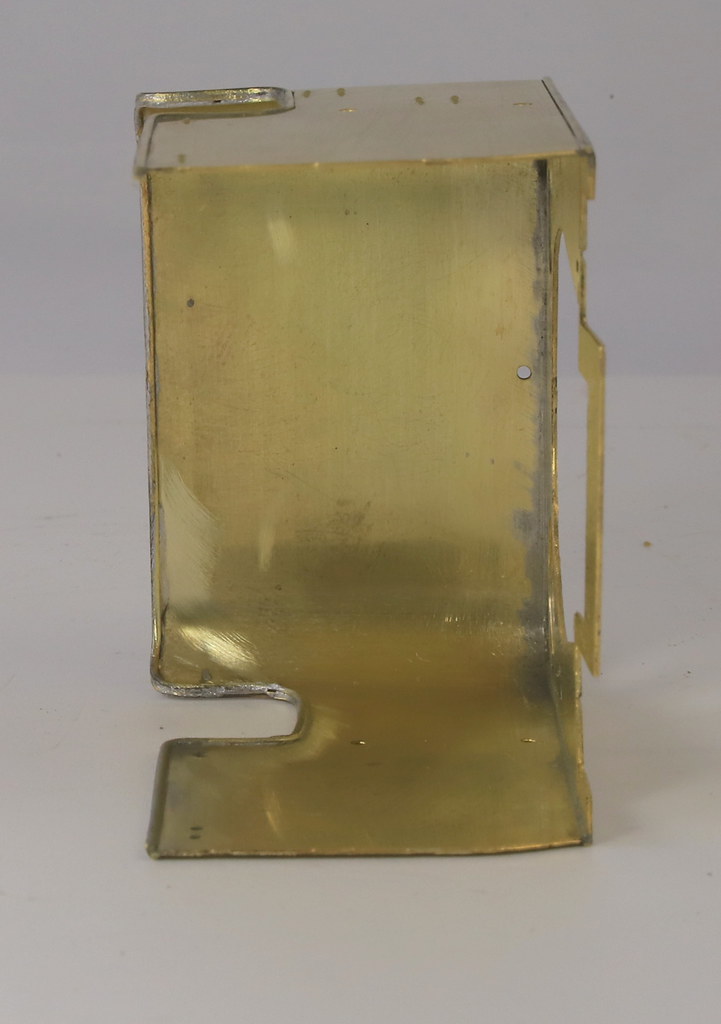
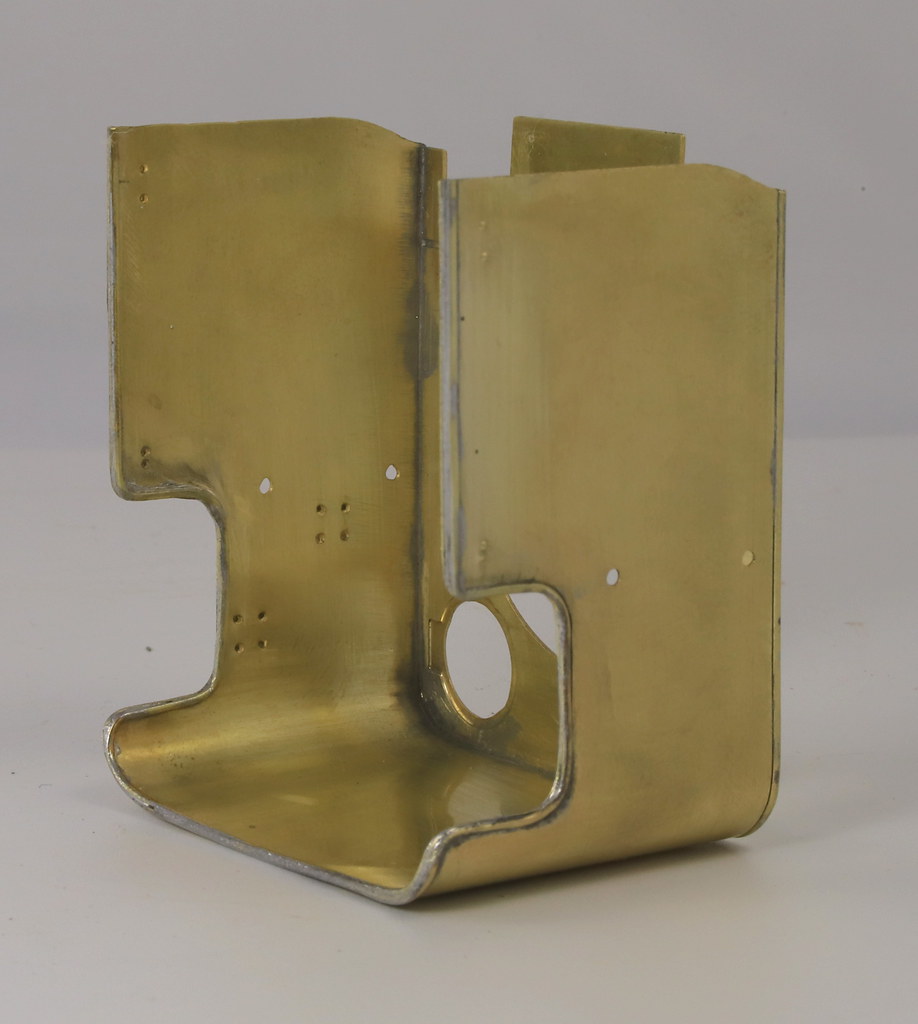
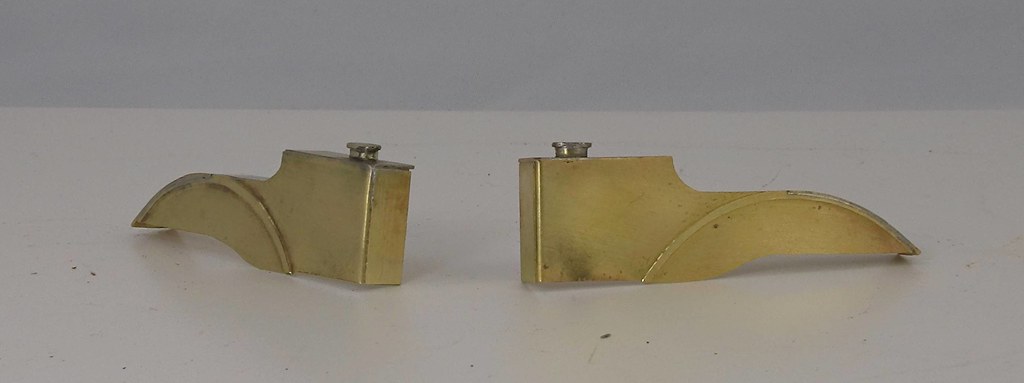
Not much to show for two evenings work, but I have completed the sandboxes.

I did the same as Tony and removed the fold over top plate to fit as a separate item. I didn't have any brass channel to replace the front section so I scored the back with an Olfa cutter and then folded it as designed.

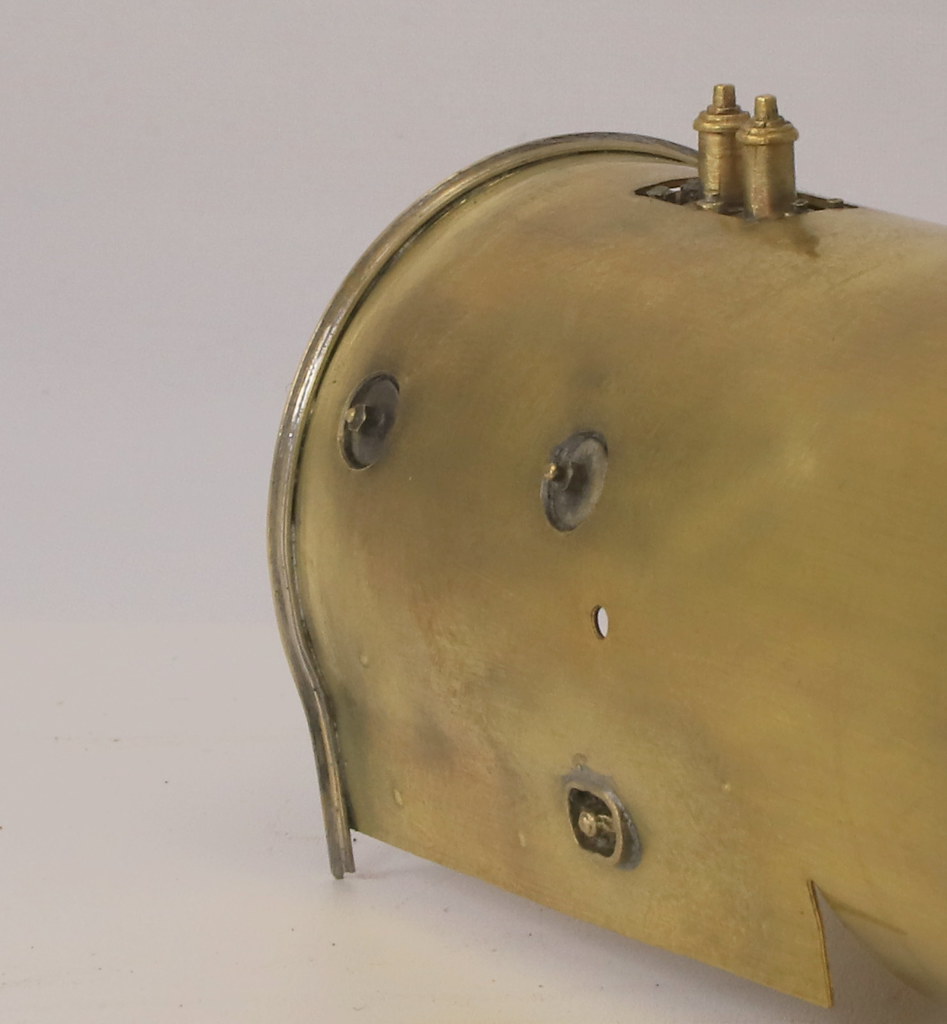
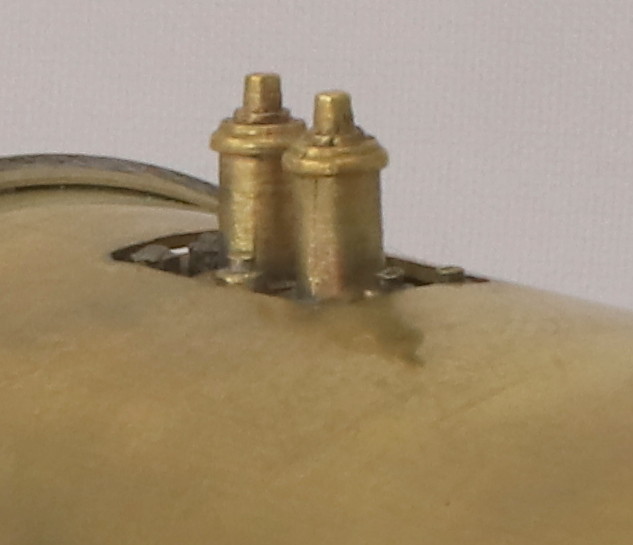
The first one went together without much trouble but I had to have a couple of goes at the second one before I was happy with it. The fillers are the etches provided sat on a short section of brass tube which I squashed into an oval with some pliers.
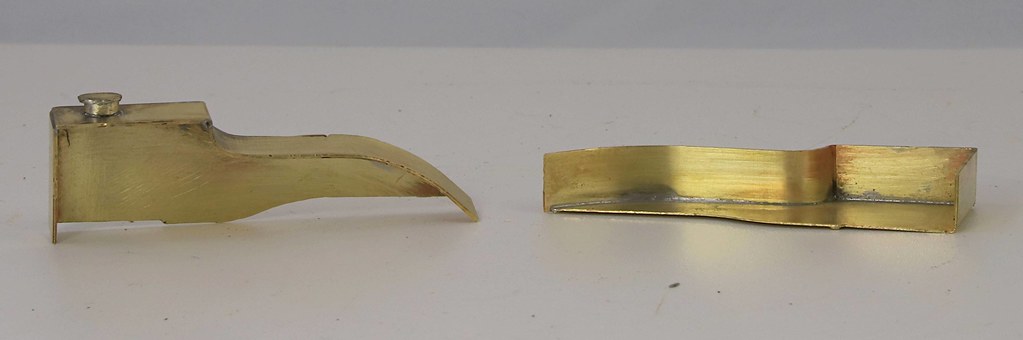
50444395332_9cb2797e53_b.jpg


50444395382_2ef89a8a6f_b.jpg
 

Rob Pulham

Western Thunderer
I had posted an update of the J6 build over on the Guild forum and Malcolm Stelfox (GNR Guru) kindly pointed out that all GNR engines had beading on the inside of the cab opening as well as the outside so last night's session was to add the internal beading. Oddly it only took an hour to ad the beading with the cab made up and I am sure it took longer than that to add it to the outside while the cab was flat.

50449915263_067048d981_b.jpg


50449914068_c085dbd836_b.jpg


50450612246_6982f140a4_b.jpg
 

Rob Pulham

Western Thunderer
Before closing up the boiler seam I worked on the washout plug holes, mud holes and the rivets/bolts on the side of the firebox - they were interesting to punch out with the boiler pre-rolled.

There are some etches that could be modified for the mud hole clamps but I didn't use them. I had some nice castings from Ragstone for the clamps and surround in stock. They are round when they come and need to be squashed a little to become oval. I heated them to glowing with the microflame and gently squeezed them in the vice.

Next up I tackled the washout plugs/covers. Again there is an etch provided for these.

50469498247_e35dfce8fe_z.jpg


They are included on the chassis etch and are nickel silver. Even at half etch they are still quite thick but due to them being hand drawn the spigot that represents the stud and nut was misshapen and not quite central on some. There are six provided where only four are needed so you have a bit of choice.

I decided to use these as the covers but to modify them to have a bit more detail. I soldered them to a backing strip having marked this to ensure that they fit through the holes in the firebox. I had opened these up with a series of broaches and reamers until they were just bigger than the cover plates. I filed off the spigots and punched the centres, then I drilled them with the proxxon. Finally I soldered a short stub of wire in covered by a home made (from filed tube) nut to complete the fitting.

50469498192_22b8e4ab7c_b.jpg


50469497652_66993fcd3a_c.jpg


I popped them in the holes in the firebox to see how they fit.

50469497602_e21d2f599d_b.jpg


In this shot you can also see the Ragstone clamp castings which I have soldered in place.
 

Rob Pulham

Western Thunderer
Flushed by the success of the washout plugs and covers I deviated from the kit and decided to see if I could make my own mud hole clamps
After all this is what modelling is about for me at least.

I started by taking measurements from the Ragstone castings. Then I found an appropriate diameter tube in my tube stock and cut a 3.9mm length. This I squeezed gently to make the oval and promptly squashed it. I was about to cut another when I decided to have a go at straightening it using a pair of round nosed pliers. A piece of scrap etch provided a backing plate and I drilled a .8mm hole for the stud. another piece of scrap had a hole drilled in it and then filed and bent to shape for the clamp itself. A short stub of tube under the clamp and a nut I made earlier completed it. a few tiny slivers of solder and a waft with the microflame and I had this.

50471410211_94c411cfc0_m.jpg


50471564427_3f0956780b.jpg
 

Scale7JB

Western Thunderer
I'm sure I recall the N2 not having half round beading inside...

Will check at some point just for personal interest.

Hand holes and washouts look great!

JB.
 

Rob Pulham

Western Thunderer
I'm sure I recall the N2 not having half round beading inside...

Will check at some point just for personal interest.

Hand holes and washouts look great!

JB.

Thanks JB,

I have a couple of N2's in the stash so confirmation of the presence of beading or not would be good.

I do wonder if it was just a Stirling/Ivatt fitting or whether it was present on Gresley designed GNR engines too (I have a J50 kit too).
 

Rob Pulham

Western Thunderer
While discussing the cab beading, a gent (Dave Lester) on RM Web pointed me at a photo which shows the tops of the cab and upper boiler of a couple of J6's and other locos stabled at Hammerton Street Depot in bradford in the period that this loco is destined for (the photo is on page 38 of Great Northern Railway Engine Sheds volume three - I have the three volumes in my library). What the photo lso shows is that the Safety valves don't just sit on the top of the firebox as you might think from ground level photos.

This is a snip from a scan of the photo that I referred to

50487366048_e9e678e9bf_m.jpg


As you can see the base of the valves are inset into the boiler clothing and fastened to the top of the firebox with studs. Yesterday's task was to replicate this with my trusty filed rod and tube.
50487939611_33693da12d_b.jpg


50487939156_b1f85df6db_b.jpg


The next task is to cut out the firebox top so that I can mount this in place - I may need to trim the mounting plate as I had cut it big enough to hold while drilling all the holes with my pillar drill.
 

Rob Pulham

Western Thunderer
I haven't managed any modelling today but I had a really productive day at the bench yesterday. I will appologise in advance that this post is going to be a bit photo intensive.

I started by cutting the recess in the firebox top for the safety valves to sit.

50501553573_b7d247c0ce_b.jpg


50502268421_5ff368e153_b.jpg


50502421662_3368000698_z.jpg


50501553438_e256f240e0_c.jpg


The eagle eyed amongst you will note that I rose to the challenge of the angle beading around the cab/firebox joint. I was sure that I had seen it done before but when I spoke to a couple of the guys that might have done it both sad that they did such things in two pieces. In for a penny as they say I thought the worst that could happen was that I ruin a quid or so's worth of 1x1mm milled brass angle.

I have to admit I am really pleased with how it turned out and I have no fear of doing it again in future.

50502268826_ca3f42bebf_b.jpg


50502268421_5ff368e153_b.jpg


50501553203_d89a73a754_b.jpg


Finally one shot to prove that it really is brass angle and not a subterfuge.

50501553308_f693006a29_b.jpg


Still a bit of tidying up to do and the overlong stud to cut short.
 

Rob Pulham

Western Thunderer
I was working on the cab roof when Dave Lester posted the dimensions of the snifting valve on my thread on RM Web and casually mentioned that I might like to make one since I had most of the details. Now this struck a bit of a chord because I have always been disappointed with the snifting valve castings supplied in kits and to look at the best I have 'seen' is the turned example sold by Markits. I say seen in inverted commas because I have no idea if it's dimensionally accurate it just looks good. The trouble with Markits, is actually getting your hands on anything from the catalogue.


If I had any suitable bar in stock, I might have had a go at turning one but sadly everything I had was far too thin. I did have some brass tube of just the right OD though so this was pressed into service I cut a length off that I could grip and hold safely and soldered a square of scrap etch over the end and snipped/filed it round. Finally finishing it in the lathe chuck. At this point it became a bit “Triggers Broom” because Mike Trice posted a selection of close ups of snifting valves on locos and I realised that I had drilled the holes in the side too big and too many (the hole size was one dimension that Dave didn’t have).

Armed with more info I made a second cover salvaging the end cap and the 14BA hex headed screw that I had fitted to the first attempt. Next came the base plate and five goes later I had something usable, albeit it to my eyes it seems a bit small at the measurements quoted. I may revisit this once I have the chimney fitted.

This is what it looks like.

50509268368_87be4aa061_c.jpg


50509268323_1d9542e027.jpg


50509982026_0ebf57c8ea_b.jpg


Finally one with the obligatory 5 pence piece for scale – small ain’t it?

50509981976_9d62dcddd4_b.jpg


I have to say that I had immense fun making it and learned a few things about my lathe in the process.
 

Steph Dale

Western Thunderer
What's that feature for Rob? A lamp? It's the only thing I can think of, and that's only because I know of some German Landerbahn locos that had lamps mounted in a similar style to illuminate the inside of the cab.

Steph
 

Dave Holt

Western Thunderer
A removable roof section to allow for lifting tackle to reach the rear buffer beam for lifting the loco on/off its wheels?
Dave.
 

Rob Pulham

Western Thunderer
What's that feature for Rob? A lamp? It's the only thing I can think of, and that's only because I know of some German Landerbahn locos that had lamps mounted in a similar style to illuminate the inside of the cab.

Steph

I have to admit to not being 100% sure, there was a suggestion on RM Web that it might be something to do with blackout arrangements during the war.

A removable roof section to allow for lifting tackle to reach the rear buffer beam for lifting the loco on/off its wheels?
Dave.

There doesn't seem to be a seam on the cab roof that would indicate a separate section Dave, just the rivets/bolt heads.
 

Rob Pulham

Western Thunderer
Modelling took a bit of a back seat last week because everything I touched turned pear shaped so I didn’t risk it.

This week I have made more progress with the cab adding al the additional bolt heads that are visible in the photos and replacing those already pressed out on the right hand side of the loco to match. A couple of weeks or so ago I was given an RSU which was surplus to requirements by a neighbour who was moving house and I got around to setting it up and trying it out on these bolt heads/rivets. I have to say that it doesn’t look much (I was told that it was made eons ago by Bernard Weller) but it does what it says on the tin and I am converted. I just need to get used to it’s vagaries and how little solder I can get away with now.

50548323057_42cbe88362_b.jpg


50548322822_8c96840543_b.jpg


50548322432_cb2e3904e4_b.jpg


After seeing that Tony Geary had done a proper job on fitting the rather shapely rain strips above the cab cut out’s I bit the bullet, took them off and fitted them as correct as I can. They say practice makes perfect and so it did the first one was a right pain to get somewhere near right but the second one almost fell into place.

50547455273_d0d3ef81ae_z.jpg


50547455233_b88397dfed_b.jpg
 

adrian

Flying Squad
A couple of weeks or so ago I was given an RSU which was surplus to requirements by a neighbour who was moving house and I got around to setting it up and trying it out on these bolt heads/rivets. I have to say that it doesn’t look much (I was told that it was made eons ago by Bernard Weller) but it does what it says on the tin and I am converted. I just need to get used to it’s vagaries and how little solder I can get away with now.
That's looking nice - as you say it gets easier with practice. Although with respect to the RSU - they are a "marmite" tool, you have to appreciate in what situation it it useful and for some tasks they do make it easier. However the amount of solder required is no different if using an RSU or a standard iron. Again just my opinion but I'm not a huge fan of RSUs - all it does is heat the joint, no different to a standard iron so if you find yourself using less solder on a joint with an RSU then you will be able to do exactly the same with a standard iron.
 

Rob Pulham

Western Thunderer
That's looking nice - as you say it gets easier with practice. Although with respect to the RSU - they are a "marmite" tool, you have to appreciate in what situation it it useful and for some tasks they do make it easier. However the amount of solder required is no different if using an RSU or a standard iron. Again just my opinion but I'm not a huge fan of RSUs - all it does is heat the joint, no different to a standard iron so if you find yourself using less solder on a joint with an RSU then you will be able to do exactly the same with a standard iron.

I agree with you about them being a "Marmite" tool, and despite what some say, I wouldn't try to do any seam soldering with it.

I am used to using tiny amounts of solder with the microflame but in my experience when using a standard iron it's far too easy to smear some of that tiny amount in the wrong place meaning that you need some more to make the joint - or perhaps that's just me. :rolleyes:

After the "newness" has worn off, it will be just another tool in the tool box, used when appropriate. Much the same as I don't drill every hole with the Proxxon pillar drill but I do like using it when the job is suitable.
 

Rob Pulham

Western Thunderer
Having sorted out the additional bolt/rivet heads on the left side of the cab I drilled out the punched version on the right side and added 3d versions to make them match the other side. I also fitted all the hand rail knobs but I will fit the rails themselves a bit nearer the finish line.
50555713952_4341f4b1f7_b.jpg

50555713472_d1ba78bd47_b.jpg

50555577886_6b1559e886_b.jpg
 
Top